1. That finally finished a couple of his winch and hurry to share with you MK.
")
2. So ... We will need 5-l for work. Plast. Bottle of square shape, iron rod 0.6 mm., Bandage, starting spit, small spatula, brush and small water capacity, tank for kneading solution and sand, or other filler. Cognize a rod in the form of a double and insert a hole in the traffic jam, fixing from the inside, for example, with pieces of broken bricks or pebbles, close the tile glue ...
")
3. I fall asleep the sand (I had a wet) in a bottle and we see a slightly sides ...

4. The workplace by rolling with a film, we knead the solution of the splock and the spatula to the film layer for the bottom of our porridge ...

5. We sit the blank to the solution and correct the spatula from the bottom up the excess (the trowel from time to time to wet into the water so that the plaster does not appear and it was easy to work) ...

6. Go to the neck - in the wet hands we take a solution, we form a roller small and failed the rod with a plug ...

7. Mixed brush corrected ...

8. With the help of a spatula and tassels, we cut the entire bottle with a putty somewhere 2 ...

9. For wings, we will need such a grid 15 for 30cm. With a slightly bent, to give the shape of the wing, we press it into our workpiece of the painter, and immediately fix it with a small ripplet of putty ... Here it is necessary to wait a little time, so that the shtialovka grabbed. You can relax minutes 10-15, and put a support for the back of the wing ...

10. Well, what have rested? Moving further ... Moisturize our hands and take a slightly solution in one hand, we insert to the outside of the wing, and hold the second hand all this from the inside ... I do it with the second wing. Do not be afraid if it doesn't adhere very well, go to the time of the second wing and so alternate everything will turn out. Well, and all flaws we will fix the biggest, when the shtclowing will be slightly ...

11. When the wings need to give rest, we smoothly go to the manufacture of the neck ... Again, we form a roller from the solution with wet hands and attach to the rod ...

12. Help yourself a wet tassel ...

13. In the course of the work, enngulate the wet piece of bandage neck and squeeze all the hands a little ... When with the neck, at this stage of work, you can go again to the wings and to block all the breeds ...

14. Lock the head and calmly go to rest somewhere for 30 minutes.

15. It's time to think about the tail - a small piece of mesh bending under a kut of degrees somewhere 40-45 and fixed with a solution and backup ...

16. To continue the manufacture of the tail, a small number of plasters with brush movements "up-down" and "from side- to the side", forming a small rounding on the bottom of the workpiece ...

17. Tailor Tailing in a few approaches, alternating it with the manufacture of the second layer of neck and head ...


18. Frame the edge of the blank on the shoulders of the roller from the shnotka and lay the ...


19. View of the resulting tail from above ...

20. View of the tail side ...

21. But, in fact, a ready-made semi-finished product ... Write it from all sides at this stage and hide all flaws all flashes ... After a couple of hours it will be possible to raise it and move it to another secluded place from the rain. Sun in the sun is somewhere a couple of days, after which it was to clean the special sandpaper for plastering (it is a meshe, if anyone knows), then the usual skewer-nolovka, to progress under the painting of the primer (without primer, the paint rolled with lumps). I painted the usual paint enamel in two layers, then made the beak and eyes and opened with varnish in two layers.
")
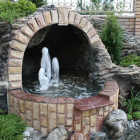
22. This is how I got a massive male swan. But I think you need to do it carefully !!! The drill is a few holes for water drain and make a similar process of painting these holes in order to protect their work from destruction ...

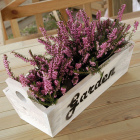
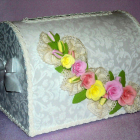
23. It remains to plant the flowers, while only the violet is kindly agreed to pop me in a photo shoot. I think the velvets for this couple just right, what do you think?

Advice: We knead the shplanyow to small portions and very thick, for better work, and it will always be able to moisten the same wet hands and wet taste in the process of work. Do with me, do as I do better than me! And remember "Do not forbid yourself to create, let him sometimes go crookedly, no one can repeat your ridiculous motifs!" As M.TSvetaev said. Good luck everyone! I will be happy to look at the Swan-Cachepo in your performance! (Source: http://stranamasterov.ru)


Clear! Super! Talent! This has not seen this yet. Very nice, neat, and most importantly aesthetic. Do not pass.
Thanks for such a rapidness, super, clever.
Very nice! And the next season will not be anything?
Very cool turned swans !!! I have long wanted to buy such, but now I will do it myself. Thank you so much for the MK. Creative success!
madly beautiful, tell me, and when the rain is hit, the design is not solved
It's just great! And how much work. You are probably a specialist, and not just an amateur. Sculpture studied!