In the era of ever-growing payments for energy resources, their careful and optimal use is one of the main problems that need to be solved. This is especially true of the energy efficiency of the house. It is no secret that most energy resources we spend on maintaining comfortable conditions in our home.
In the summer - on the electricity of air conditioning, in winter - on the same electricity and fuel to its heating. Optimal and comfortable conditions for humans are considered to be the temperature from +22 ° C to +25 ° C with humidity no higher than 75%. Maintain such conditions in the premises where the walls have high thermal conductivity, too expensive. That is why this indicator needs to be reduced. In this article we will talk about one of the most popular method of maintaining heat in homes - the outer insulation of foam. It is considered one of the most optimal, as it has a relatively low cost and a very good result. In addition, the installation process of such a insulation is not too complicated and, with minimal construction and installation skills, it can be made independently.
Content
How best to warm: outside or from the inside
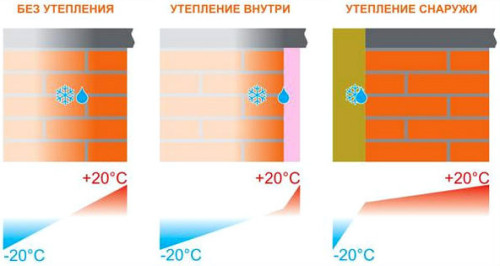
Most of the inhabitants of apartment high spirits believe that the apartment inside will be the easiest solution to the problem. At the same time, it is not necessary to issue a lot of permits and spend money on the services of industrial climbers. But it's far wrong. This warming will not avoid moisture condensation on the inner surface of the wall. The fact is that the dew point in the inner insulation will be accurate between the wall and the layer of the insulation, and since the moisture simply will have nowhere to go, it will come out by creating uncomfortable conditions in the room. By the way, it is better not to listen to the so-called "experts", which advise to solve the problem of condensate by steamoisole, laid on the outer part of the wall. It can only give a short-term effect, and then lead to more serious problems.
To say that it is impossible to insulate the walls from the inside - also incorrectly. But you only need to do so in addition to the outdoor insulation and observing certain rules. First, the insulation is laid only on the plastered wall. At the same time, the evenness of the plaster does not matter, so it can be done independently. Secondly, it is necessary to establish modern heating radiators with profiled channels. And the last - windows must have adjustable ventilation holes. Polyfoam inside you can warm the floor and the ceiling. For sex, the lamp is first made, the foam is mounted inside it and the screed is made. You can still put a wooden coating. From the above, it should be noted that outdoor insulation works best, therefore it is not necessary to save, but you need to do right away.
What material to choose: PPS or EPPS
PPS, or expanded polystyrene is one of the most popular materials for outdoor insulation. It is manufactured in the form of polystyrene pellets pressed in the stove. Also, the plates of extruded polystyrene foam (EPPS) appeared relatively recently on the market. This material has lower thermal conductivity and high strength, however, the price of such a foam for the insulation of the walls is 3-4 times higher.
In case of insulation of private houses outside the foam, where the material will point through the entire perimeter of the building, a simple polystyrene foam can be used. Arriving a closed box, it will have sufficient strength, which will significantly save funds. If you plan to apply over the insulation of several layers of plaster, for example, rough and decorative, then better, after all, use EPPS.
In apartment buildings when choosing a material, it is necessary to take into account the climatic conditions of the region. In places with abundant precipitation and strong winds, preference is better to give Epps, since it is much stronger "sits" on glue and fungi. In addition, he has a better coefficient of moisture absorption, almost 10 times lower in comparison with PPS. However, in places with a more moderate climate, you can do with simple polystyrene foam.
Glue for work
For the outer insulation of the facades, the foam is used two-component or universal construction adhesives. Specialists advise to apply the first type of mixtures separately for sticking plates of foam and surface leveling. Naturally, it is easier to work with universal adhesions, however, their cost is much higher, which affects the overall estimate of the work. This is especially noticeable with the insulation of large houses. As for the physical properties of two types of mixtures, they are almost the same.
Fastening material
The glued sheets of foam plastic are attached to the wall with special dowels - fungi. This dowel has a large hat, which presses the insulation to the wall surface. Such materials are made of steel or plastic. For fastening foam, it is better to use plastic dowels. The fact is that when heated, which is necessarily happening in the summer, the PPS is extended and can break on the sharp edge of the metal dowel.
Plastic fastener is better to buy complete. If for some reason I had to buy separately nails from the cloud, then the last one better to take from PVC, and nails are polypropylene. Polyethylene nails are better not to buy - they have low strength.
Calculation of foam thickness for insulation
Among people often there is an opinion that, the thicker layer of thermal insulation, the better, however, it is not so. An unreasonably thick layer can reduce the strength of the material that sooner or later will cause its destruction, besides, it will lead to additional costs. Therefore, for the positive effect of thermal insulation, it is necessary to calculate the optimal thickness of the insulation.
One of the main parameters for the calculation is the thermal resistance of the building or the specific coefficient of heat loss (R). In various regions of the country, in different climatic zones, such an indicator will be different. So, for example, its value for southern latitudes is 2.8 kW / m 2and for the north - can reach 5 kW / m 2.
With non-standard climatic conditions in a particular settlement, this indicator can be found in the municipality in annexes to SNiP. The heat lifting indicator for different parts of the structure is taken with a different coefficient. Thus, the standard regional magnitude heat lifting for the floor is multiplied by the coefficient of 1.3, and for the ceiling by 1.7. Simple words, if in the suburbs the value R \u003d 4,2 kW / m 2, then the heat loss of sex will be 4,2 kW / m 2 * 1,3 \u003d 5.5 kW / m 2, and for the ceiling, respectively, 7.1 kW / m 2.
The second method of calculating the indicator of heat loss is the multiplication of the coefficient of change of temperature gradient to the regional indicator. The temperature gradient is the difference between the temperature indoors and the outside. For example, the minimum temperature value in the suburbs of -40 ⁰c, and the temperature of +25 ⁰c should be stored indoors. The temperature gradient is 65 degrees. Accordingly, the change coefficient will be 65/40 \u003d 1.625. Consequently, the value of R in this case is 1,625 * 4.2 \u003d 6.8 kW / m 2.
Next, it is necessary to know the specific thermal resistance of each material in the system, including brickwork, internal plaster, plasterboard, external plaster, etc. Knowing all these parameters, you can calculate the necessary layer of thermal insulation. If it is difficult to do it yourself, you can invite a specialist who will conduct the necessary calculations.
How to insulate the house of foam. Order of work
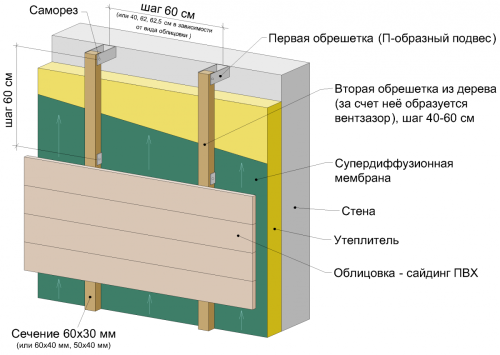
Standard layer structure when insulating foam is as follows:
- Glue for foam.
- Styrofoam.
- Glue for the grid.
- Primer under the stucco.
- Plaster.
Tool Apply Standard Construction: Spatulas (one toothed), perforator, mixer, rubber hammer, Scaffolding. For approximate work planning, you can watch a video for the insulation of the facade of foam:
Beginning work on the insulation of the house by foam is better when the walls come to a state of thermal equilibrium. That is, the temperature on the inner and upper surface of the walls, as well as inside should be the same. Experts advise work in the spring after disconnecting heating, or in the fall until it is turned on. Summer work is better not to spend. Starting the installation is needed from the northern side, then the glue on it quickly will grab, and the design will become good and durable base for the rest of the box.
In the process of insulation of walls outside the foam there are two operations that are limited in the time of their holding - it is a mixing of the grid on the fixed foam, as well as the grout of the primer and applying plaster. The foam is a pretty photosensitive material that does not have to be in the open sun, even if laid in the pack. Therefore, the fixed sheet of the material must be closed with a grid. As for the primer - then at its drying layer, the plaster will be held very badly. Therefore, the work is performed by small pieces. Glues exactly so much foaming so that after sticking for the next two days it was possible to fix it and paste the grid. Then, too, for three days, you must have time to apply a primer, get lost it, and apply plaster.
Phased work order:
- Before insulation, the foam of exterior walls must be prepared. It is necessary to primitive in a mandatory mixture of deep penetration for stone. Before the primer, it is necessary to remove the dust and dirt from the walls, and also clean the irregularities. The primer is better not to regret.
- After that we breed the glue. It must be made of two consistencies: jelly-like for walls and sour cream for plates. With such consistencies, a smaller consumption of material is achieved, with quite good results.
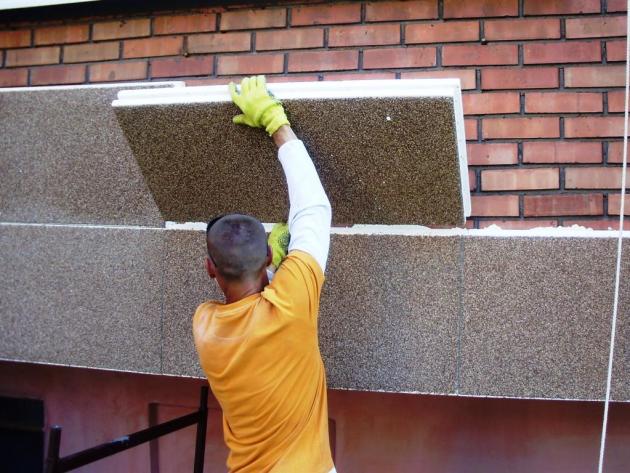
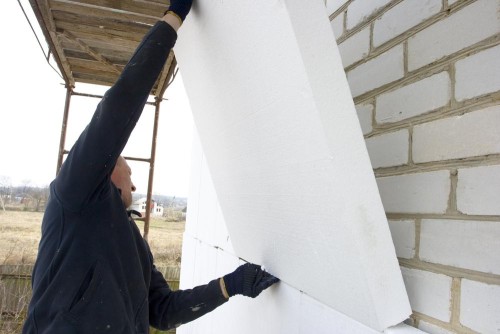
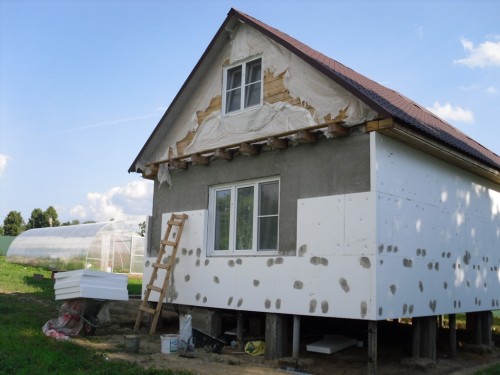
- Polyfoam sticking is produced from below. Otherwise, due to the pressure of the upper layers on the lower construction can "swim". Each subsequent layer must be laid with a shift on the ½ plate, just like brickwork. For this, the angular elements will have to be short.
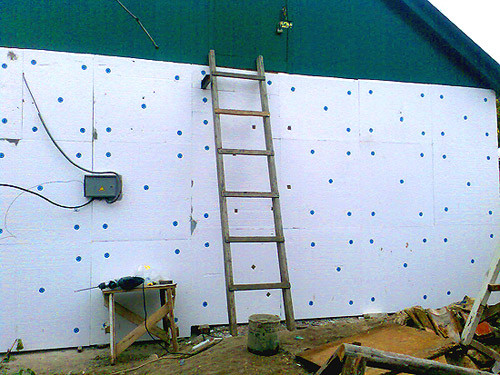
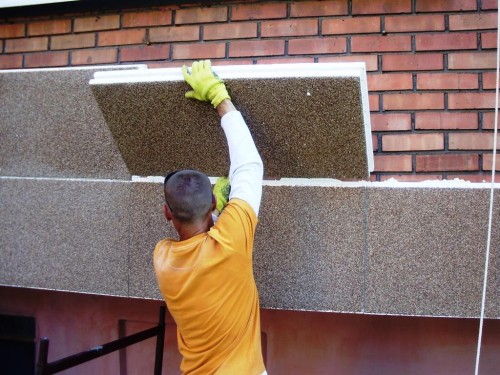
- On the wall we applix a jelly solution with a toothed spatula. A small spatula is placed in a coafling solution on the slab end. We install the stove and tightly press it to the surface of the wall and the adjacent plate.
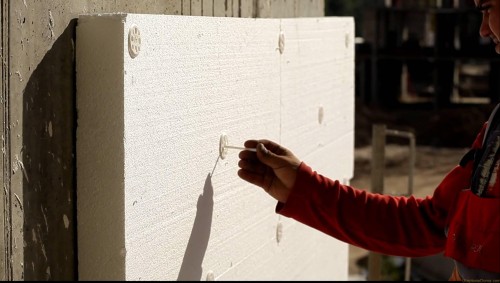
- After sticking, secure slabs with a dowel. Despite the fact that in the instructions on the insulation of houses, the polystyrene foam is the need for fastening the plates with five dowels, and at a short distance from its edge, most of the masters have a similar requirement ignore, as it is deprived of any logical meaning. It is advisable to install a dowel at the point of the joint of four plates so that his hat keeps all their corners. Also, one dowel is installed in the center of each plate.
- When choosing a fungus, you need to take into account that it should sit in the wall at a depth of at least 80 mm. Therefore, for foam 50 mm thick, the minimum dowel length should be 130 mm. The bur for drilling holes is selected depending on the thickness of the dowel. It is better to immediately buy two beads so that in the event of a breakdown of one do not interrupt the work process.
- The edges of the corners and slopes are strengthened with a dowel in a step of up to 300 mm.
- A day after fixing the foam on its surface, you need to stick the grid. First, the foam flames is grinding with a grinding grid. After that, glue the grid on the leveling solution. It is necessary to glue from the corners from top to bottom. We apply a solution on a foam with a toothed spatula, and gently lay on it and smoothed the solution. At first, the grid, and then the solution is quite common, but the wrong way.
- For the next day after sticking the grid, we wash the solution with a grater and apply a primer. We remember that it is necessary to apply primer and stucco in two days. In case of rain, it is necessary to strengthen two beams under the cornice and nourish the polyethylene film to cover it to cover the insulation.




A good article, in my opinion that is not more clear. Still wrote how to finish the window slopes.