In the modern world, everything changes so quickly and the technical progress is hard to keep up with the times. Sometimes you just want a cozy company for a cup of coffee or tea in the fresh air. Of course, you can arrange it, just having left the fence, and settling somewhere on the ranch, paying considerable money. But so I want to have a personal place, and then the question arises about the need to arrange arbor: how to build it in the country or how to choose the material. In this article, we will reveal the issue of facing the place to relax on our site, so that even a newcomer in the process can build a cozy nest, where it will not be ashamed to invite friends.
First you need to decide which gazebo you want. After all, costs are growing with the needs, but as usual, the miser pays twice. Therefore, you need to approach this issue with maximum benefits to choose the right solution for yourself.
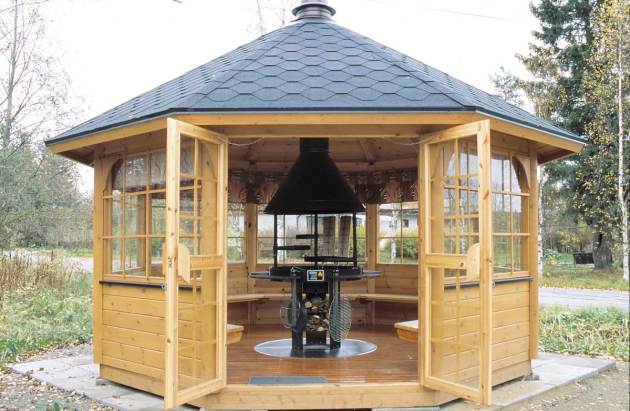
Gazebo for giving with a mangal
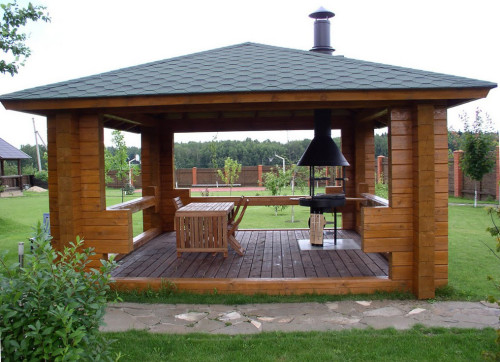
The most common version of the summer building on the household plot is a gazebo for giving with a mangal. The designs of such summer houses there are many. First you need to decide on the material, as well as a recreation period on the built building, whether it will be all year round or only spring and summer seasons. Consider several options for arbors and their differences.
Types of construction
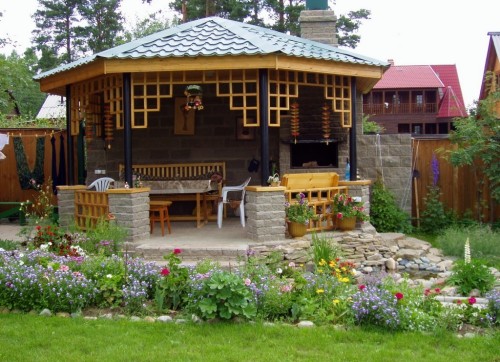
Brick arbors
Brick, as you know, rather durable, refractory material. This building can be compared with a small house that will successfully fit into the interior of your cottage, and especially if the main brick house will be erected against the background. Having a detailed scheme, styling this material is even a newcomer.
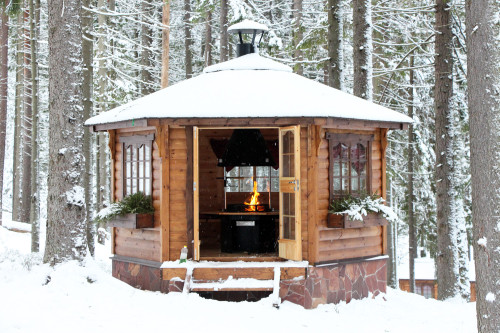
Wooden arbors
Such a construction is relatively inexpensive pleasure. It is often precisely gazebos from the tree can be found near the country houses, even some restaurants make a large number of wooden arbors for different landing of people. The only minus is a fire hazard, but it can be solved by wood processing with a special composition.
Metal gazebo
Such seats for recreation look implies, besides this, properly treated metal, rather durable. However, to create a cute masterpiece in the yard, you need to have good forging and cooking skills, and already ready-made structures not everyone afford.
Features of Mangala planning
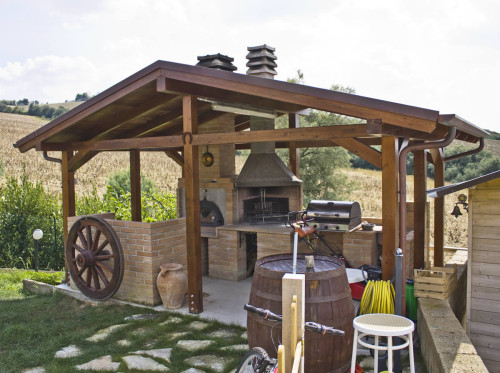
- Next, you need to decide on the brazier, and this is still at the design and design stage of the whole structure. It will be stationary or portable. Of course, the prefabricated grill is much easier to install, ordering in the store according to its size. However, the brazier embedded in the gazebo itself, with chimney and classical cooking technology, adds a special chic, plus meals are obtained more saturated and beautiful.
- Construction of the arbor, like any construction, begins with the foundation. If you decide to make a thorough building, you need an ideal foundation. For this, the site on which summer terrace for recreation will be built must be approached under the design dimensions. Therefore, the first thing is to make a drawing of the arbor, where to calculate the load and dimensions of the design. Also do not forget to consider the issue of communications and wiring in parallel, and then proceed to the fill of the base concrete.
- After the foundation, proceed to the support pillars. In many cases, the chimney also serves as the basis, but do not forget that it must necessarily rise above the roof surface. The brand can be built from brick, and you can use a cheaper and fast version of steel pipes. If you want to save and you have in construction skills you can make a small metal brand for a gazebo in the country of your own hands.
Arbors at your own hands: Instructions
- We make a drawing with all sizes.
- Next, you need to cut the mantal elements with the help of a grinder: the bottom, short and long walls for the oven. Metal thickness for parts can vary from 2 to 3 mm. Of course, it is better to take a thicker material, then durable walls will better hold warm. Usually, sheet steel is used for this type of work. It saves warmth and does not burn.
- Mangala legs are usually made from a pipe or corner. You can consider the figured base that will be screwed, thereby becoming collapsible. To do this, cut into the threads on the legs and in the corners of the mangala. They are connected in the middle of the acceleration of the desired size.
- The remaining parts are connected by welding or bolts.
- For the color of the manga, choose the heat-resistant coating.
Installation of arbors: recommendations
Gazebo
Arbors made of wood by type of designs can be divided into summer and winter buildings. Options for warm-time season are simpler in the installation, but there are nuances here.
Summer Arbor
- To begin with chosen wood. Usually for such construction use materials from solid rocks.
- The foundation can be simply wooden or pre-flooded concrete. For pillars, a timber or logs are used for the same size.
- They fit on each other, crosswise with the help of spike-groove technology in the edges. This is a sufficiently strong connection and is used in many produced from wood.
- The roof is usually built of flexible tile. You can also use a fane or more modern polycarbonate.
- In conclusion, the gazebo can be decorated with wooden lattices and curly plants.
Winter gazebo
To the construction of the winter gazebos for giving, it is necessary to approach more thoroughly.
- Wood is chosen mainly of pine.
- The foundation is necessarily done durable, poured concrete.
- Since the house with a mangal is used in the cool time of the year, it is important to consider waterproofing. Typically, such solutions use bitumen mastic and rolled material.
- The floor of the winter gazebos is also subject to waterproofing, which is laid on the ground, and subsequently fall asleep with gravel. Such an approach protects well from moisture and germination of greenery in unnecessary hosts.
- When the walls are erected, it is necessary to strictly control their vertical position. To do this, in the process, it is necessary to regularly measure the diagonal using a water level. At the same time, do not forget to leave places for windows, which will be subject to glazing with opening flaps.
- Next, the roof is mounted, the benches are installed and everything you need inside. You can also hang small curtains for comfort.
- In conclusion, it is necessary to carry out work on the protection of wooden structures from moisture and pests by primer and coating with a yacht varnish.
Polycarbonate gazebo
Polycarbonate gazebo is a more simplified version of the installation of a cozy picnic nest in the country. If you are not afraid of work, and do not want too much time to spend on the construction of a gazebo for giving your own hands, then this option is for you. Consider in stages, as with your own hands to build a gazebo with minimal costs and in a short time.
- First you need to decide on the design of the arbor and calculate the drawings for the future masterpiece. Whether a closed or open-type house, a rectangular or square shape, temporary or for long-term use, as well as other nuances on the construction device.
- Photo of the design of the arbors There are a large set in specialized Internet magazines, and you will not create a lot of effort to choose the option that will be visually in my soul. Well, and then you can go to the practical moments of construction.
- To begin with, we choose a place for the arbor, it should be smooth.
- Next, measure the place for pillars, while observing the measurement clarity using a level.
- We prepare the pits for the basics and install them by pouring concrete for a stronger clutch.
- For a frame, metal structures or wooden bars are most often used. Of course, the frame of the rigid material exceeds the operational characteristics of the wooden, but if it is properly to care for an array, and it will last for many years. Therefore, when choosing the storage conditions should be taken into account. Wood is better to acquire on sawmills, where the rules for the preparation of material for use are withstanding, and metal - on the wholesale bases of scrap.
- The roof remains with the walls. It is installed according to pre-harvested polycarbonate sizes, fixed using H-profiles and is attached to the frame of self-draws or screws with sealing rubber shears, which insert the prepared sheet.
- After all the troubles begin to make the most pleasant occupation - arrange a cozy place for kebab and recreation. Here you can already fantasize at will. You can use the walls of the arbor as the backs for benches, plant curly plants, such as grapes, hang curtains to protect against sunlight and put a portable brazier. Do not be afraid to experiment, because creating something with your own hands, it really makes fun and brings pleasure for many years.
Metal gazebo
- As you know, the metal is a very durable and reliable material. It is possible to build the designs of a wide variety of forms, due to its flexibility at high temperatures and stuff in the cooled state. On time and properly processed metal does not require much care, if necessary, it is easily dismantled and restored elsewhere.
- In order to make a metal gazebo elegant and unlike others, you can add wrought-iron elements that give it a special charm. You can combine with various materials, such as wood, polycarbonate or brick.
- Metal structures from other types of buildings are distinguished by their strength, ease and resistance to fire. It is possible to attribute high thermal conductivity to cons, since in the summer the design is very hot, and in winter it is cooled, so such a gazebo should not be very close to plants. It is better to build it in general in the shade of a large tree to minimize sunlight entering.
- Designing a gazebo is better to paint, create a drawing with all sizes, and then begin the structure.
- For the construction of a metal gazebo with their own hands, you will need:
- metal pipes;
- the material for the roof;
- bulgarian;
- drill;
- welding machine.
Installation recommendations
- Choose a flat surface.
- We determine for what purposes need a gazebo, such as seasonal or picnics with barbecue gatherings throughout the year. Since it is possible to construct a temporary gazebo for use in the summer, which is when the onset of autumn, can be easily disassembled and stored in the garage. Also an important point is that for a number of people it will be calculated.
- Fill the foundation in a pre-excavated shallow pit.
- Set the basic rack design, so that they are symmetrical with welded cross members.
- Complement the walls gazebos elements of forging. After welding sure we clean the connecting joints and stained metal parts.
- The coating may be used awning.
- To prevent corrosion, the arbor should be treated with a special solution.
Gazebo from bar
Bruce is a heavy, durable and reliable material. Considering the photo in construction journals arbors from a bar, you can choose the most suitable design, and easy to install. Another plus - the cost of lumber, it costs much cheaper in comparison with other materials. For the construction of timber pergola will use a phased plan of action.
- Choosing a site for construction.
- Determine the type and kind of gazebo.
- Create drawings with dimensions for arbor.
- Fill foundation.
- Install bearing pillars.
- Mount the roof.
- Sheathe the walls, if provided in your plan.
- Decorate the gazebo.
Installation recommendations
For self-built of timber pergola look at a few features.
- During the laying of the foundation, to do pre-timbering of boards. So that it retains its shape, it is filled Booth.
- The valve is driven into the ground, and it is connected between a cotter-pin wire. Such attachment, in practice it turns out even stronger than welding, as by pouring concrete welding can be broken, and the cotter-pin connection wire - it is forever.
- Then, the foundation is filled with concrete to the edges of the formwork, and allowed to stand for 2 days at 35 ° C. After the foundation of well-cured, the formwork can be removed.
- Form boards may be either round or square. The design of the treated material is round, it looks, of course, more gracefully.
- Is laid on the foundation beams criss-cross, it needs to make a pre-grooves of sufficient size, and where the logs will be. To prevent cracks laid special thread construction.
- It is important not to forget to leave openings at the joints for further glazing.
- The roof can be made of different materials, such as tiles, reeds or polycarbonate.
Gazebo on water
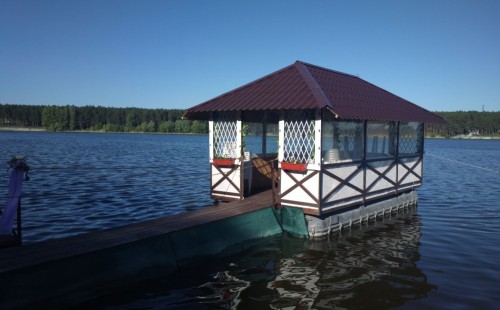
An original arbor, maybe a floating structure. This design will be attractive if there is a river or racks nearby. Such a solution will allow connecting comfortable rest, for example, fishing or beach rest. Let us give an example of the construction of such an unusual arbor.
- The foundation is carried out from closed plastic bottles of the same size so that the gazebo could swim on the water.
- When preparing the bottle, they are stacked on the ground and are associated with a populated soft wire. In the middle, you can make through the opening in order to look at the water and wet the legs in it.
- If there are no such number of bottles, you can replace them with four gas cylinders, they need to be located vertically 2 pieces in a row and weld to each other.
- From above, the base of the bottles are laid out the bars and are wrapped up with the same thread. If a kind of foundation is made of cylinders, then iron corners are welded at the corners of 5 mm, and the boards are laid out on them.
- Before mounting, the bars are necessarily processed by the anti-nipple composition and are covered with bitumen or special varnish.
- Then the boards are attached by bolts or welded to the corners vertically and symmetrically so that the gazebo is subsequently falling apart.
- The roof is mounted tiles, mosquito net or reed.
- The side sides of the floating arbor can be seen with a pressed plywood, attaching sheets with bolts or lay out her bars, securing them to corners.
- The final chord will be the bridge to the shore and anchor to the gazebo.


 Start a discussion ...