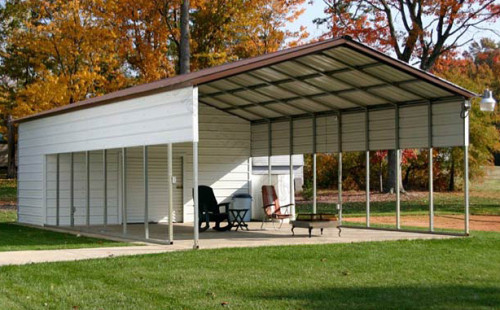
The owners of private houses and cottages often there is a need to establish a canopy, an open garage, a gazebo or a barn. Not everyone knows that it is possible to make a durable canopy quickly and with a minimum of investments. In addition to protection against sunlight, wind, rain and snow, the canopy is also an excellent designer solution for the design of the site.
Tools for work
Make a canopy from the pipes with your own hands is not at all difficult, as it may seem at first glance. For this, there will be no complex special skills, even a newcomer can be mounted in construction.
A canopy from profile pipes is a simple and budgetary design, the mounting of which will not take much time, and the costs will be minimal.
Instruments:
- working mittens;
- roulette;
- level;
- shovel;
- welding machine;
- bulgarian;
- drill;
- perforator;
- bolts;
- roofing screws with gaskets;
- profile pipe;
- corner;
- a metal sheet;
- flange;
- sand;
- cement;
- gravel.
What you need to know before construction?
Before starting installation work, it is necessary to determine where the canopy will be located, with its shape and for what should be applied to further.
It is important to determine the design of the canopy, because they are built for both stationary use and dismantled. Stationary canopies use all year round: for example, to protect against bad weather inlet and car. Removable (mobile) put when defense is needed only temporarily: country canopies, greenhouse. The main requirement for dismantled structures is easy assembly, strength and good wind resistance.
A canopy from the profile pipe is built as separately, so attached to the wall of the building, forming a single design with it. Under the use of canopies divide on the economic used to protect property (house, car, inventory, summer kitchen), and canopies that are placed in the recreation area (gazebo, canopy over the playground, swimming pool).
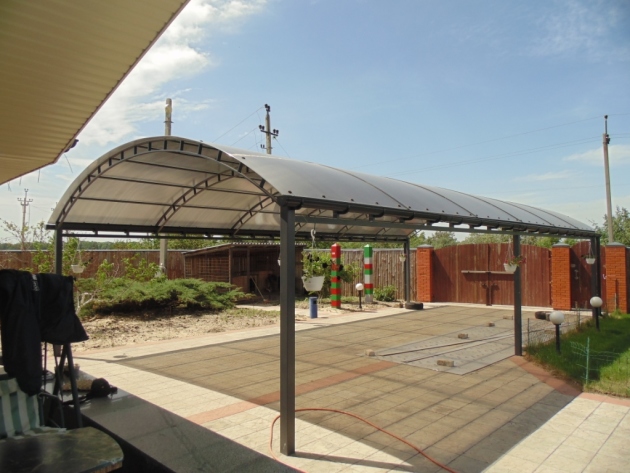
There is a variety of forms of roofs at a canopy: dome, arc, arched, pyramid, single or duplex. Of course, than the exquisite the shape of the canopy, the more difficult it becomes the process of mounting it.
Forget about the long hours carried out in the calculation of the correct design when there are ready-made photos and a sowing drawings from the profile pipe. Depending on the load, it will be necessary to calculate the amount and thickness of the supports from the canopy, and select the metal from which they will be made.
The complexity of construction directly depends on the design, which will be selected, and the materials used in the process of assembly work.
Therefore, we think in advance the material from which the shelter will be made for a canopy. The easiest option is slate - at the same time one of the most severe materials.
Where attractive looks canopy from the professional flooring, although this is not the cheapest material.
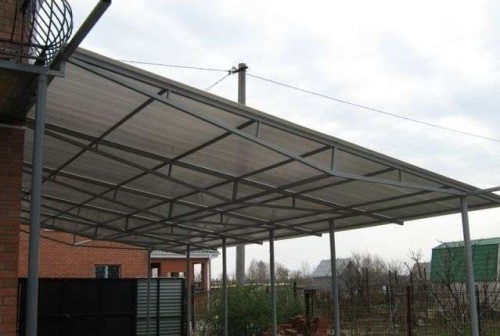
At the same time, the light and translucent polycarbonate, though it looks aesthetic and expensive, but passes the sunlight and delays heat, creating a greenhouse effect. So think well before mounting the polycarbonate flooring for a carport over the automotive platform. Under the influence of sunlight, the car paint will begin to burn out. And in a gazebo with a polycarbonate roof it will be hot and uncomfortable.
Carrier from the profile pipe. Where to begin?
The construction of a canopy starts with the preparation of the construction site and mount the supports for a canopy.
For the construction of a support, you can take iron pipes with a diameter of 50 mm and the wall thickness of 3.5 mm. Sealedness does not play any role, so it can be advantageous to purchase second-hand pipes, thereby reducing the total costs of construction. The diameter and thickness of the pipe walls are selected based on the load on the planned canopy: consider the weight of the design itself, the material used for the roof, and the snow load in winter.
On average, a pair of pipes with a diameter of 80 mm, mounted at a distance of three meters from each other, withstand the load up to 250 kg. But the harder the structure itself, the smaller the distance between the supports will have to count on. So for a canopy, covered with slate or natural tile, better stick to the distance between adjacent supports in 1 - 1.5 meters.
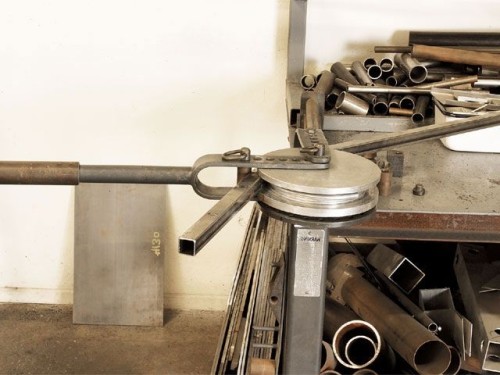
The main material of the formation for frame frame is profile pipes. Pipe walls can be different in shape and thickness. They are selected depending on the load and the magnitude of the finished canopy. It is best to use profile metal pipes of a square or rectangular section: this is a budget option, they are designed for high loads, and at the same time, at the expense of their small weight, create a smaller load on the house and support.
The easiest option of construction is to docile a canopy with a wall of the house, which will significantly reduce the amount of material being expended.
Preparation of the construction site before assembly work
Before starting work, they are preparing a platform for construction. Equal to the base, after the trambet and place the place to attach the supports. All calculations should be carried out exactly and according to plan.
Before carrying out land, you should also make sure that the cable or water supply will not be damaged.
Material for support is used the most different. They are made of stone, bricks, wood, apply forged metal and, of course, a metal profile. What is the advantage of using the profile before all the others?
Metal profile - simple and economical material. High wear resistance, concise design, aesthetic appeal, all this makes it an excellent choice for building a reliable and durable canopy.
The recesses for fastening the supports are rectangle into several rows, depending on the size of the roof. After the places for the recesses are marked and calculated the distance between them, you will need a shovel. The size of the deepening is digging at least 60 cm deep, depending on the dimensions of the canopy and freezing of the soil. At the bottom of the deepening put a substrate from the rammed sand and gravel.
- At the beginning of work, all pipes need to clean well and produce primer. To avoid corrosion and rusting, metal plugs are welded to the ends of the pipes.
- Before installing the supports, it is advisable to welcome the flange to the upper end of each pipe. This will facilitate subsequent welding of supports with a carcass. The flange can be used by any, both solid and perforated.
- In the future, the welding location is cleaned and bubbled by the corner.
- Check yourself, once again producing measurements. Supports exhibit strictly vertically, it is a very important stage in the construction of a canopy. To do this, measure the supports level. It is measured separately each of the supports, for a more accurate calculation you will need the help of another person.
- The height of the support is calculated on the basis of the angle of the slope. For a normal sediment sediment from the roof, the slope is worth doing at least 10 cm.
- If the base for the construction site is already concreted, the supports are attached to it using anchor bolts. This is the most reliable and proven fastening method.
- If it is planned to mount a heavy canopy, docked to the same with the wall of the house, the walls are additionally fixed to the wall.
- To impart the reliability of the design, you can fight between the basics of the reinforcement rod, thereby additionally engaging the foundations among themselves.
In addition to pipes for supports, cutting pipes with a similar diameter will also be needed. Plugs are inserted into pipe trimming and weld together to obtain racks. They are then installed in the recesses, poured with cement composition and leave to estimate, at least for several days. Time depends on the quality of cement mortar and weather conditions.
Before moving to the mounting of the frame, you need to make sure that the cement froze well, and the foundations are tight and reliably.
Make a frame with your own hands
To work on the frame, you will need a smooth work surface and a welding tool. The frame is collected and welded on the ground to achieve accuracy in the manufacture of frame design.
Before starting the installation work, the profile pipes are thoroughly cleaned from the scale and rust, drown out with a metal sheet to prevent corrosion processes, then ground and start directly to the frame assembly.
Consider to start the order of the assembly of the dismantled (mobile) frame:
- Short cylinders with through holes are welded to the profile tube on one side. With their help, the rafters will be attached to the basics, therefore they are placed so that the holes are cut with supports.
- At the ends of each support, similar holes for fastening the frame and rack are drilled. Then the pipes are collected on the bolts.
- To simplify the process instead of cylinders, metal plates can be used, but this method of assembly is considered less reliable and suitable for light and simple canopies.
It is much easier to collect a stationary canopy of pipes. The rafters and transverse frame tubes simply weld to the racks. Welding places are then carefully cleaned and painted as needed.
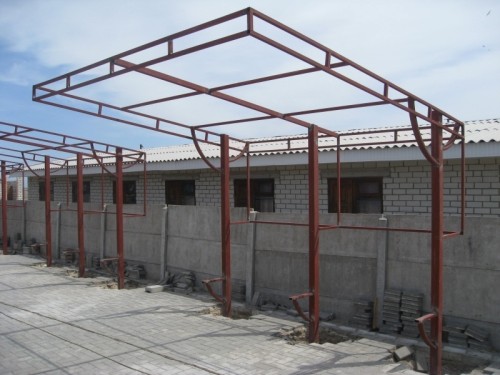
There are two types of frame design: using farms and without them. The choice of design directly depends on the size of the canopy and its overall height. The more canopy and higher, the more seriously the load is underway, the more powerful the framework should be.
Here is a simple embodiment of a reliable frame without using farms:
- Before starting the installation work, the profile pipes are cleaned and put a plug on the ends.
- Then welded bearing longitudinal supports (rafters), forming the basis for the frame frame.
- Form the crate, due to the welding of pipes transverse to rafters. There is no need to weld a close crate, step ranges from 100cm and more.
- Perform final sweeping of pipes, primer and painting.
- They produce alternate welding of the frame to the supporting columns, and the slag is subsequently rummaged. At this stage of assembly, you will need help at least one more person who will hold the frame during welding.
Frame for canopy without the use of farms is suitable for small canopies with low load. If you need to mount the overall design with severe roof, it will not be possible to do without the use of farms.
How to assemble the framework using farms?
- For each pair of supports, a separate farm is welded in the form of a triangle. If a canopy is mounted without inclination, you are welded.
- The resulting triangles are mounted between the supports and the wall of the house, and then the transverse pipes for fastening are welded between them.
- Installation of crates for fastening the roof.
- Processing pipes before work and the final processing of the already assembled frame is made in the same way as for assembling the frame without the use of farms. Pipes cleaned, ground and color.
Now that the frame for a canopy is assembled, you can start roofing and mount the roof for a canopy. As a rule, in the roofs for a canopy, the groove is not provided for the drainage, therefore the professional flooring is placed in such a way as to ensure normal outflow of water directly from the roof surface. For this, sheets must be put according to a specific scheme.
Of the two sheets of the corrugated, the lower row of the roof is going. Then the third sheet of professional flooring is fixed in parallel to the eternity, the first in the second row. Then one row is put on top of it in the reheast. So continue until it fills the entire roof.
With the correct and competent installation of the roof, its weight will be distributed evenly, and the roof will endure any weather surprises.
In order to ensure the flow of water from the roof away from the stands of the canopy, the roof should be greater than the distance between the supports. For additional convenience, you can set around a canopy of a gutter for water removal.


 Start a discussion ...