Each motorist perfectly understands that the car should be stored in a dry place. Excessive moisture can cause metal corrosion, which leads to a damage of the car body. Therefore, humidity in the garage, where the car costs, should be minimal. One of the main places through which water can fall is the roof of the garage. That is why its installation and operation should be paid great attention. Next, we will look at how to make the roof on the garage do it yourself correctly.
Content
Types of roofs
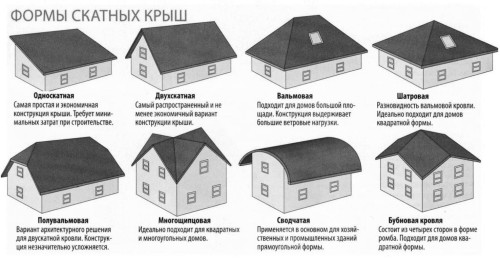
In order to start work, it is necessary to determine the type of roof that will be arm. Below we present the most popular roofing designs that are used in the construction of garages:
- Flat roof. Flat name can be called, of course, with difficulty. After all, even such a roof has a small slope to prevent moisture accumulation. The slope of a flat roof, as a rule, does not exceed 2⁰-3⁰. Usually, such a method cover the roofs of garages in garage cooperatives, where the buildings are on topty to each other, which prevents the overlap on another method. This kind of roof is most popular for the construction of the garage, as it is mounted quite easily and quickly.
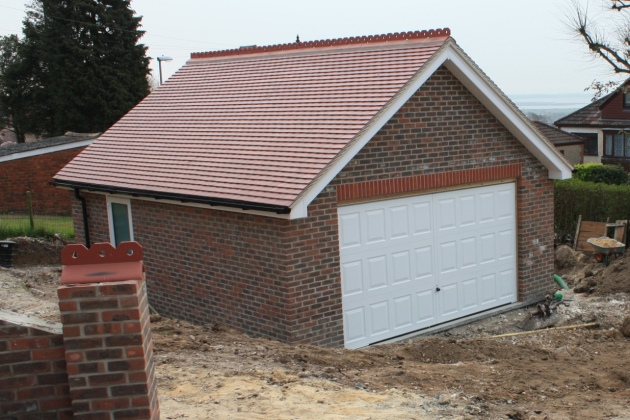
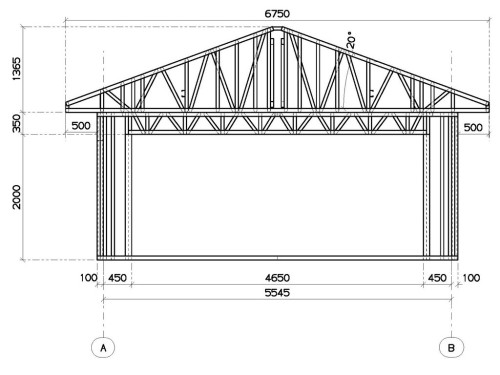
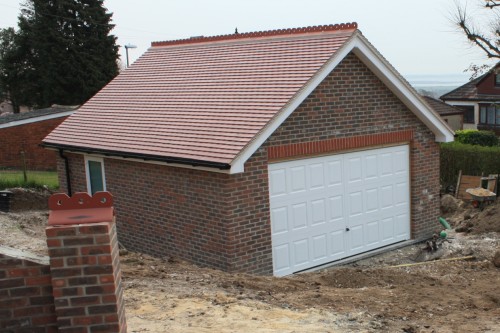
- Double roofs. Less common when building garages. Such a roof has a more complex design than flat, and its installation takes longer.
- Tent or hip roofs. Pretty rarely found as a roof for the garage due to the complexity of the design. The only justified case of using such a coating method is the architectural homogeneity of the garage with other buildings.
- Roofs of a mansard type. Through such a roof over the garage, a residential premises or a workshop is usually equipped. The cost of this design is very high, and is justified if there is a need for an additional area. The process of facing the roof of an attic type is quite complicated and requires special knowledge and skills.
Types of roofing materials
For different types of roofs, various roofing materials are used:
- Rolled materials. These include rubberoid, rupture and other materials on a bitumen basis. Also recently, membrane coatings and overlaps on glass axis were widely distributed. As a rule, they are used for flat roofs. Their main dignity is good waterproofing, a relatively low price and simplicity in the installation. The disadvantages of rolled or soft roofing materials include their relatively low service life, potential fire hazard and fear of strong heating.
- Slate. Wave slate has been a leader among roofing materials for several decades. As a rule, it is covered with two-tight, single-sided roofs or the design of the attic type. The slate is stacked on a wooden crate and fastened with self-tapping screws. Its advantages include a low price and excellent performance. From the disadvantages it is worth noting the fear of blows and fragility, as well as a lot of weight, which requires the construction of powerful rafting systems.
- Metal tile. Used for the roof of the pitched roofs. It is a galvanized metal sheet under the structure of the tiles, covered with a special anti-corrosion coating. Such material is easily mounted, has excellent performance, not afraid of shocks, has a small weight. Metal tile service life can reach 50 years. From the disadvantages can be distinguished only by its price. In addition, when having a hail or a large rain, the roof of metal tile can give an unpleasant resonance.
- Professor, in principle, looks like a metal tile. The only difference is the structure of the profile.
- Ondulin. It is the sheets of cardboard impregnated with bitumen. This is not too popular roofing material for a number of reasons. It is quickly lit, not too practical, requires a large amount of fasteners, has a short life.
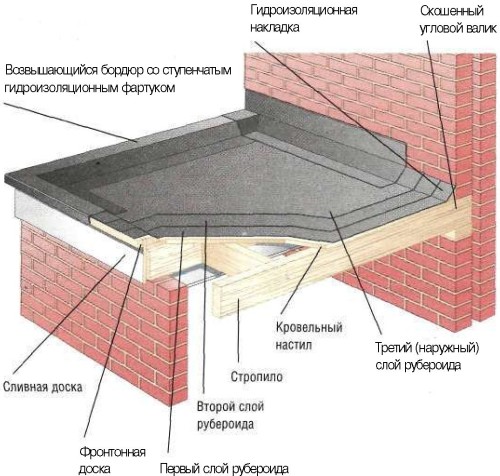
Roofing flat roof with soft rolled material
So, our garage is built, reinforced concrete plates are laid on the ceiling and we need to block the design.
Phased procedure for performing work:
- To begin with, ask yourself the question: will our new room be heated. If so, it will be necessary to lay a layer of thermal insulation, if not, we can only be waterproofing.
- First of all, we prepare the coating. We remove it from the construction trash and dust. If this is not done, there is a risk that in emptiness formed from the lumps of dust, water can leak.
- After cleaning, the coating is thoroughly primed by the primer. The slots between the plates close in cement mortar. Then we put on the surface of the rubberoid with an allen at least 150 mm.
- Next to the surface of the rubberoid by placing the heat insulation layer. It can be a ceramzite, slag or polystyrene plates. With the help of thermal insulation, you can form a necessary roof slope.
- The next step is to lay a screed. It is placed on the basis of a cement-sand solution prepared by the proportion of 1 part of the cement of the M-400 brand and three parts of the sifted river or career sand. After laying a screed, you need to wait 2-3 days until it finally freezes.
- When the screed is freezing, a bitumen solution is applied to its surface. To reduce the cost of work, you can use a melted resin. Due to the high resin temperature with it, it is necessary to work carefully, using personal protective equipment.
- A layer of waterproofing is stacked on the surface of the bitumen layer. As a rule, a rolled material is used as an insulation, such as rubberoid, a rupture or hydroizol. Their foundation can be bitumen or fiberglass. The material is stacked with an adhesive up to 30% of its width. If all work is done correctly, then such a roof will serve for quite a long time.
Every year in the summer it is necessary to inspect a soft roof. In the event of a detection of minor damage, the area of \u200b\u200bthe spoiled coating is cut and the latch is superimposed, the edges of which are scanned by bitumen. After 10-12 years of service, the soft roof is made to change.
Single garage roof with your own hands from slate
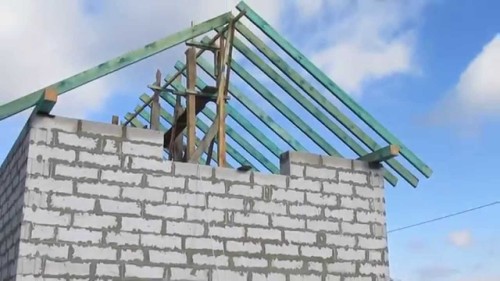
To mount such a roof, it is necessary to make a rafter system. During the construction of the walls of the garage, a slope should be provided. Therefore, as a rule, one of the walls of the construction are made above.
Phased procedure for performing work:
- The first stage must be mounted overlapping beams. For this, the timber is perfect for a size of 150x150 mm or 150x100 mm. When choosing a tree to install the rafter system, it is necessary to carefully examine it. Brussia should not have bitch, chosel and defects. Wood must be dried.
- The beams are put on the so-called seismic belt. They must be located in parallel floor. If there is no such belt, a special board is mounted on a high wall at an altitude equal to the height of the opposite wall. Make it with a dowel with a diameter of at least 8 mm in increasing no more than 500 mm.
- On the attached board and the surface of the opposite wall laid beams at a distance of no more than 800 mm from each other.
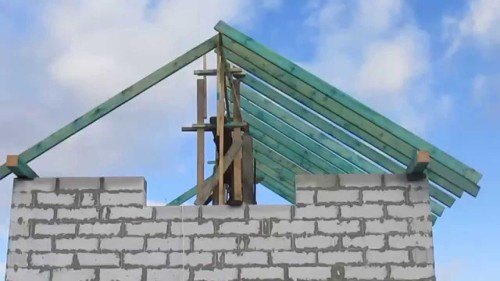
- Next, the high wall is setting vertical racks. For them, we use the same bar as for the beams. The rack is installed on the beam, and one of its edges is roasted under rafyled.
- The next step is laying rafters with one end on a vertical beam, another - horizontal. Mounting beams and rafters need hard, because the reliability of the entire design depends on it.
- Next, install the disclosure. Draps - diagonal beams that connect inclined rafters with a horizontal beam. Their installation is designed to improve the stiffness of the structure and its reliability.
- On the inclined rafters by placing the waterproofing layer. As a rule, a polyethylene film or hydroizol is used in its capacity. Starting waterproofing should be started below. The joint of two bands should be on the rafyl. Material fastened to rafters using a construction stapler. You can duplicate the mount using a wooden plank, nailed over the rafyled. Outlines and joints of the material are stuck with construction scotch.
- The next step is putting the crate to which the roofing material will be attached. For her, we take a 50 mm width board and a thickness of 20 or 50 mm. It is placed across rafters and krepim with stainless self-tapping screws. If the strips are less than the length of the roof, then drink them so that the joint is in the middle of the rafter. The distance between the shelling boards depends on the size of the roofing sheet. The sheet must cover the two labels of the crate and join 120-150 mm on each side.
- The last step will be the installation of roofing material. In our case, it will be slate. Stacking start from the bottom right corner. Fresh slate with slate nails or self-tapping screws. Sheets of professional flooring or metal tile laid similarly.
Laying thermal insulation
If you want to insulate the roof of your garage, then it is best to use mineral wool mats. It is necessary to choose the material when the project of the roof of the garage is being developed. This is done to ensure that the width of the insulation coincides with the distance between the rafters. In order for the material to do not pull moisture, it is protected from the indoor room with a layer of vaporizolation. Polyethylene film or membrane material can be in its quality.
After laying vaporizolation, the roof can be separated by WHP sheets, chipboard or other sheet material. A good option can be a lifting of plasterboard layers. However, it is worth remembering that only the roof does not make any sense, so if you wish to get a warm room, then it is worth thinking about the insulation of the walls and garage gates.
Garage Roof: Photo


 Start a discussion ...