Build a proper brick chimney, it means to provide your home with warmth and comfort. The most significant in the work is the rocking of the chimney, as it is very important to accommodately approach the seams and tightness of the structure, because the duty of the chimney includes a responsible mission - to remove combustion products. It is important for this thrust inside the pipe - it is thanks to her with hot pairs, air flow is provided, the process of combustion of fuel is supported. The brick chimney has excellent cravings, and it is much longer than the sandwiches and metal pipes. The masonry of the chimney of the brick is not complicated - even a novice builder will be completely able to cope with this work.
What you need to know about brick chimney
Of course, today people seek all the benefits of civilization, so it is unlikely that anyone will plan in the cottage the construction of a chimney in the cottage purposefully. But here the country's cottages can not do without this important component, especially if there are regular trips here in the winter season. By the way, if you plan to build a fireplace, then you also need chimney.
The masonry of the chimney of the brick has its price - specialists who build ovens and fireplaces on the old, still "grandfather" methods, asking for their work a lot of money, claiming that they own the "secret method". In fact, the masonry of the chimney do with their own hands is not such a "mysterious" - the main thing, carefully treat each stage of construction and then you will succeed!
The chimney consists of several parts, so those who think that this is an ordinary pipe - is deeply mistaken. By the way, experts claim that the thrust is good, the chimney should not be less than five meters high - otherwise the thrust will be weak.
Before starting the chimney pipe laying, carefully examine all the parts from which it consists, only in this case you will be understood by all stages of construction.
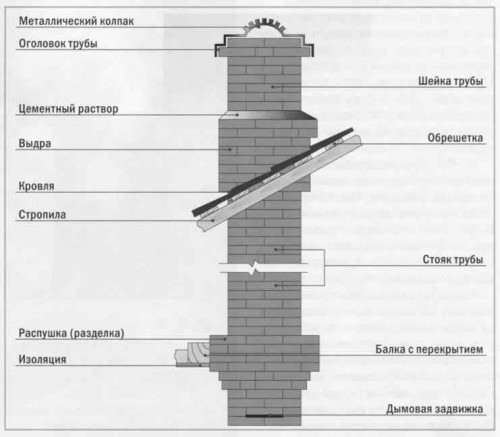
Brick chimney consists of such parts:
- The beginning of the chimney is a housing tube. It is installed directly from above on the furnace (fireplace). Most often, it is here that the catch is located. It is necessary to lay out this part of the chimney when complying with mandatory bricks in each row. The onset is about five or six rows of bricks. The mandatory part should not get to the inter-storey overlap, so its height depends on the height of the ceilings and the furnace, as well as the inter-storey overlap.
- The neck of the roller or just a roller is followed by a housing pipe. This is exactly the place where the pipe expands a little. It is worth noting that the chimney itself remains the same size as it was, and the extension appears due to brickwork. The outer part of the chimney is expanding from about 25 centimeters to 40 centimeters - due to bricks in several rows.
- After the renclosky there is a riser - this is the part of the chimney that begins in the attic and comes to the roof.
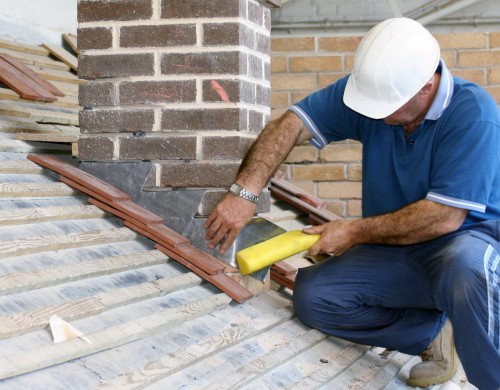
- The otter is part of the chimney, which is repaired from all sides at least 10 centimeters. Thanks to this expansion, atmospheric precipitation will not be accepted into the attic. The otter protects the carrying structures, roof, overlapping and items that you will be stored in the attic, as it will not allow moisture.
- The neck of the pipe - after the otter there is a smooth part of the chimney, which reminds his masonry riser.
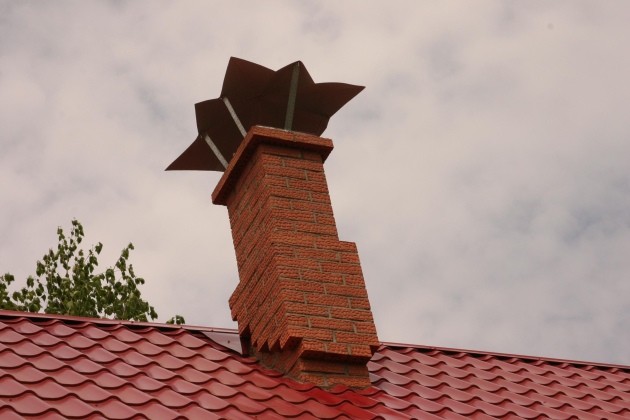
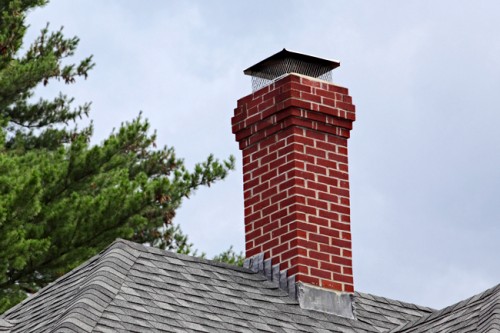
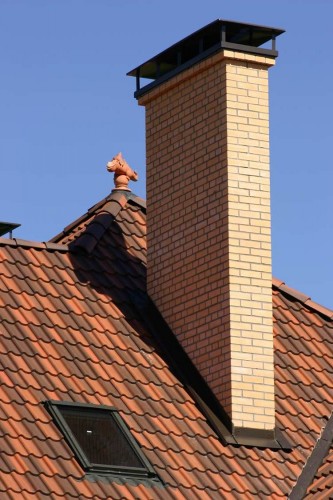
- The headpoint is the final part of the chimney. The masonry expands again. From above, most often put a metal cap, a flugyant or a deflector - thanks to this, it is possible to protect the chimney from atmospheric precipitation, and also noticeably increase the thrust.
Selection of tools and material
For the construction of the chimney, you will need the following tools:
- Level.
- Roulette.
- The hammer with the rubber nozzle.
- Brick hammer.
- Trowel.
- Bulgarian.
- Buckets are somewhat for water and somewhat for the solution.
- Electrode + nozzle "Mixer".
- Capacity for breeding solution.
- Sieve.
- Brick.
- Sand.
- Clay.
Choice of bricks
The choice of bricks for the construction of the chimney is a very important point, because the fire safety depends on it. Today there are a huge number of different types of bricks, which differs in appearance, in form, in color. As you know, the brick is burned, after which it is ready to operate. It is the firing stage and forms three types of bricks:
- Well buried brick has red. He has even walls and edges, if they knock on it, then a characteristic "metal" sound is heard.
- Initial brick has pink color. If you knock on it, then a deaf sound is distributed. Its most often used for laying less important sites.
- The checked brick has a dark brown. It is mainly used to laying the foundation.
Any of these types of bricks are suitable for one or another stage of the construction of chimney - make sure that it is full and refractory.
Chimney masonry
Many people think that if it is necessary to make a solution for masonry, it means that cement is necessary. In principle, this is true, but not for the construction of the chimney. Experts argue that the best mixture for the construction of chimney is a ratio in an equal proportion of clay and sand. But the concrete is completely not suitable for this construction.
How to do mix for chimney masonry
- For the chimney masonry, such clay should be used, which was mined from half-meter depth.
- Sand is best used river.
- Clay should be clean, without impurities and garbage.
- Sand, like clay, needs to carefully sift.
- The sieve through which it is necessary to sift sand and clay, should have holes no more than five millimeters.
- For a few days to masonry the chimney, clay need to soak in water and mix thoroughly.
- The ratio of sand and clay in the solution must be 2: 1, that is, two parts of the sand and one piece of clay.
- Sand and clay pour in a special capacity with water in a 1: 4 ratio.
- The solution should be good, so it is desirable to soak it from the evening.
- When the mixture is imagined and the clay is rascisnet, it is necessary to very thoroughly stir the solution so that there are no lumps - to the consistency of sour cream.
- It is possible to interfere with the solution manually, but you can use the engine with the nozzle "mixer".
- The quality of the solution is the key to a strong and reliable chimney.
Laying of the chimney do it yourself
If you first make chimney with your own hands, then best pay attention to the standard construction scheme. For clarity, read the following drawing below - it will help you navigate.
Laying the bottom of the chimney
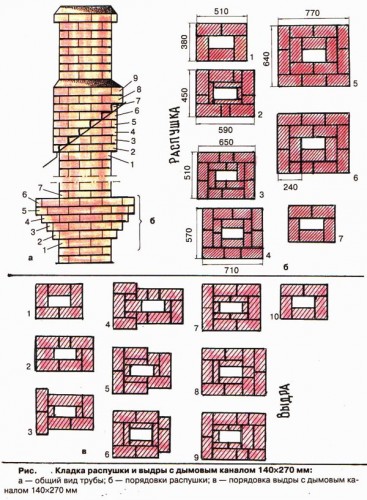
- First, the housing tube is laid out - right on the stove near the hole left for these purposes or the fireplace is stacked by a rectangle - six bricks, leaving inside the cavity - the so-called smoke canal or well.
- Chimney from the stove to the ceiling should be strictly vertical, so it is necessary to use a plumb when it is construction. Depending on which heat transfer you expect, the internal dimensions of the chimney are selected. For example, with power up to 3.5 kW, the masonry is made in four bricks, but for a large, so-called "Russian oven" make masonry in six bricks.
- The well of the chimney does not affect the masonry, on average, it has a size of 14x27 centimeters.
- The external dimensions of the chimney are 59x45 centimeters.
- Try to make the seams you have thin - no more than 1.5 centimeters. It is also a pledge of the chimney fortress.
Laying roller
- To form a flush most often used metal bars - it is necessary to build them into brickwork, but so that they do not overlap the smoke well.
- The masonry must be increased by one brick, that is, if you started the construction of a chimney of four bricks, take five, and if you take six out of five. At the same time, they are used first quarter and halves.
- Each new row should be formed so that the brick is a little "hanging" from the edge, the next row - a brick again "hangs" from the edge, etc.
- The third row of masonry increases to the size of 65x51 centimeters.
- So that the smoke canal does not increase, insert the brick plates insert. Their thickness of 6 centimeters.
- The following row again increases the chimney - its dimensions should be 71x57 centimeters.
- So you must lay out two more rows.
- Fifth row - end of the roller. Now you need to put two whole bricks nearby.
- The sixth row is exactly the same as the fifth, but with strict observance of dressings.
Laying standing
The attic is laid out straight risers up to the roof. In the roof it is necessary to make a hole through which the pipe will be output. The riser is displayed on one or two rows higher than the roof.
It is necessary to watch the ligation of the brick bag very closely!
Masonry Otters
- For laying, the otter uses nine rows.
- Each next row should be more bricks.
- Do not forget about the size of the chimney - it should not change.
- The third row - the otter increases with the help of bricks extended.
- First, the increase is in width, then in length.
- The fifth row should increase the chimney to close the gap between the roof and the pipe.
- To the seventh row, the formation of all side protrusions should be completed.
- The eighth row is the fourth, the last protrusion.
- The ninth is laid out in the same way as the eighth.
Laying cervix
The tenth row is the beginning of the formation of a chimney neck. Its length depends on your wishes and from the height of the chimney - on average, it is five to eight rows.
Masonry headband
After you put the neck of the chimney, you can proceed to the construction of the head - this part is laid out just like the rush.
Do not forget to the top of the chimney place the cap, the flugark or the deflector!



 Start a discussion ...