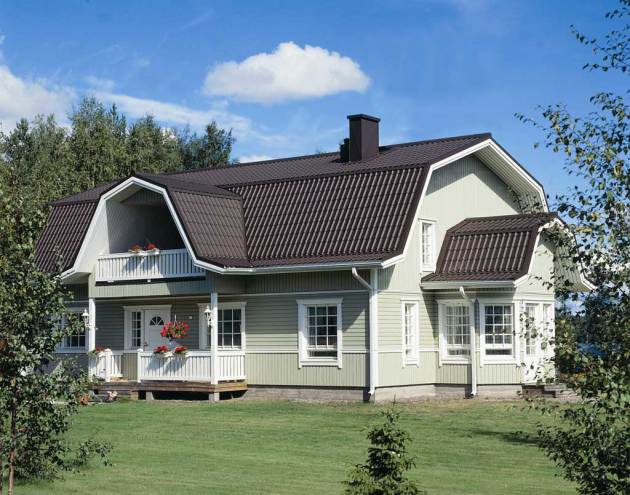
The broken roof design allows you to increase the functionality of the building. This name of the roof received due to its interesting form and the presence of a large number of broken lines. With its help, you can easily equip the attic room. Such a roof is considered rather difficult for independent design and construction. But despite this, it is quite popular. On how to build a broken roof, we will describe further.
Characteristics and structures of a broken roof
Such a roof is essentially a type of a duplex roof. However, it is more functional and practical. Thanks to its design, it is possible to equip the attic of a rather large area and with a high ceiling. This is ensured by fractures on the skate. True, such an opportunity is used infrequently.
Even the popularity of the broken roof has deserved due to its appearance, which is more attractive for some than a conventional duplex design.
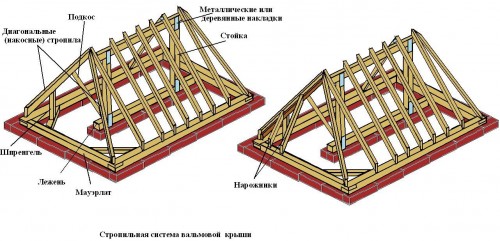
In the device of a broken roof, fairly dimensional rafter systems are erected to ensure its strength. Due to the modular method, such a massive construction can be collected without special lifting equipment. In places of fractures, rafters and the supports of the skate are cut under a small angle. Nodes of the entire system are attached to plywood strips with a thickness of no more than 20 millimeters. For large buildings, more overall rafting structures are usually created.
It is known that the upper part of the roof is most vulnerable to the impact of the wind. Therefore, it is erected almost horizontal. At the same time, the lower part of the skate is lowered down under a big slope.
Such a roof is suitable for houses with minor dimensions. This is especially important where it is impossible to build the roof of a complex form.
Types and shapes of a broken roof
Now consider the main types of broken roofs. They are separated depending on the number of skates on:
- single,
- double
- three-tight
- four-tight.
Not only the reliability of the construction depends on this parameter, but also the comfort of living.
Specifications:
- Single roof is a conventional inclined plane. It is easiest in the manufacture.
- The double-screw roof has two slopes, which are directed in opposite sides. A similar type of mansard organization is also quite popular. The fact is that this type of roof is quite high-quality in operation.
- The three-tier roof has one stable vertical wall in the end. At the same time, the second end and side skates are made with small fades. Due to the lack of one of the capital walls, this type of construction has a smaller weight than others. It is usually erected when it is necessary to combine the roof of the attic with the rest of the building.
- As for the four-tie roof, there are broken profiles in its design on all four skates. Perhaps this is the most time-consuming and complex version of the roof. But at the same time, the final design weighs quite a little and therefore it is quite popular. The practicality of the roof and the possibility of arranging residential premises is quite large area. The full-fledged room in the attic can be obtained even with minimal investments on its construction. And it is suitable for accommodation at any time of the year.
- The broken structures with a large number of skates are used very rarely. The fact is that some difficulties may occur when installing rafted and install roofing.
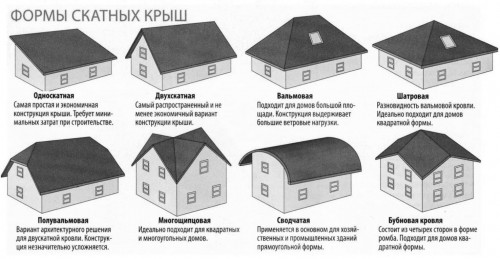
- The most common structural roof design is parabola. At the same time, the skates have a trapezoidal form along the long sides, and the short - triangular. This option is most often used for private houses of rectangular shape.
- There is also a semi-walled roof type. It is a variety of four-tie roofs. The half-haul is an end slope that is cut into the lower and top. The bottom of the roof has the form of a trapezium, and from above - a triangle.
How to make a broken roof
General process
Different types of such a roof have a different complexity of the construction, but, nevertheless, it is quite possible to build a broken roof with their own hands.
The rafter design for the roof is recommended to produce from wooden materials. This allows you to make it easier. Do not use under the arrangement of the roof metal profiles and massive reinforced concrete structures.
The overall process of construction of the roof:
- First of all, you need to decide on the size of the roof. They are indicated in the scheme.
- After that, you can proceed directly to the construction. All distinguishing features should be taken into account. If the installation is wrong, then in the future there may be flowed and ventilation. In addition, if the right tilt of the roof is not settled, then different precipitation (ice, snow and rainwater) can be accumulated on top of it.
- For the rafter system requires a wooden timber. It must have optimal humidity. Most often used wood coniferous rocks. The fact is that it is a soft and inexpensive material.
- The structural elements of the rafter system are connected to each other brackets on self-drawing or metal brackets.
- It is believed that the less the weight of the roof, the more reliable it will be. Therefore, the roofing material should be selected in advance. To light and at the same time, the following roof flooring includes:
- metal tile;
- galvanized iron;
- sheet steel;
- reed canvas.
Calculation of sizes
The necessary calculations for the project of broken roofs must be made before construction. And they should be accurate enough. The fact is that even small deviations during the distribution of the load will certainly lead to a violation of the strength of the carrier structure. As a result, it will not endure the weight of the roof.
For the right calculation at hand you need to have:
- Calculator.
- Roulette.
- The project sloping roof or drawing.
The values \u200b\u200bobtained should be applied to your sketch. Generally, such a roof shape is best broken down into a few simple geometric shapes, such as a triangle, a rectangle and a trapezoid. Then you need to measure the area of \u200b\u200beach of them, add up all the values \u200b\u200band thereby identify common design dimensions.
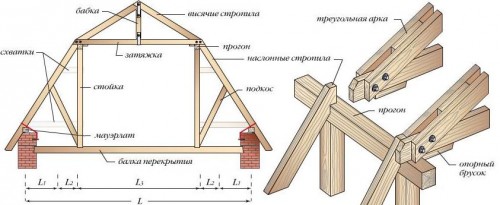
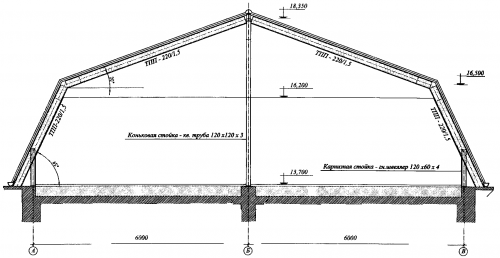
Apparatus sloping roof (schematic drawing):
It is recommended to calculate the required number of roofing materials to avoid shortages. This will save a lot of money. In order to calculate how much will need sheets of roofing deck, you can start from the already known areas of the roof. The calculation must take into account all the subtleties of the roof frame arrangement. The presence of cornices with skates, too, plays an important role. All it needs to know to be able to carry out the construction of sloping roof.
wood protection
Before you erect the rafters sloping roofs, wood need to get rid of excess moisture. Furthermore, it should do anything to prevent the processes that may cause combustion. To do this, all the structural elements of the roof before you begin installation, be treated with antiseptics, fire-prevention compositions, as well as substances that prevent rotting.
The composition can penetrate as deeply as possible into the wood, it should be applied with a broad brush in several layers. A person who performs this type of work, you should wear protective gloves on his hands and face mask. After connecting all design components must further process the joints and seams of composition that prevents the ingress of moisture.
Installation of floor beams
Before you begin to place ceiling beams, it is necessary to thoroughly familiarize themselves with all the intricacies of the process. For example, in the video. After all, this type of work is quite difficult to carry out.
Installation sequence:
- First of all, you must install mauerlat and joists, which should be sized 100 by 200 millimeters.
- Then, two lines have to stand vertically to expose the beam from the beam.
- Then tighten the laces and secure the intermediate bar. Care should be taken so that between them there was no gaps of more than 3 meters.
- All racks must be temporarily fasten using reliable struts. The dimensions of the supports should be chosen in such a way that they are 100 millimeters in the planned height of ceilings in the room.
- It must be said that when erecting a new roof in an old house there are difficulties. So, often between the ceiling beams, it is impossible to set a smooth rectangle. To facilitate the work, it is recommended to maintain the design under the desired angle with the help of racks and supports.
Side wall frame
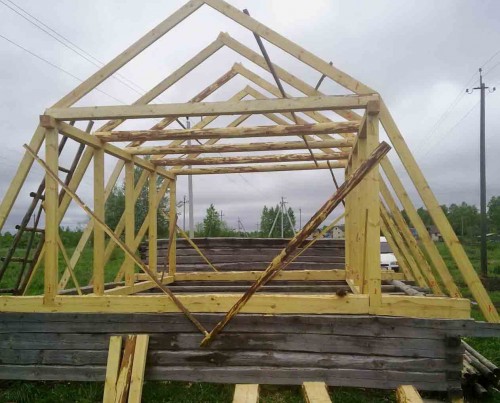
- When installing the frame, first of all, you need to put the floors on the racks. After that install the rest of the supports. This design will be a basic frame for the side walls of the attic.
- From above to runs, it is necessary to place and attach tightening. Under each of them, a temporary backup is established. They are necessary so that when installing the upper rods, it was possible to walk without any problems on the straps, without deforming them.
- When all tightening are installed, they need to be copper from above with the board. As a result, the design will become more rigid. It is also recommended to install side rafters and plugs for insulation. When this is done, you can start the installation of the upper row rafters.
Installation of the upper rods
- First of all, you need to make a template for rafters.
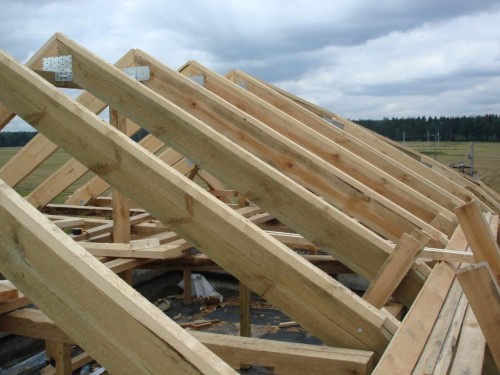
- Take part of the board cut according to previously made measurements. Secure it for a while in the riglele vertically. At the same time, one of the upper corners of the board must accurately coincide with the center of the lone of the roof. The photo above shows how it should look about.
- On the finished template, a pair of rafter beams should be installed, then fasten them with a pink.
- Now you can mount the rest of the rafters. According to the recommendations of specialists, the roof needs to establish four pits (two on each side). Then pendant pendant. They will remove tightening from sagging. In the course of work, it is necessary to navigate the previously drawn design scheme.
- After that, it is necessary to put the frame of the fronton, and then shelter it. Next, you should take turns to make cornices, crate and frontal skes.
- The next step is carried out roofing work. All compounds of structural elements are recommended to be treated with a special solution that protects moisture from the destructive effects.
Hearth roofing
For this purpose, it is best to use special roofing flooring, which allows you to maintain the optimal temperature and humidity.
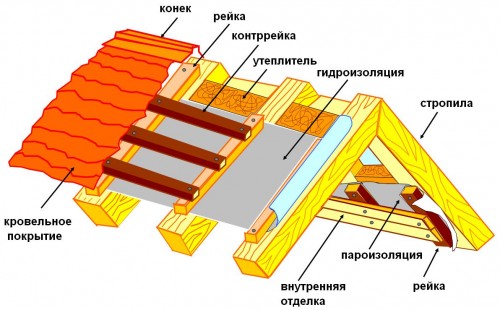
First, a waterproofing film is put on the crate. Then, any insulation should be put on it, for example, a rolled, bulk either in mats. A layer of roofing is lined up on it. It is fixed to the doom with the help of a dowel. After that, you can lay the second series of crates.
Roofing work
Regardless of the design features of the roof, the installation of roofing materials is made on the same technology. Initially, the crate system is fixed on special interfaces. They allow you to create so necessary natural ventilation for the roof. During the arrangement of the crates, it is necessary to ensure that all geometric dimensions are respected. This is important for proper roofing.
Pantry
When the roof is not necessary to forget to make waterproof. Otherwise, water will be forced on the surface. It can significantly reduce the service life of the building. Today there are both plastic waterproofs and metal. Each of them has their own advantages and disadvantages.



 Start a discussion ...