The traditional Russian sauna sincerely was considered the best tool from diseases, unchalled, other hands. So today people turn to the old proven reception for the prevention of ailments. Bath procedures effectively help with stress, reducing activity. Doctors and cosmetologists unanimously say - the contrast of high and low temperatures slows the aging, stimulates the metabolism, enhances immunity. We learn how to build on the "storehouse of health on our own.
Planning
At the initial stage, it is required to choose the optimal place for construction. Let us give several recommendations to accommodate a bath with a veranda:
- Choose a flat site away from raw places dangerous for the foundation of the structure.
- Build a steam room with a recreation area at a remote distance from other structures.
- Consider in designing the entrance from the south side (here less snowdrifts in winter, the snow is faster in spring).
After choosing a place, a ready-made building plan is created or borrowed. Stripping from your preferences, the units of measurement in the project may be different. As for the foundation, two foundations are often built for a bath with a veranda, which is beneficial from the economic side.
Construction of foundation
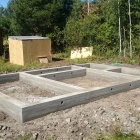
So that the foundation of the verandas does not ask, it is recommended to take a concrete reinforced plate of monolithic type 120 mm. Secure this element is preferably pillars placed in the soil to the depth of freezing. The supports are pre-wrapped in rubberoid. And the resulting space between the soil and pillars is covered with sand. This building cunning prevents deformation of the supports in the frost.
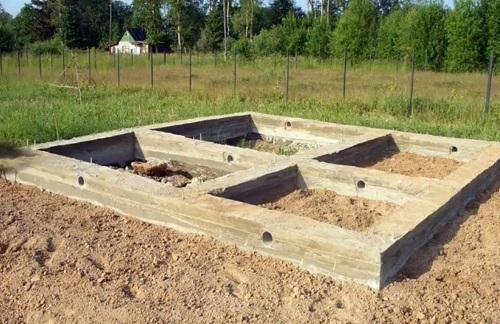
An example of a foundation for a bath with a veranda:
- There is a trench around the perimeter of the structure, taking into account the bearing walls.
- Concrete pillars are installed on a 600 mm sand pillow. In case the sandy type soil, the design is additionally strengthened with a 100-meter layer of rubble and a bombed hot bitumen.
- Monolithic poles are covered with bitumen, filled with gravel or broken bricks.
- Between the supports, a brick or wood is taken.
- In the formwork poured cement-sand solution with adding rubble. It is advisable to choose the cement M300 brand. The proportions are as follows:
- cement - 1;
- dry sand - 3;
- crushed stone - 4-5;
- water - 0.5.
Weight and conditions Operation of the bath and veranda various. Therefore, both structures demonstrate a different degree of shrinkage. To prevent the process, it is advisable to not connect the foundations among themselves. The gap in 2-4 cm will be enough.
How to make a frame veranda
The design is performed from 100x100 mm bars. The course of work includes the following operations:
- Lower strapping is mounted on the foundation poles.
- Then lugs are cut.
- The whole design is fixed with spikes and additionally with brackets.
- At racks, rafters and upper strapping on nails and spikes are fixed.
- A horizontal beam is installed under the roof slide.
- The upper ends of the rafters are shown for the beam.
- Racks and runs that adjacent to the bath are fixed by anchors. Moreover, the roof of the verandes should be docked with the surface of the roof of the steam.
How to make a roof for the veranda
- A traditional doom is performed.
- All parts are attached.
- Based on the choice of roofing material, the attachment method may vary. Thus, the steel sheets of the roof are connected by folding seams, fixed with nails. Slane fasten with special nails, the sheets are overpowered by one wave.
- The junction of the roofing materials of the bath and the veranda is masked by an apron of galvanized iron.
Walling
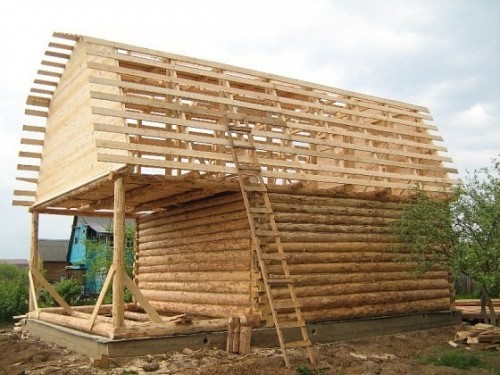
The traditional material for the construction of the bath is wood. Consider the embodiment of walls from a weathered log. The product does not contain a fair amount of moisture, as a result, does not crack and is not deformed under the influence of the Sun.
- On the waterproofing layer on top of the foundation, a wooden lining with a thickness of 50 mm and a width of at least 150 mm is stacked.
- Herron is poured either bitumen.
- Immediately before laying a busting crown on a lining, it is necessary to smoothly spread the mineral fiber strips, moss or smeared the pass.
- The bustling crown is fixed (the first row of logs) with the help of a wooden pin-bent or a sewage. Fastenings are clogged into the finished deepening in a checkerboard in a step of 2 m. To the log in the natural sweep, the depth of the hole must have a 5-centimeter reserve. In order to strengthen the walls between the logs, an interventical seal is used.
- The horizon of the crowns is checked using a construction level.
- The remaining logs are installed according to similar technology.
Finishing of the room
Olhi, linden woods, aspen are used as finishing materials. Conifer breeds are not recommended to apply when designing the interior of the bath. The ceiling is trimmed by boards. This not only gives the structure a natural look, but also improves air circulation. For the trim, a tree is chosen, differing in low thermal conductivity. It is also important that the material does not highlight a large number of resin at high temperature. Based on this, it is desirable to use deciduous woods at the ceiling.
Bath floor
Floor laying technology Next:
- The concrete is set to brick pillars with a cross section of 25x25 cm.
- Lugges are stacked on top of the brick columns.
- Fill the boarded floor (the thickness of the boards is 30 mm).
Moreover, the boards are set in such a way that the annual rings are sent to the opposite sides. Paul as a result comes out perfectly smooth.
Concrete floors in turn are more durable, but they are cold. To avoid this, install wooden lads over the base. Alternatively, you can achieve the effect of a warm floor. Armed with glass gambled, perlite, clay, or other thermal insulation material, make insulation.
How to install roof
The traditional two-tight roof includes a system of rafters, a crate and roofing material. No differences from the roof setting for the veranda are noted. A rafter farm is fixed to the bath, a doom is made and the roof is attached.
List all the steps:
- Mauelalat is installed (roof base).
- On Mauerlat nails are attached overlapping beams (long and short).
- The horizontal beams are recorded.
- Mounted a rafter system.
- A doomer is made taking into account the frontal soles and sweats.
- Roofing material is laid.
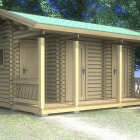
- In the area of \u200b\u200bthe roofing joint of the bath with the veranda, apron is attached. In the photo you can see the whole design.
Installing a stove for a bath
Wood stoves-Kamenka are:
- metal;
- brick.
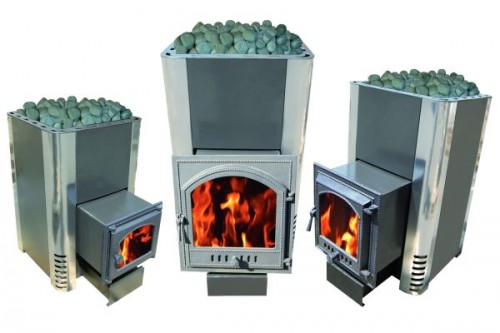
Metal Kamenka
- In the rail case, the cooler with the stove is installed on the metal shelves. They make up the bottom of the chamber for the furnace.
- Bricks are stacked around the perimeter of the heat chamber. They form a screen to reduce heat radiation.
- Metal lattices are put on bricks. They serve as a pallet for installing stones, hold bricks strictly vertically. In the functioning of the metal furnace, the gases are sent to the chimney through the stone filling.
- A red refractory brick is erected.
- The furnace is equipped with a national chimney.
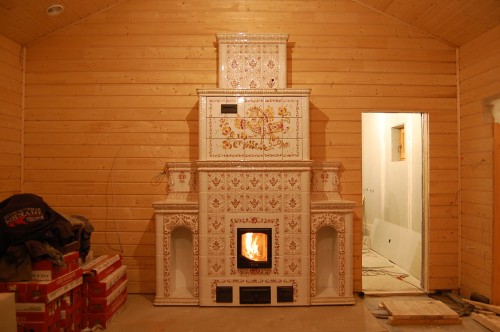
Brick Kamenka.
Construction of a brick chain on technology begins with the construction of the foundation. Moreover, it must be opened by 50 cm so that the design does not increte due to moisturizing or freezing of the soil. The foundation is poured by concrete solution. In dry soil, the construction of a brick design is allowed. In this case, a lime-cement solution is used. By analogy with the foundation for massive designs, the technology includes the following elements:
- pillow;
- underground part;
- upper cut;
- insulating layer;
- brickwork.
Important: Use full brick for masonry. Hollow or silicate blocks are strongly recommended for the furnace structure.
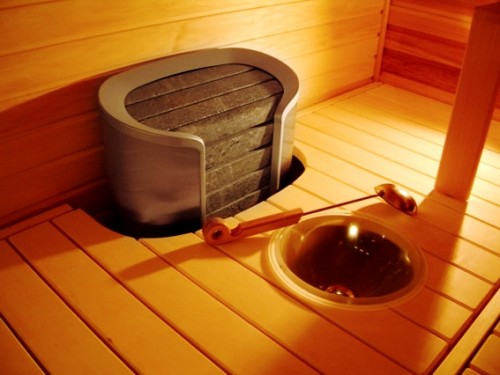
Electric Kamenka.
Modern baths are often equipped with electric chambers with integrated authoring means. The device turns off the electric heater with the temperature threshold installed, as well as in cases of repayment of the flame in the furnace for various reasons.
Kamenka operating on electricity should have a temperature limiter, a time relay. The first device is able to disconnect the TEN, the second is the electric heater through the time set by the owner.
How to avoid mistakes in the construction of a bath with a veranda
No matter how scrupulously do not approach the construction of a bathhouse with an attic and a veranda, the final version will not be perfect. This is a hundred times checked in practice. However, you can always minimize the likely shortcomings attentive attitude to the technology of the construction and installation of certain elements of the steam and adjacent premises. We give brief recommendations of specialists:
- We must not forget about the competent design of the internal space. The steam room for two or three people should not exceed 10 m².
- The sexual basis is advisable to perform taking into account the natural flow of water into the sewer tube.
- The optimal height in the steam room is 2 m. This is enough to comfortably steam and rationally spend heat.
- Windows and doors are desirable to make small with minimal heat loss. The most suitable option will be the installation of PVC windows and doors that minimize heat loss.
- Windows for considerations of practicality is preferably located with a western or south side, the door with south.
- The choice of materials for construction is entirely depends on you. We just advise not to repel completely from aesthetic considerations, but to take into account the operational data.
- Pay high attention and comfort. Do not save on finishing and high-quality equipment.
- When finishing the steers, use wood that does not have a high resin content in the composition. At high temperatures, it will stand out on the surface of the boards.
- Wooden designs located on the street, it is advisable to regularly process special compositions. They protect wood from rotting, insects.
- Purchase special lamps for shower and parillas. They are distinguished by resistance to humidity and high temperature.
Conclusion
Bath construction with their own hands is a responsible and complex process. Guide primarily by practical advice, use high-quality equipment and materials. For the construction of the walls, it is recommended to select dried logs, when decorated - deciduous rocks with low resin.
There are ready-made projects of baths with a veranda, you can independently develop a plan. Nevertheless, one enthusiasm and the required amount of funds are not enough for the construction of a bath with their own hands. Carefully examine all aspects of construction, consult with experienced familiar, make an accurate plan and follow it.


 Start a discussion ...