The cozy and spacious veranda is not only a wonderful place to relax homeowners in a secluded silence, but also a multifunctional structure that performs several destinations. The terrace can serve as a place for family lunch or parties in the company of friends, she can play the role of summer kitchen, and in winter to form an obstacle to getting into the cold wind house. At the same time, learning how much it costs to attach the veranda, the question of independent erection is becoming increasingly relevant.
Location and site breakdown
Part of the house where the veranda will be attached should be selected according to some fundamental criteria. As a rule, an extension is located in front of the main facade of the building, however, it is permissible to build the structure and in front of the side of the house if there is such a need. The main thing is that the terrace is clearly visible from the main entrance and has a way out of one or more rooms of the building.
Before attaching a veranda to the house, it is necessary to prepare the territory:
- inspect the construction site and clean it from garbage, fragments of old buildings;
- then remove the layer of fertile land and distribute it to the plot where it will be able to need;
- cross the platform and proceed to the markup of the territory;
- the boundaries of the future veranda must be divided according to the design project, for which we drive wooden stakes or metal pins in the corners;
- all over the perimeter pull the twine.
Important! The determining factor when calculating the length of the future terrace is given to the length of the facade of the building, along which the veranda will be built. Regarding the width of the requirements. As a rule, it is 2.5 m.
Foundation for design
In order for the terrace to serve for many years and pleased the owners with durability, reliability and comfort in operation, it is important to pay attention to the basis of the structure. Experts allocate two ways to lay the foundation:
- columnar;
- ribbon.
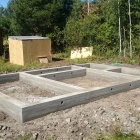
Formation of belt foundation
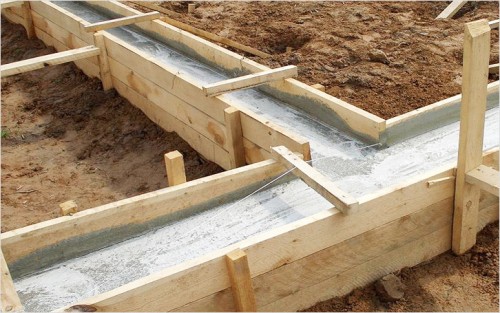
The first stage of construction before you attach the veranda with your own hands, is to create a solid foundation. The ribbon base is the optimal option for the construction of large-sized buildings, spacious veranda from blocks or bricks that have heavy roof.
Step by step guide to the fill of the concrete foundation of the ribbon type looks like this:
- Initially, it is necessary to dig a trench, the length of which will correspond to the project, and the width is calculated on the basis of the house.
- Then put the wooden formwork so that the height was the insertion of the planned foundation or slightly higher.
- Prepare concrete dough. To do this, you will need to follow the proportions: 3 parts of the sand account for 6 parts of rubble and 1 part of the cement.
- Start the pouring of the first layer - evenly distribute the solution at the bottom of the trench and strengthen the stones from above so that the total height turns about 10 cm.
- Then begin to form the following reservoir that needs to be strengthened by analogy with the first portion of concrete.
- When pouring the upper layer, the stones will not be needed, because the surface you need to carefully dissolve the trowel.
- Upon completion of the process, leave the Fresh foundation for 72 hours so that it is completely dry and fixed.
- If construction work has begun during the hot period of the year, until the moment of complete frost, it is possible to top up the top of the water so that the basis does not crack.
Foundation Fulfillment Rules
An alternative option is a column foundation. This type of base is less durable and suitable for wooden terraces. However, such a technology has its advantages to attach the veranda to the house: the price of materials is much less than with a belt fill, this method is also easy to work and is optimally suitable for small-sized buildings.
Guide to form a columnar base looks like this:
- The primary task is to dig a holes in which columns will be located.
- Put at the bottom of each deepening sand so that a layer of 20 cm is formed.
- Prepare concrete dough and pour into the pit to the surface level. The proportions of the solution are similar to the previous option.
- Expect full pouring concrete.
- Fixed Poles Lescape bitumen.
- Formed gaps and cracks fill the earth, with the addition of sand.
- The ground part of the support is performed by block or brick masonry so that the height reaches the main foundation.
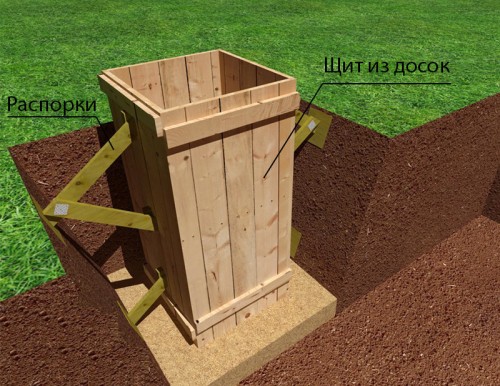
Consider that during the construction of relatively low pillars - up to 1 m long - dug holes can not be strengthened. If the project columns exceed the specified parameters, it is necessary to make a well, slightly expanded to the top, and then install several spacers from the boards or wooden bars. It is also permissible to build a pillow from reinforced concrete at the bottom of the recesses to eliminate the risk of veranda drawdown.
Frame for veranda
Studying the material on how to properly attach the veranda, it is impossible to miss the subtleties of the construction of an extension frame. As a rule, the forming of the core is performed from wooden beams with dimensions of 200x100 or 120x80 cm. It is also permissible to use logs with a diameter of at least 12 cm.
The sequence of work on the construction of a carcass veranda looks like this:
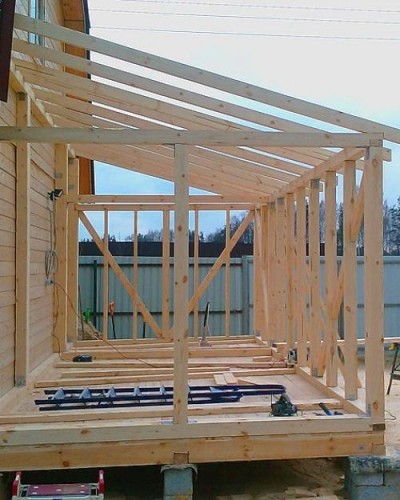
- On the draft base of the terrace, put the bars, which will serve for the bottom strapping. At the same time, connect them in the corners using the connection of the type "straight lock", i.e. Make the longitudinal protrusions of the M-shaped form on the bars, which can be made at right angles.
- Then, after each 50 cm cut on the bars of the grooves under the vertical racks.
- Install the backups, strengthening them with metal brackets and nails.
- On top of the vertical racks, fix the bar, which will serve for the top strapping.
- Then come down the beam-run near the roof of the house. It will be mounted rafters. Use for these purposes anchor bolts.
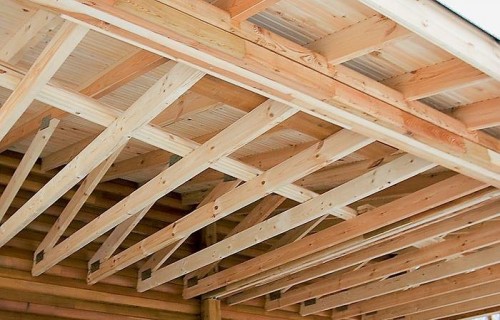
- Start the construction of the rafter system.
- Upon completion of the process, handle the wooden design with an antiseptic composition.
Construction roof
Undoubtedly, the roof of the terrace should be not only durable and reliable, but also to perform aesthetic function. Therefore, if you decide to attach the veranda to the country house, it is necessary to raise the roof so that it represents a harmonious continuation of the building.
The process of facing the roof for the veranda is as follows:
- Initially, it is necessary to choose the roofing material, which is exactly the existing coating on the roof of the house.
- Then it is necessary to build a wooden crate, which can be mounted either closely or with intervals. It depends on the type of roof design.
- Tight fit of the boards is necessary if the rolled roofing material is used. When it is fixed to the rafters, it is necessary to hardly pull the nails hats into the wooden beams.
- Then, along the edges of the roof, the rolled rolled nails, and for better fixation, fasten wooden rails from above.
- If steel sheets are chosen as roofing material, then they should be attached to the crate with nails and dock "folded" seam.
- Asbestos-cement sheets need to be knitted in so that there is no less than 14 cm. At the same time, you need to do the holes for the screws in advance.
Paul and staircase on the veranda
The optimal version of the facilities for the floor for the veranda is a single milk coating that does not waste the design and will exceed even high loads. Consider some features relative to this structural element of the extension:
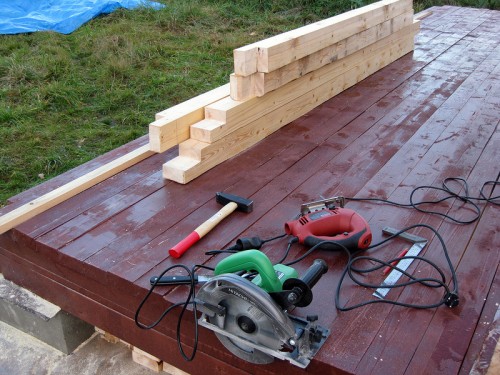
- when forming outdoor overlap, it is advisable to place boards on the lags, which are cut into honey 1st and 2nd wrens of the lower strapping;
- halfing and lags must necessarily be treated with antiseptic composition to prevent biological corrosion of the material;
- also wooden fragments must be painted for outdoor work.
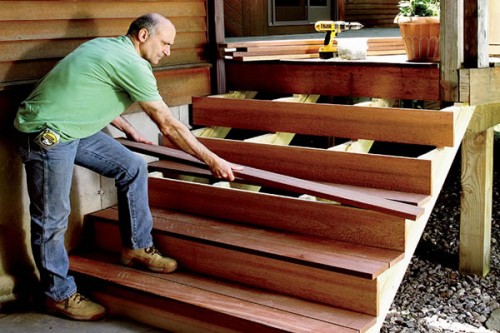
Staircase - an integral part of the veranda, and therefore should know some of the features of the process of its construction:
- The wide upper step should be a continuation of the porch, and therefore it is desirable to place it at the floor level.
- Fragments of the direct staircase must be recorded to the side growths that are located at a low angle.
- The lower step should be located at the ground level, and its ends to fit into the growths. Create a flooring by nails.
- Make between the inserts steps that repeat the outlines of the sideboard. They are also attached to the growths and form a neat solid design.
Installing windows on the veranda
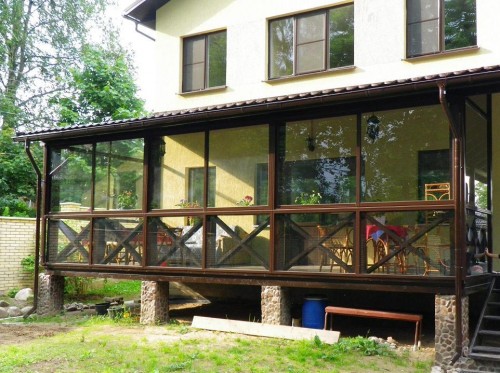
A bundled to the house of the veranda, whose photo is often decorated with designer editions, also carries a decorative function, because it is a decoration of the facade of the building. Therefore, after the construction of the frame and draft floors, the openings should be left for installation of doors and windows. To do this, you will need to carry out the following manipulations:
- Install the windows in those places where you plan to put the windows. The distance from the floor should be about 50 cm.
- Fix the wooden plate to vertical racks.
- When installing the doorway, it should be considered that the design should not be located opposite the front door. Many photos of the attached veranda in directories show this method, but in practice it will lead to the fact that the dwelling will lose thermal insulation properties due to draft. Optimal location of the door - from the end of the building.
Tips on how to properly attach the veranda to the house, see the video:


 Start a discussion ...