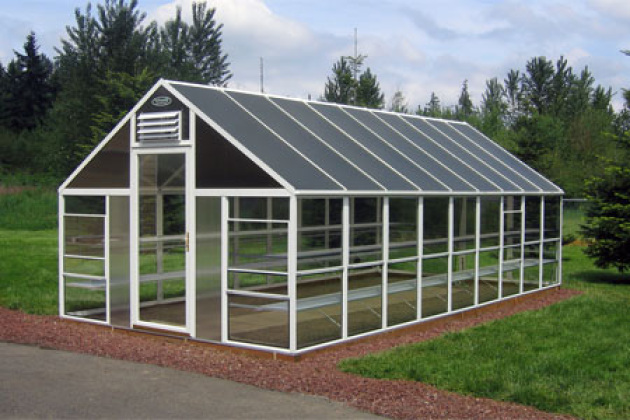
Gardeners are often wondering if there is a greenhouse in a separate foundation? I understand a little in a situation, it becomes clear that it is not necessary to do without the foundation, but then there are new questions - what functions he must perform, what type of choose and how to make the foundation for the greenhouse with your own hands? In this article we will tell in detail about the most popular and reliable types of foundations under the greenhouse.
Main characteristics
Tasks
The foundation under the greenhouse should be durable and reliable, but its tasks still differ from the foundation under the residential building.
Tasks of the foundation for the greenhouse:
- durable and reliable support for the carcass of the greenhouse;
- protection and warming of plants from the cold, coming from the Earth;
- protection of landings from flushing with groundwater, seasonal precipitation, etc.
Installation of the greenhouse on the foundation allows saving from 10 to 15% of heat, which allows you to save a significant amount on the heating of the structure. It is quite simple to make it, if you precisely decide on the choice and know the sequence of actions.
Types of foundations
As in the case of the construction of residential buildings, the foundations for greenhouses are several species depending on the materials used and the construction method.
The main types of foundations for greenhouses:
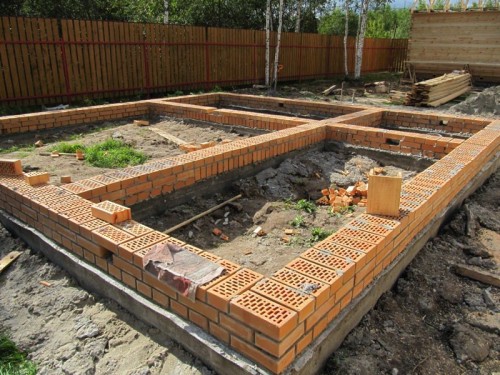
- brick - one of the most popular options for the construction of foundations under the greenhouse with their own hands. Brick places easily, it is relatively inexpensive, and serves a very long time than and its demand for garden construction is explained;
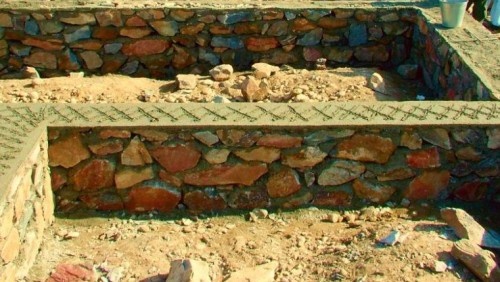
- stone - This type is ideal for any greenhouse, including for polycarbonate greenhouses from a metal frame. Having such a basis, it is possible to be sure that it will have no less than a century, but such a durability will "fly into a penny" and will require special magazine skills;
- spot - installation occurs under the support pillars. A rather sustainable structure, however, protect plants from cold soil and other dangerous exposure to the external environment he will not be able;
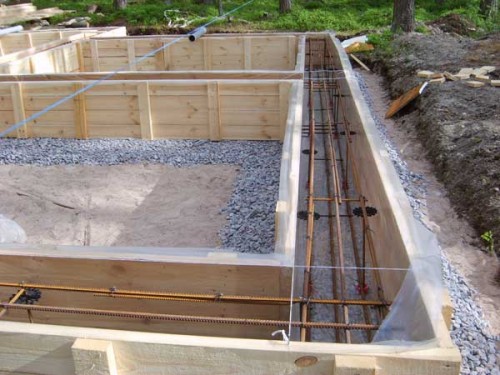
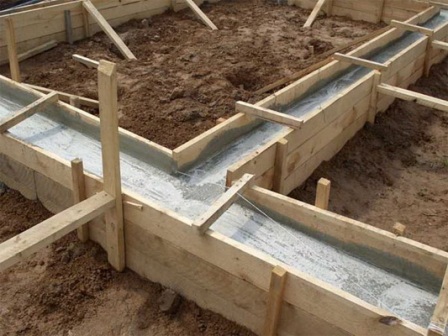
- ribbon - Pouring takes place around the perimeter of the structure, thereby providing good heat conservation and reliable support. This is probably the most popular type of foundation, both for greenhouses and for residential buildings, since it is suitable for constructions of various scales;
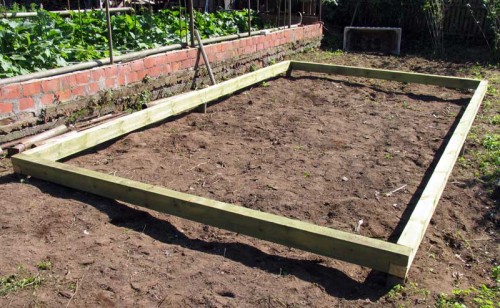
- from the bar - the easiest option of building the basis for the greenhouse, but its service life is no more than 5-6 years, even if the tree is treated with protective compositions that prevent corrosion and rotting. Brux of hardwood are best suitable, since they are not affected by parasites;
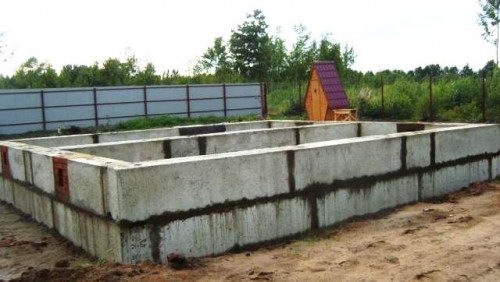
- from blocks - block foundations are obtained truly durable and durable. By comfort and service life, they can compete even with stone, because it is much easier to install blocks. But the cost of building materials will be significantly higher than during the construction of any other type of foundation.
Device of a ribbon foundation
As we said, the ribbon foundation is the most popular type for the construction of any structures, starting by multi-storey living houses, ending with small greenhouses. Make such a foundation under the greenhouse with your own hands relatively simply, if you stick to the plan.
Stages of construction:
- Calculate the desired area on which the foundation will be poured.
- Prepare a pillow under the formwork to make a rigid base, the formwork itself and concrete solution. Concrete solution can be bought or make it yourself using cement and river sand.
- Drop the trench, enhancing the entire perimeter of your future greenhouse. It is necessary that the foundation takes over the ground at a distance of about 20-30 cm. For this, the depth of the trench should be about 50-60 cm with a width of 25 to 40 cm.
- Put the pillow under the formwork, pouring onto the ground and gravel.
- Install the formwork on this rigid pillow.
- Fill the formwork in advance prepared concrete mixture. To increase the strength, you can install a lightweight belt from the reinforcement, covering it with a ring along the foundation contour.
- Before filling the support, install the fasteners that will fix the future carcass of the greenhouse (if you build a greenhouse from the metal profile).
After that, you can install a greenhouse for the foundation.
Foundation device from timber
Bar is one of the most affordable, and therefore popular, materials. If you want to build a small greenhouse with a relatively low weight, you can safely install the foundation from the bar. It will easily endure a small load and ensures due strength and stiffness of the structure.
The weighty advantage of this type of foundation is that it can be easily disassembled and rearranged to another place if necessary. But there is one, but a very significant disadvantage - the foundation from the bar will serve you no longer than 5-7 years. If you used bars from hardwood trees, then the service life may increase to 10 years.
Stages of construction:
- Reinforcing the perimeter of the future greenhouse with a bar with a cross section of 12x12 cm.
- Treat the timber or a solution for wood that prevents rotting and damage to parasites.
- Drop the trench and lay out only in it. Tol - special construction cardboard treated with tar compositions.
- Place a bar on top tool.
- Thus, the strapping is found in a kind of "shirt", and now you can install the greenhouse on top of the foundation.
- To make the basis more reliable, you can pull out the trench of deeper and put the bars into several rows, which brings them together with carved stiletts.
Brick Fundrament Device
Brick foundations are in second place in popularity after tape. They serve much longer than wooden, but also cost more. Such a foundation can serve you from 20 to 50 years, depending on the operating conditions. So if you are aimed at the long-term use of the greenhouse, it is better to build it from the brick. It will be not much more expensive than the bar, but also the benefit is obvious.
Stages of construction:
- Drop the trench around the perimeter of the future greenhouse 20 cm wide and a depth of 10 cm.
- With the help of unnecessary boards and building wooden waste, build elementary formwork in the trench.
- Fill formwork concrete, without forgetting to check the horizontal level.
- Set 12-Milmeter anchor bolts on the side and end in accordance with the base of the greenhouse frame (for frame construction).
- The concrete mixture finally hardens in 5-7 days, after which you can begin in the laying of bricks. Place the brick so that the laying seams are in the place of the anchors and were completely flooded with a solution.
Foundation device from blocks
Block foundation will be an excellent solution for building greenhouses on dry soil. Blocks provide proper waterproofing and protection against the negative impact of the external environment. This is a massive monolith, which has excellent protective properties, ensuring heat, dryness and comfort indoors.
Before pouring the foundation under the greenhouse, it is necessary to know that the size of the standard block is 19.4x39.7x19.4 cm, despite the fact that the seams between the elements will have a thickness of at least 0.95 cm. Thus, the block dimensions will increase to 20 , 3x40,6х20.3 cm. This is an important factor that should be taken into account and which must be guided by creating a drawing plan.
Stages of construction:
- Prepare a mortar in proportion 4: 1: 0.25, where on 4 parts of the river sand is part of Portland cement and a quarter of construction lime.
- Construction of walls start with corners, without forgetting to leave a place for the doorway (about 95 cm + shoals 1.8 cm).
- Squeeze the mortar bed before masonry blocks so that the solution is not silent. The bed must be width of 20 to 25 cm and a thickness of 1.3-2.5 cm.
- Place the first corner block to bed, checking it horizontally by the construction level.
- Pull the solution to the end parts of the next block and press it into bed at the level with the angular block. After laying out the first row, it is necessary to comply with the limit accuracy, otherwise the foundation will be released.
- When the solution solids, expand the seams to protect the masonry from precipitation. To do this, they are better made concave or V-shaped.
- Install over the foundation of an anchor by filling the cavity in the block with a solution and placing a bolt there.
Stone foundation device
Stone foundation will provide enviable durability and strength of any building, whether it is a house in several floors or a common greenhouse. Of course, its cost is quite high, but do not think that something "simpler" is suitable for the greenhouse. It is enough to build such a foundation, and it will serve you, your children, grandchildren and even great-grandchildren! So it is possible to regard it not as a costly idea, but as a long-term investment in the future of your family.
To make a foundation for a greenhouse from stone with your own hands, you will need not only money, but also the skills of the Mason. If there are no such, it is better not to try to do everything somehow, because as a result you will spend a lot of strength, time, nerves and money, and the foundation will still come out with a shaky and will require constant repair.
Preparation
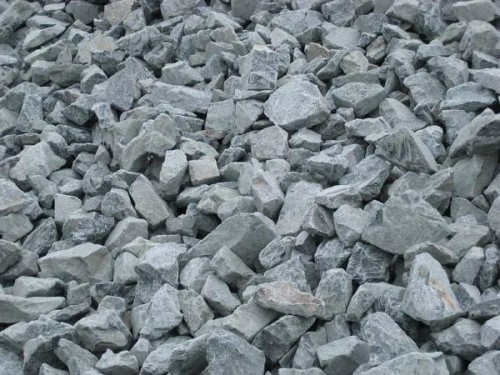
Before constructing, select the suitable building material. Build a reliable foundation can be far from any stones. Perhaps you have a familiar landscape designer or a mason who will advise you the best solution. If not, you can always count on the natural butt stone, which is mined in the same area where you are going to build a foundation. This is important because the stone brought from afar may not withstand the natural conditions of your edge, and the structure will last less than the laid. So, for construction, granite, shell, dolomite, limestone or sandstone will fit.
The thickness of the stone should not exceed 50 cm. About the absence of cracks and any other defects, we hope to speak is not required. The original result depends on the quality of the building material. Check the strength of the stone by hitting the hammer on it. If it splits or flies a piece from it, you are trying to sell poor-quality goods.
Before laying stones you need to make water and clean from dirt. Also, except for large "basic" stones, you will need small pebbles to fill the space between the masonry.
Required tools and materials:
- stones for masonry;
- cement mortar;
- wooden bars;
- crushed stone;
- sledgehammer to split big stones;
- traaming;
- master OK;
- shovel for solution;
- kirk-ham;
- construction level;
- plumb;
- roulette;
- order.
Stone laying has its own characteristics and nuances. So, stones, not lubricated with the solution, should not touch, and the seams should be made not thicker 10-15 mm.
Packing the stones are much more complicated than bricks, so they are simply picking up as "conveniently" to each other and laid in a special way - the mason must alternate a tych (short side) and a spoon (long side). The next row is stacked in the reverse order.
Stages of construction
Stages of construction of a stone foundation:
- Drop the trench around the perimeter of the future greenhouse.
- Continue the sand pillow with a thickness of 10 to 15 cm.
- Seal the pillow with the help of a rambling.
- Lay out the first row of the largest and most opportunities for flat stones, and then put a sandy pillow on them without lubricating the solution.
- Place the next ranks in the way "under the blade". Show stones and lay them with layers (method of stitch-spoon, as described above). The thickness of the layer should be from 20 to 25 cm.
- Put the first lower row of stones on the ground, starting from the elements of the same height at the place of intersection of the masonry.
- The lower layer is filled with cement mortar.
- After completing each row, make a precipitate, the trambus of the stones and filling the emptiness with small stones or crushed stone.
- On top of the rubbish layer layer with a thickness of up to 4 cm, and if necessary, align the row of stones by adding the solution.
- Customized stone should be first dry, and then putting the solvent under the stone happing it with a hammer.
When laying a stone foundation should not be hurry, and if everything is done correctly, it will justify the long century. Finally, we suggest familiarizing yourself with the useful video about the foundation for the greenhouse.




 Start a discussion ...