Any roofing material needs high-quality laying, regardless of its cost and characteristics. Bituminous tile is one of the most budget proposals, however, it is able to ensure reliable protection of the house from moisture subject to the installation of installation. In this article we will tell you everything you need to know for the installation of bitumen tiles do it yourself.
General
Bituminous tile is one of the most popular roofing materials mainly due to its low cost and good protective characteristics. She appreciates not only professional builders, but also self-taught, because with the laying it is possible to easily cope with independently even without special equipment.
Bituminous tile, also known as shingle, in contrast to finelywed ondulin characterized by greater aesthetic and versatility. However, these materials still have much in common in terms of manufacturing technology and composition. Tile is unpretentious when installing and operating. Over time, it has the "blooming" property, but it only gives it a more noble appearance and does not affect protective abilities.
Material is characterized by high flexibility and plasticity. But at least for the installation of bitumen tiles and does not require special equipment and professional skills, you still need to know the specifics of the process. So, use it as roofing material only when the roof has a slope of at least 12 °. On a more canopy, the water will inevitably be stamped in the joints of the material, gradually destroying the coating and leaking inside the roofing cake.
The weather also affects the weather. It is clear, then make a roof when it rains on the street, meaningless. The operational characteristics of the bitumen tiles react to temperature differences. It can only be stacked if the air temperature ranges from + 5C. When it's cold on the street, bituminous shing loses flexibility and elasticity, so the result of laying will be poor quality. If you still need to urgently make the bituminous roof in the cold season, hold down the tile in the warm room for several hours, after which you quickly install on the roof. Also allowed the use of heat-air burner.
Product specifications
Soft bituminous tile is a durable and inexpensive roofing coating, characterized by good protective indicators and aesthetics. Thanks to a short weight, it does not create a strong load on overlapping and rafting beams, so it helps to save on construction (the rafter system can be made from the beams of a smaller cross section). Installation takes at least time and strength, and any domestic master can cope with it.
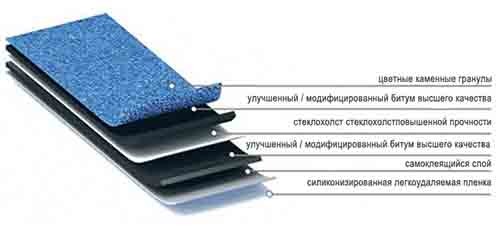
Bituminous shingle, in fact, is a modified colored ruler, which was given a certain shape resembling the usual tile. The thickness of the bitumen tiles can vary from 3 to 5 mm, the service life reaches 30-40 years. The structure determines the quality of the material. Basically, the shing consists of 5 layers, it may have or not have adhesive coating.
Bitumen Tile Characteristics:
- The basis of the material is the glass cholester or fiberglass. These materials are designed to ensure strength, as well as prevent the appearance of waves and convexities on the surface. Fiberglass features high refractory and not exposure to rotting.
- Usually, the tile has two layers of waterproofing made from a modified bitumen. Waterproofing layers are characterized by high strength and rigidity. They are not only reliably protected from moisture penetration, but also ensure resistance to mechanical effects.
- The lower layer of material is sandy sprinkle or a special film that prevents gluing a bitumen under transportation and storage.
- The upper layer is a pigmented spript of stone crumbs (basalt, natural slate). His task is the decorativeness and protection of the internal layers from the effects of ultraviolet. There are models where the copper plate is located instead of the sprinkle.
In addition to the main advantages, the bituminous tile possesses, it has another thing - the roof covered with it, it is possible to change without difficulty, since the dismantling of the shingle is even faster and easier than the installation. For example, if you want to make a mansard window, you will only need to remove several "ticker", and not remove all the coating.
Accessories for laying
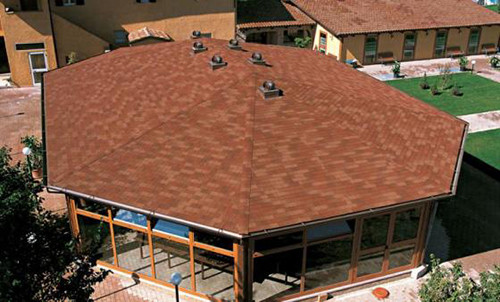
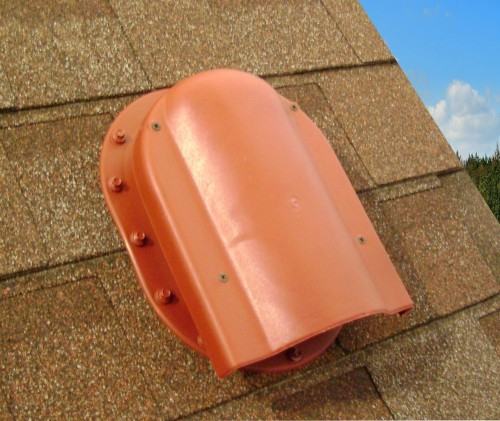
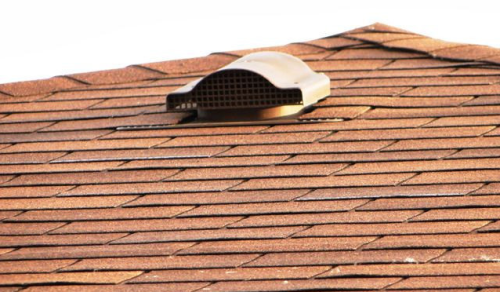
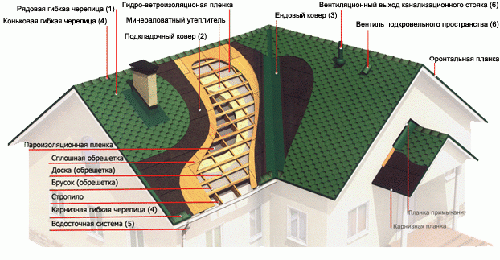
For laying the soft roof of one bitumen tile, it is not enough to use various components. So, it is very important to use aerators for a complete ventilation of the inner space of roofing pie. Without them, condensate will be formed on the heat insulation layer, which will reduce all the properties of the insulation. Aerators are placed in roofing skate or skate. In stores you can find two types of aerators: for roofs with gentle rods and for use in regions with abundant precipitation.
In addition to the aerators, you will need otem and skate elements. They are similar to the tile structure, but without a decorative framing. They are fixed in the roofs of the roofs, most susceptible to damage, for example, ice skating, undershones, and around smoking pipes.
To protect the soles, special PVC profiles also use, fixing them on the eaves under the tiles. They do not allow water from the drainage gutters to penetrate inside and play the role of tin trim. If the house is located in mountainous terrain or region with rich snowfall, snowstores should be used.
Laying of bituminous tile
To install the bitumen tile, it is successful, it must be properly transported and stored. To do this, choose a cool and shaded place. Do not fold the shingle on the open Earth - be sure to conceal the film or wood under it. Place the tiled face up and do not store pallets to each other. Deliver the material to the roof in small batches.
Preparation of the foundation
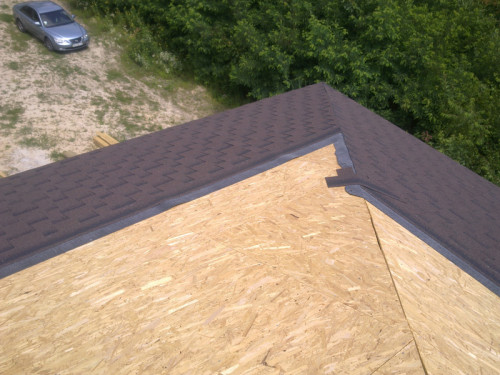
Before laying bitumen tiles, it is necessary to prepare the surface - create a solid or lattice base. In most cases, the crate makes from wooden rails or streaming pine boards with a thickness of 20-25 mm. For a solid foundation, choose moisture-resistant faeer, chipboard or board, fixing them with self-draws or long nails. At the same time, consider that there should be small gaps of several millimeters in case of natural movement of wood between the elements. Without gaps, you can do only if all lumber were subjected to technical drying.
The thickness of the shell boards is determined by the rafal frequency of the rafter. If it is equal to 60 cm, then the thickness of the crate will be 20 mm, but if the rafters are located every 90 cm, the thickness of the crate should be increased to 23 mm, otherwise it will be fed under the severity of roofing pie.
Ventilation of the underfloor space
Bituminous tile laying technology provides for the presence of ventilating space. It depends on the life of all layers of cake and the rafter frame. Ventilation is provided by the ski beam, which is mounted on a special ribbed profile. But it happens that it is not enough and necessary to install additional ventilation elements. They are ribbed plastic profiles installed with a specific step. If the slope is 15-40 °, the ventilation area is the area of \u200b\u200bthe skate / 300. If from 41 ° to 85 ° - the roof area / 600. For example, the total area is 50 m², a bias - 35 °, a cross-section of the ventilation element - 258 cm². Then the ventilation area will be 50 \\ 300 \u003d 0.167 m² (1670 cm²), and the required number of elements will be 1670 \\ 258 \u003d 5.
Skates should be installed twice as long as the ventilation elements than on the rods. In our case, you can put 3 pcs on the skate.
Blood lining
When working with a lining layer, its operational purpose should be taken into account - protection against moisture with possible leaks. There are certain standards for stacking, which say that if the roof has a bias of 18 °, it means that the waterproofing lining should be laid parallel to the eaves and ends, since it is precisely the most vulnerable areas.
Waterproofing must be laid no further than 40 cm from the roof edge, but it will be best to bring it to the very facade. You should also protect the skate beam with leaks, putting the lining so that it captures at least 25 cm on each side of the skate.
For Kysch with a small bias, things are somewhat different. So, if it is from 12 ° to 18 °, then the waterproofing lining must be drained throughout the area of \u200b\u200bthe roof, moving from the bottom and overcoating the layers with each other. For fixing lining use galvanized nails with a wide hat. The mounting step is usually 20 cm.
Tile: Laying
Finally, when all preparatory work is completed, you can start laying bitumen tiles. Often, at the same time, home-grown masters allow one and the same laughter - put the material first from one package, then open the other, they spend it, etc. This leads to the fact that the roof becomes a "ripple" - a tile from different parties may differ in shades. It is clear that one package is not choking the whole roof, so you can open several of them before work. As a result, the surface of the roof will be inhomogeneous, but is more less uniform, which will give it uniqueness and visual volume.
Technology of creating a roof of bituminous tiles:
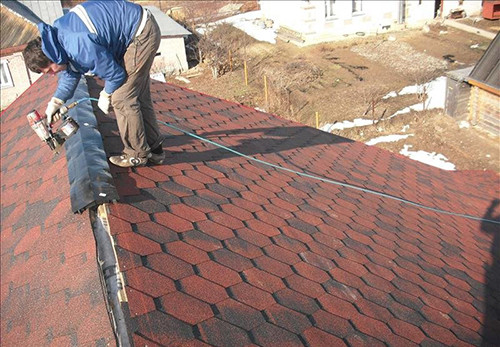
- Stamp from the central part of the eaves, moving-up. Attach the tile by vertical rows, climbing closer to the front.
- The initial row is stacked so to leave a gap of 2 cm between the cornice and the edge of the tiles.
- The lower edge of the second row elements should be trimmed in the center for the formation of a beautiful pattern and overlap of the first vertical row fasteners.
- If you cut the tile, be sure to scroll the bitumen sections. Do not regret the glue - the sizing width should be about 10 cm.
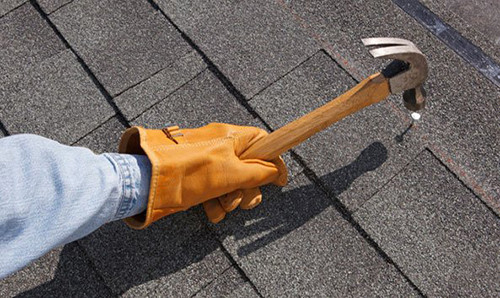
- Use galvanized nails for fastening tiles, scoring them when installing two neighboring rows. As a result, driving fasteners in the first row, you will simultaneously fix the next. About 5 nails should leave for each element.
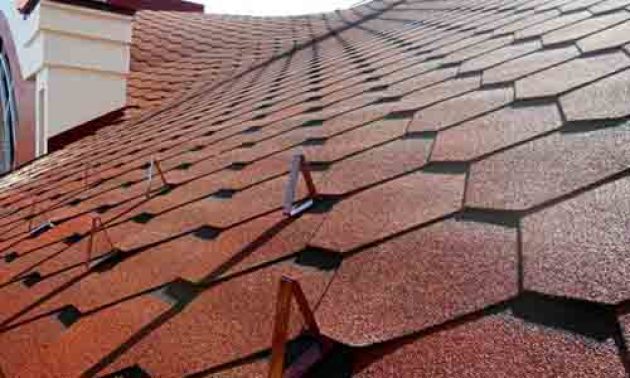
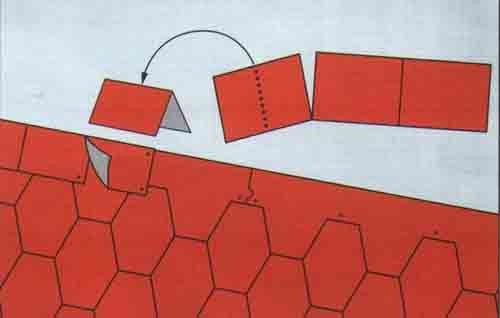
- To adjust the tile to the skate, use a special type of material - skate shingles. It is distinguished by the fact that each element has perforation, conditionally separating it into 3 sectors. Place the skate tile of the bracket by 5-6 cm, having a short part parallel to the skate.
Tiling adjoining
Often when laying a bitumen tile, many masters face difficulties in the form of various roof items. How to get along to do not disrupt the integrity of the coating? If a chimney sticks out of the roof, how to arrange its adjoining? In this place there will always be a gap through which the moisture will penetrate under the coating.
To prevent this, you should know how to attach the material correctly:
- Come on a wooden rail to the angle between the pipe and the surface of the roof. It is more convenient to use a rack with a triangular cross section, like an ordinary plinth.
- Get tiled on the rail and on the chimney.
- Starting from the pipe, put on top of the tile carpet of the endhouse so that it covers the pipe is about 30 cm from the surface of the roof.
- Place the bottom of the pipe together with the carpet of Enda and Tiled into a special waterproof apron. The easiest way to make it from a sheet of tin, wrapped from all sides.
- So that the pipe does not accumulate the snow, adjust the rash. To do this, install a kind of dummy dummy pyramid to the chimney so that snow and water simply climb this site.
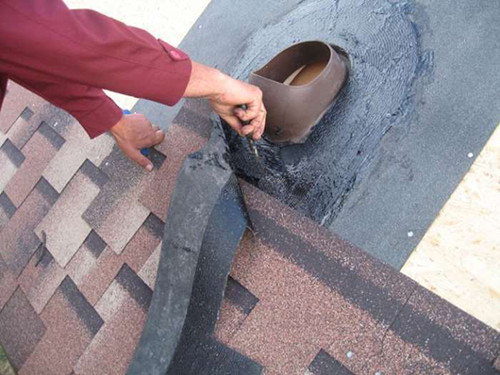
- To remove various communications through the roof, use special passing elements specifically for tiled roofs.
As you can see, there is nothing complicated in laying bitumen tiles. It is only necessary to adhere to technology and follow the rules of personal security when working at height. By the way, if, after a long year, the tile collapses or you just want to change the color of the roof, we can safely mock the new gear on top of the old coating.



 Start a discussion ...