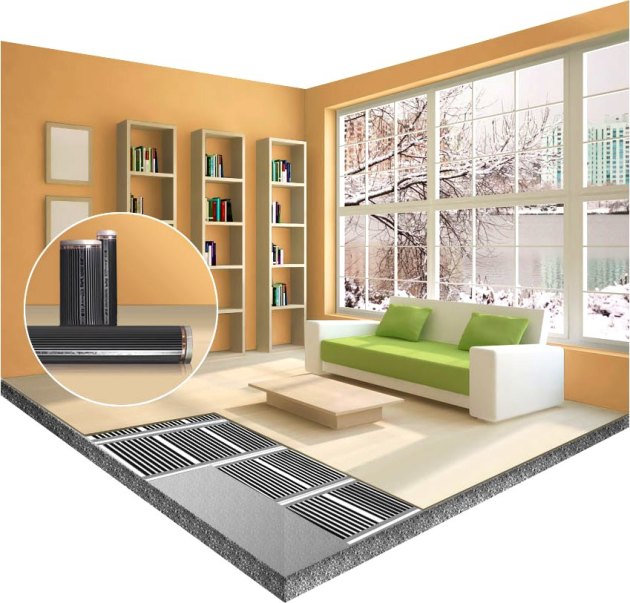
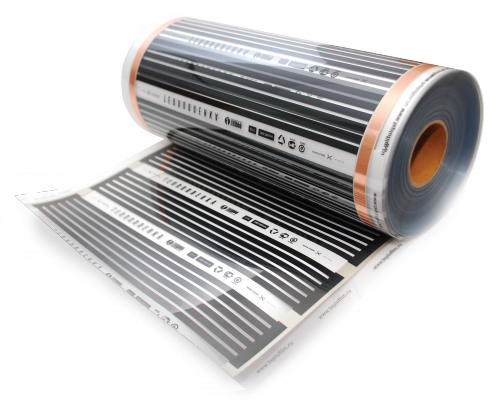
Film floor under the tile is a fairly new trend in the construction market. Until recently, water floors or coatings with a gasket of an electrical cable were used as the heating coating. To date, an alternative appeared and infrared warm floors are becoming increasingly popular. Such a coating is a thin film that emits heat due to the passage through its electric current.
Features of the film floor
The growing popularity of these products can be explained by the fact that as a result of their functioning, no air indoors are heated, but located near objects. This is favorably distinguished by film floors from the preceding heating coatings for the floor. Also, in the presence of such a heating system, the room will be heated evenly, which will improve the functions of comfort for people living in it.
In addition, such a heating system has a number of other advantages:
- Available cost. Film floor under the tile at a price varies significantly, and depending on the performance characteristics, each homeowner will be able to choose the option according to its budget. If you save on the installation, the insulation device and the benefit will be even more obvious.
- During the operation of such a coating, electricity consumption will decrease. This effect is achieved due to the fact that infrared floors warmly feel more quickly than other types of floors.
- The film warm floor under the tile has a high capacity of the working potential, and the maximum heating of the film allows you to raise the temperature to 50 ° C.
- Universality - the material can be laid almost under any coating. It can be linoleum, laminate, parquet, stone, tile.
- Due to the resistance to moisture and safety of infrared floors, they can be mounted in any room including bathrooms, bathrooms and showers.
- Infrared radiation does not pose health hazards, in particular, it does not harm people suffering from allergic diseases. In the process of functioning such a system, air is saturated with negative ions, which has a positive effect on the body.
- There is no smell. A uniform warming of the room will avoid drafts.
- Warm film floor can perform full-fledged heating. It will give the opportunity to damn facilities without gas.
- Does not require special qualification preparation for installation.
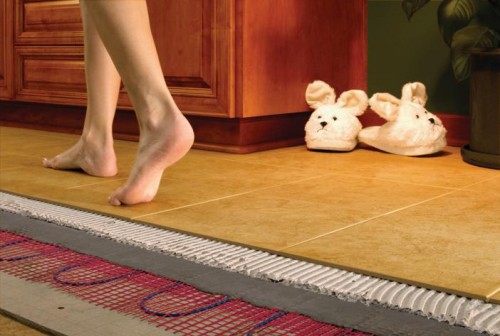
The most common option for laying a film floor is its installation under ceramic tiles, since this material has a high thermal conductivity. Such thermal insulation will ensure uniform and comfortable heating of the floor in the bathroom or in the kitchen. However, this type of work implies a certain preparation. Consider step-by-step action of the process in more detail.
Film floor under the tile photo:
Preparatory work for floor laying
- At the first stage, it is necessary to choose the optimal version of the film floor. Such coatings have different heating parameters. To select infrared floor, you should focus on the climatic conditions of your region. In addition, you need to choose the insulation. Under the tile is most advisable to use solid material.
- Then it is necessary to determine the locations where the thermal film will be located. There should not be furniture or household appliances, as it will overlap the return of heat.
- After that, it is necessary to remove garbage and dust from the base. To do this, it is recommended to use a vacuum cleaner.
- Then, with the help of the level, check the surface on the horizontality. Deviation indicators should not exceed 3 mm. In the case of existing deviations exceeding this number, the concrete base must be seized. Deprotes eliminate, applying putty for this, and compare the protruding surfaces.
- In the presence of wooden floor, we perform cyclishing to obtain the desired horizontal surface.
Technological process of laying
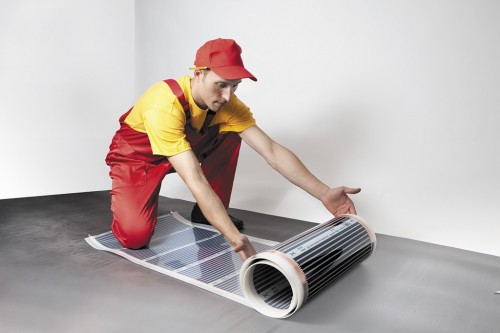
Installation of film floor under the tile implies the laying of the thermal film with a reflective layer to the top. In order to produce all work correctly, you must follow the following sequence of actions:
1. We fasten the sheets laid out with Lavsano Scotch. At this stage, the surface is prepared for laying thermal blinds.
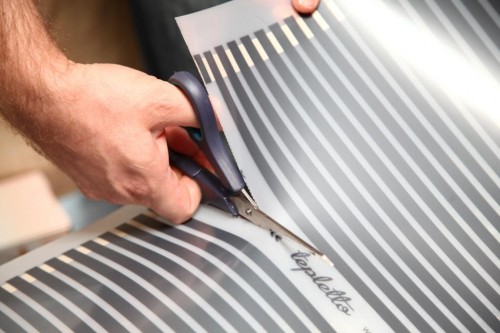
2. Before laying the film, you need to cut the bands for the required length. As a rule, they do not exceed 10 m. To cut off the film, it is qualitatively advisable to perform cuts exclusively according to the available dotted lines.
3. Moving along the room, lay the film to the floor. Such an approach will provide a greater number of one-piece strips. In this case, the number of connection points will be less.
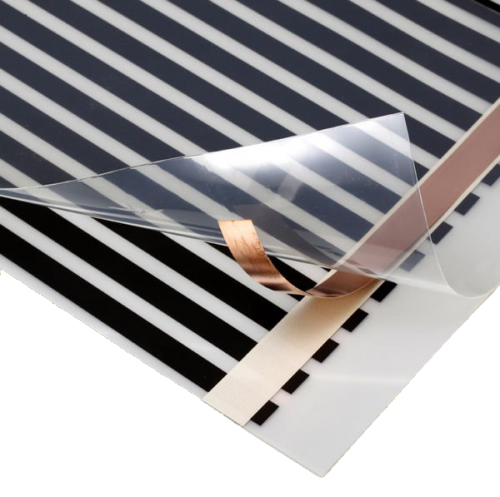
4. When laying, the thermal film should be located a copper strip down. Next using double-sided tape, fix the film strip. This is necessary in order to prevent its shift when laying tiles.
5. You can also mount with mounting brackets. It is important to take into account that only the side edges of the film should be recorded, which do not contain the elements conducted.
6. Laying of thermal blinds is allowed exclusively by one layer. Shut down film layers that contain heating elements cannot be. In the process of work, the accuracy should be done in order not to damage the film and the connections.
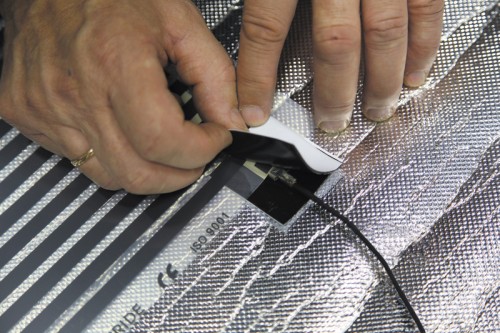
7. Further, from the side of the existing cut, we install the terminals that will provide the contact function.
8. Using a conventional hole, we make a hole in the center of the copper strip in thermal film. Then you need to insert the terminal.
9. After that, we combine both holes - terminals and thermocons. We insert into the existing hole rivet, with its most of the copper strip.
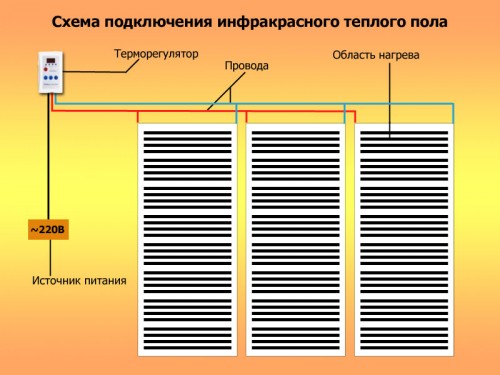
10. Install the thermostat on the wall. It is recommended to place close to the wiring. You can install this instrument, both in a stationary way and connect it using a cord in the existing socket. When installing it is important to consider that in the future the presence of the thermostat does not prevent the placement of furniture and home appliances.
11. At the next stage, connect the wires to the terminals. Wires should be positioned along different ends of the insulation to prevent their crossings.
12. After that, we connect the film with the wire. To this end, it is necessary to remove insulation from the wires in those places where it will be connected to the terminal.
13. Then we bring to the terminal the bare wires, and their connections are compressed using the passage.
Important! It is necessary to isolate the places where the wires are connected. For this purpose, we use rubber material, which is included in the largest lanes of the thermal film. To make the insulation of one terminal, two segments of the material will be required - for fastening from above and below. To align the insulation, it needs to make cuts in the appropriate places. For this, simple scissors are suitable. After connecting the wires to the thermostat box.
14. Then set the sensor for measuring the floor temperature.
15. Connect the device to the network. This part of the work is recommended to entrust a qualified electrician.
Laying tiles
The technology of mounting a film floor under the tile with their own hands implies not only high-quality installation of the thermal film itself, but also a thorough process of ceramic coating. To do this, you need to perform such actions:
- First, we install plasterboard or construction cellular grid. Then we make the markup of the floor depending on how tiles will be located. They can be placed parallel to the walls or diagonal of the room.
- Stop the tile, as a rule, follows from the middle of the room. However, under certain conditions, the location of the material is permissible to shift.
- In accordance with the instructions, we prepare tile glue. In this case, the glue composition should be focused on use with warm floors.
- Following marking, begin to lay the tile. It is possible to start performing this work from the middle of the room or on the side of the far wall towards the output.
- Using a toothed spatula, we apply a mixture of prepared glue on the tile itself and on the floor. Click tile tight to the floor. Thus, we put all the flooring.
- To adjust the uniform distance between the tiles, use a special separator. And the protruding glue should be immediately wiped.
- In the process of work, you need to check how exactly the tiles are located relative to each other.
- After the course of the day, after the end of the work, it is necessary to measure the sutures. To do this, you need a special composition that can be found in the construction market.
- We apply the composition, thoroughly rubbing it in the seams. We use a rubber spatula for this.
- To remove an excess grout, the tile should be wiped with a wet sponge.
- On this work completed.
How to lay a film floor under the tile on the video can be viewed in a fragment:





 Start a discussion ...