It is always nice to use useful items for the house, but doubly will be more pleasant if you create the desired detail for the interior with your own hands. Hangers for clothes from wood always looked presentable. You can make such an apartment for an apartment or home yourself, and the experience of collecting furniture will not need.
How to choose the appropriate option
You can build a wooden hanger from any material. For example, it will be good to look in the interior wall hanger from wooden boards. A wall or desktop hanger made of dry logs with bitch looks very original.
When choosing a material, it is necessary to be guided by such principles:
- You can buy a high-quality wooden board in special places, in the forest-trading bases, sawmills or in large building supermarkets. There at the same time they can have a service to cut the boards, and you do not have to spend time and strength to prepare the material.
- When choosing boards for the hanger, it is necessary to remember that the tree is a non-ideal material and each board will have their own drawbacks. So, purchasing coniferous woods, keep in mind that over the years wood will be less plastic and its strength decreases. Also, some soft wood species can react differently to varnish. Over time, the board can change its color and ship.
- Pay attention to the presence of bitch - it significantly complicates the processing of wood and reduces its strength.
- If when choosing wood for hanger, the color of the tree will be inhomogeneous, it can also reduce the strength of the material.
For hangers from a tree, it is necessary to choose not very thick and not a thin board. The optimal thickness is 3 cm. To protect the tree from rotting, treat the surface with a special antiseptic. Remember that if the finished product is in a wet room, then the service life of the wooden hanger will be shrinking.
Hanger do it yourself from wood
To make a beautiful tree hanger, you must approach this process responsibly and prepare everything you need in advance.
You will need materials and tools:
- wooden boards;
- plane;
- saw;
- drill;
- screwdriver;
- brush;
- varnish;
- rubber gloves.
Let's start creating a template. On the pure sheet, draw the model. It can have a different form: rectangular, square, oval and even in the form of a circle. In this case, your fantasy has no boundaries - do the way you want, and embody this dream into reality. Basic condition - the drawing must match the size of the board.
After the template is ready, attach it to the board and circle a simple pencil.
And now it's time to start working:
- With a joinery tool (saw, jigsaw) cut out of the board the desired size of the hanger.
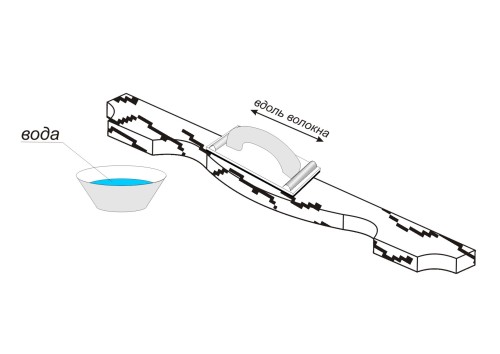
- Since after the "coarse" work, the surface will be rough, it must be seized. Wet a slightly tree and wait for it when it snacks - you can now begin to grind the boards along the fibers.
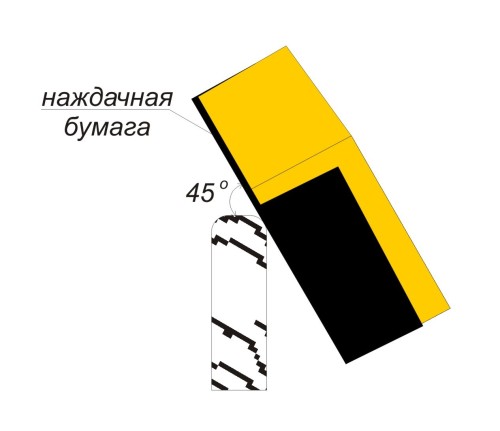
- The edges of the tree need to be slightly rounded so that the varnish when applied well lay down. Roundings better do with the help of fine-grained emery skins (bins), angle - 45 oS. Betrushka is well cope with the task and allow you to make smooth corners. In construction stores you can find a thin steel wire for grinding (sold in motges). It is impossible to use it for wooden surfaces, since after grinding in a tree, metal particles can remain, which will eventually begin to rust.
- How to check the quality of grinding: put on the hand of a kapron stocking and spend them on the surface, if the hooks will remain on a thin material, then you need to go through the emery paper on the tree again.
- To decorate the facial part of the hangers, you can use a special tool and burn beautiful drawing on the tree. If you do not know how to do this, you should not be upset, you can buy ready-made pictures of fine plywood pictures in the store. You will be left to stick it onto the surface with glue, but it is not worth nailing it, since such work will look rude.
- Now you need to treat the tree with varnish. Using a brush, apply several layers of varnish and wait for each layer to dry well. Varnish can take any shade.
- After complete drying of the varnish, the billet for the hanger will be ready. Now you need to think about the fastening element and proceed to the manufacture of hooks. They can be both metal and wooden. Iron hooks can be purchased in the construction supermarket. It is only necessary to decide on the model and nourish them to the tree. Wood hooks can be made of bitch. Choose a branch of suitable size (not thicker thumb on hand), remove the bark and carefully inspect the tree - it should not be rot. Using the tree hacksaw neatly saw the branch. Future hooks are desirable to handle the plane, pollute and only after this workpiece can be opened with a verse or varnish.
- With the help of a manual or electric drill, gently drill the holes in the hook and plant wooden rods on glue. They must perform 1-2 cm. Now you can drill holes in the workpiece and insert hooks.
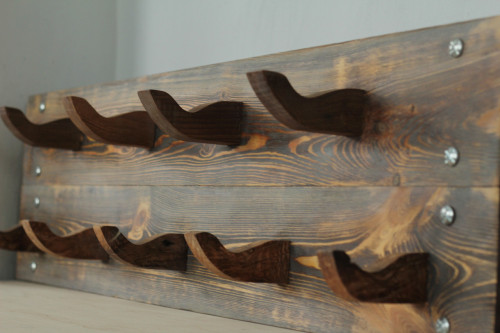
It turns out such a pretty tree hanger:
Hanger is ready, it can be knitting it in a hallway in a convenient place, and if you attach thick hooks, you can hang garden equipment or tool on such a hanger.
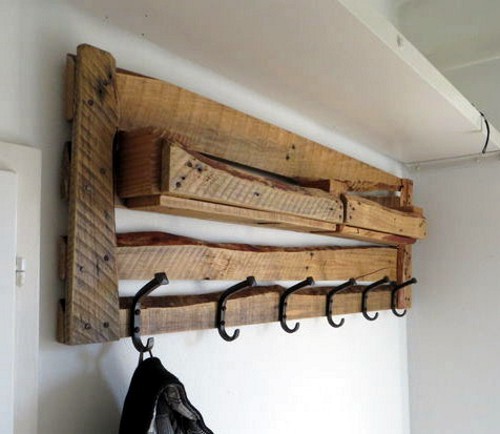
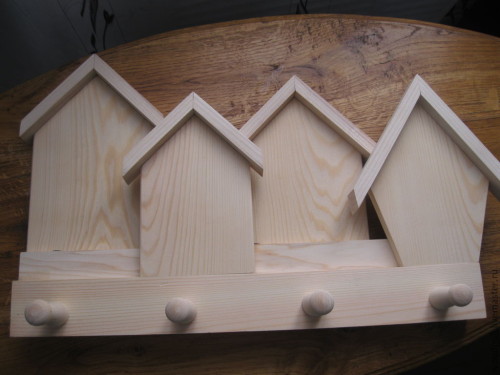
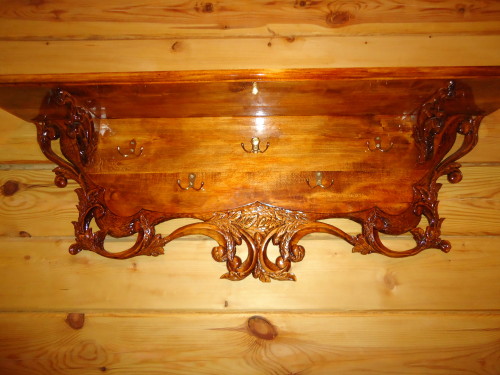
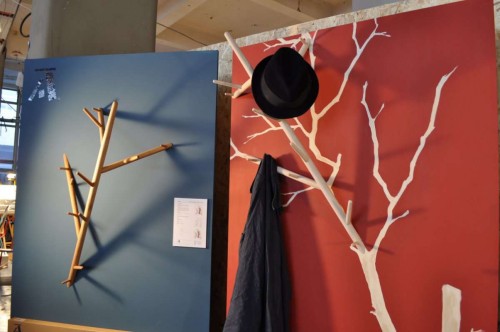
Wood hangers options can be viewed in the photo:
How to make a hanger
From the tree you can make not only a wall hanger, complement and decorate the interior of the hallway of the room vertical hangers. Very convenient to come from the street, remove the coat, the hat and hang things on the hook hook. You can also free your hands and find a place for the umbrella and the lady handbag.
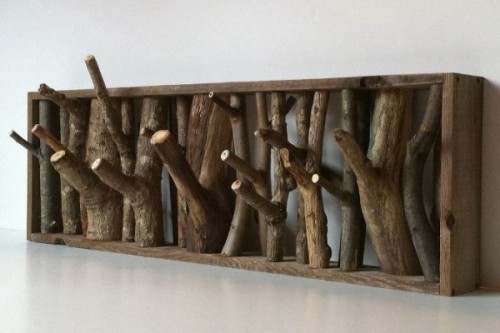
Depending on the material used, you can make as a modest, classical model of vertical hanger, and show fantasy and from ordinary snags to make an interesting instance.
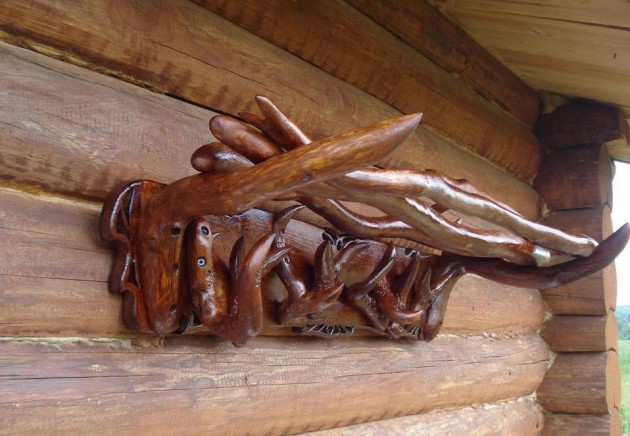
Look at this image - make such a hanger completely forces to everyone:
And in order to create such an original hanger, you will have to make maximum effort:
We offer to make a wooden hanger yourself:
- Choosing the necessary material, it is better to give preference to oak chocks with knots, they will just serve as hooks.
- We split the ax pollen in half. We need a billet with a size of 15x15 cm, with a diameter of the bitch not more than 3-4 cm.
- Then you need one side of the chip to align the electric plan. We prepare the surface and process varnish.
- You can fasten the hanger to the wall screws. First, the drill is drilled by the chamfer, and then the hole is prepared - in diameter equal to the size of the screw head. This precaution will allow not to damage the product.
The hanger looks good in the bath, and you do not need to place it in the residential room.
When a person values \u200b\u200bevery subject and does not want to part even with broken things, it is possible to build a wooden hanger for clothes from old "shoulders."
For work, you need a board, several broken hangers, glue for gluing wood, varnish and brush. Even the hooks do not have to buy, because they are already available. It is necessary to prepare the board, drill in advance from the back of the hole for fastening, stick the shoulders and wait for the glue. That's all! Now you can be proud of your invention!
And this option of vertical hangers is considered creative, but the practicality will have to be silent, especially since you can place no more than 1-2 objects on such an improvised hanger.
We looked at a few options for the hallway hangers. And now it's time to make the creation of wood hangers from a tree. To do this, you can use old items that many people are in no hurry to throw away. With every year, many unnecessary things accumulate in the storage rooms and garages, from which it is possible to make a very practical and necessary thing.
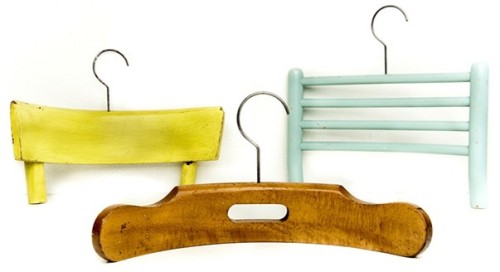
Using the hook from the old hanger-shoulders, you can attach the back of the back from the old wooden chair as the basis and cover it with multi-colored paints or simply open the old back from the stool with varnish. To make such a hanger for clothes, it is necessary to sand all the edges and irregularities in advance. If you miss this preparatory stage, then after exploitation of the hangers, you can damage almost all your wardrobe and "plant" on the fabric on the fabric.
When choosing the back of the chair, it is necessary to take into account its form, since it will depend on this functionality of the finished product. For example, a back with horizontal planks is suitable for a coat and other outerwear, and for scarves and ties - with vertical.
These are beautiful hangers for clothes from wood can be done in just 3 hours:
How to independently make a tree hanger, watch the video:





 Start a discussion ...