Before laying a floor covering, it is important to prepare the basis. Regardless of what the floor is trimmed, it will look beautiful, it will be able only if it is smooth enough. We will tell about the methods of alignment of the floor with your own hands, as well as about suitable for this materials we will tell in our article.
Basic Floor Alignment Methods
It is possible to give the floor to the floor using several ways:
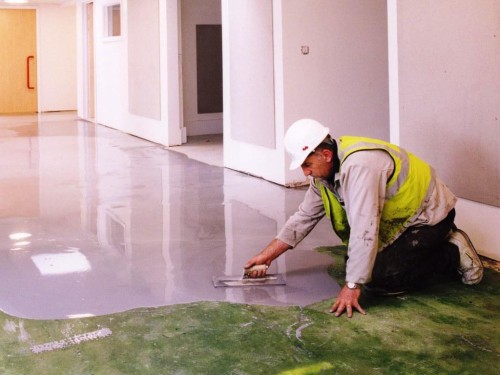
- Monolithic wet screed. Such a screed is performed from several types of solutions and allows you to make the surface smooth, smooth and seamless. Depending on which compositions are used in operation, the screed is divided into plaster, cement-sand and special self-leveling.
- Dry screed is another way of alignment of the floor under the finish. Such a process involves the installation on the surface of rigid smooth plates, for example, plywood, chipboard or gypsum fiber sheets. If the floor in the room is made of wood, the wooden floor is aligned with lags.
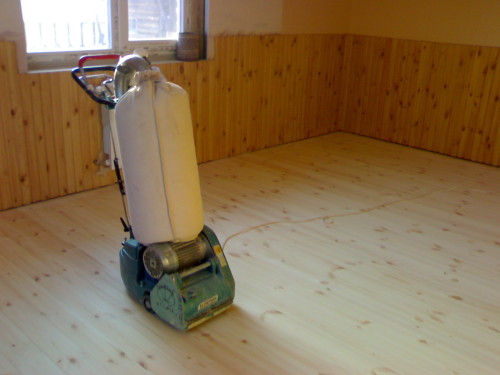
- Wood floor alignment can also be performed by cyclishing. When implementing a similar process from the working surface, the upper layer is removed and defects are smoothed.
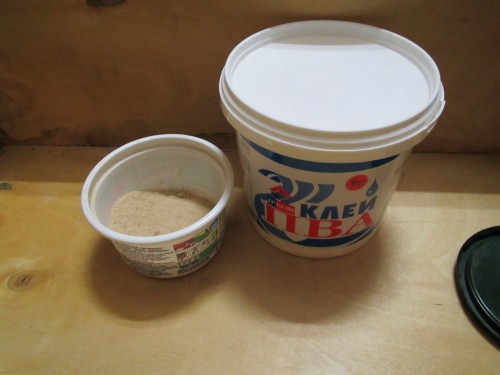
- As for the floor of the wood, sometimes it is equalized by embedding the gaps, deepening and gaps with special mastic cooked from PVA and sawdust glue.
Alignment of concrete floor wet tie
If the floor in the room is quite a curve and the differences of its heights reach the indicator more than 5 cm, the floor alignment is tie. It is possible to determine the curvature of the floor as follows:
- First you need to find a zero point, for this it is used a construction level. With it on the wall, at an altitude of about 1.5 m, marks.
- These points are combined into one line, then measured the distance from the floor surface to the designated line in several places. The place where the indicator will be the smallest, can be considered as high as possible surface.
- At the bottom of the wall paint another line, which will serve as a guide in the process of creating a screed.
- It is also important to remember that the cement-sand screed cannot be thinner than 3 cm and thicker than 7 cm.
Measuring the curvature of the floor, the working base is prepared for applying a solution. The surface is first cleaned from dust and construction trash, using a broom and a vacuum cleaner. Then the purified floor is covered with a screed, this is done in several stages:
- The working surface is treated with primer, and then waterproof. For this work, it is better to use non-rolled materials, but a special penetrating waterproofing solution. When concrete is dry, it is ground again, so that the screed is better and stronger on the surface.
- Before proceeding to the poultry of the solution, the beams for alignment of the floor are installed on the working basis. These beacons are small T-shaped parts that are fixed on the concrete floor with the help of adjustable screws. Sometimes lighthouses are not fixed with screws, but simply installed on cement-sandy solution or gypsum plaster. Using the construction level and cord, all parts are aligned under one level. The first beacon put approximately 20 cm from the corner of the room, and all subsequent parts are located in parallel to it, withsting the distance, 40 cm smaller than the length of the construction level-rule, which will be resurrected.
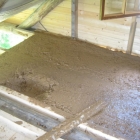
- After installing beacons, the fill of the floor with a screed. The mixture for alignment of the floor is two main species: cement-sand and gypsum. The cement-sandy solution can be prepared independently, mixing the sand with the cement of the M-300 brand, but you can also buy a ready-made dry mass and breed it with water. All proportions during the preparation of the mixture must comply with the instructions on the product packaging. To make a solution with a homogeneous, it is possible to mix it using a special mixer or nozzle worn on a drill. The screed solution should not contain lumps, should not be too liquid, but at the same time it is a bit spread on a smooth surface. It is important to know that the amounts of the prepared mixture should be enough to process the floor in the entire room, and work on the fill and alignment should be carried out within 1.5 hours.
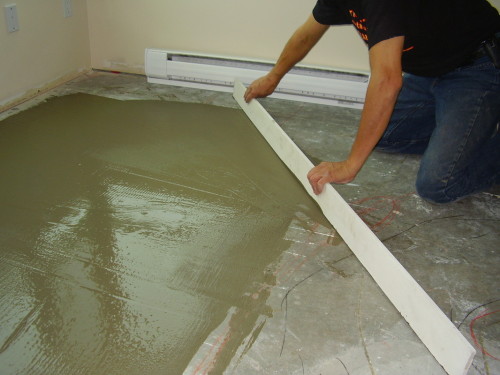
- The finished solution is poured on the surface between two beacons. After that, they take the rule-rule and distribute the screed along the selected floor fragment by moving the tool towards yourself. Work should be started from the far corner of the room, ending the tie at the door level. In the process, 2 people should be involved. While the first worker aligns the screed on the surface, the second is engaged in mixing the mass and the preparation of the next portion for the fill. In order, air bubbles are not formed in the frozen solution, which, over time, can lead to the destruction of the material, the fresh cement-sand mass must be periodically poured into a thin metal rod in different places.
- In the first few days, the screed on the floor will dry up enough so that you can safely come on her legs. But a completely solution will freeze no earlier than 14-20 days after its fill. It is possible to avoid cracking the surface layer in two ways: the floor with a plastic film with a polyethylene film or moisturizing it at least 2 times a day.
- The evenness of the executed screed can be checked using a construction level. The maximum allowable deviation horizontally from a high-quality screed will not exceed 0.2%. In addition, after frozen, the solution should form a homogeneous surface in color, when the clutch is closed, the same sound will be heard everywhere.
A fully dried flat surface is ready to carry out the finishing floor finish.
Floor alignment with dry tie
Under the dry tie usually implies floor alignment plywood, chipboard sheets or hyposite-fiber plates. Unlike the above-described process, this method is considered lighter and easy to perform. To cover the floor with sheet materials, you need to have only minimal skills in the field of interior decoration.
Let's describe the process of performing a dry screed phased:
- The first stage of work is the preparation of the foundation. The working surface is tested for the strength and availability of defects. If the old concrete crackled or revealed, the damaged layer is removed. By the way, this method can align not only concrete, but also wooden floors.
- The second phase of the dry alignment of the floor is the conduct of waterproofing work. In this case, we can use rolled materials, for example, a polyethylene film. Cuts of the film are stacked by each other, and those places where the strips are connected to each other are additionally rushed with scotch. If the floor subsequently falls down with a clamzite, you also need to put a compensation tape on the surface. It will be the protection of clay from moisture.
- Then the beacons can be arranged on the floor. This is done similarly to the above-described process.
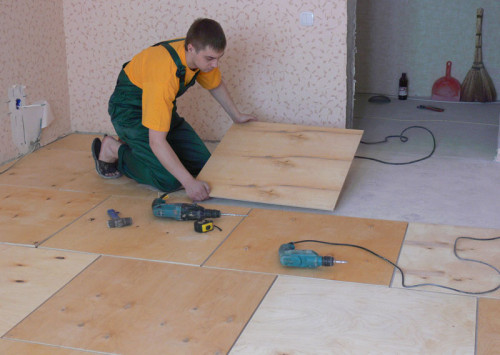
- Focusing on beacons, the surface is covered with a clay or other suitable material, for example, quartz sand or foam. Purchase to the floor immediately all the grainsite is not necessary, you can cover the surface with parts, immediately mounting on the dedicated piece of plywood or chipboard.
Alignment of concrete floor with sheet materials allows you to achieve a practically perfectly smooth surface in a short time. Such materials such as GVL, chipboard and plywood have a lot of advantages, among which can be called low weight, good strength, ease of installation. After you put the first fragment of the material on the floor, it can shift from side to the side. But it is not necessary to scare this, because after all the elements become in place, the floor will become smooth, smooth and durable. For better fixation, the sheets of the material can be born with a self-drawing. Such a base will be fully prepared for the finishing finish.
Floor alignment by self-leveling mixture
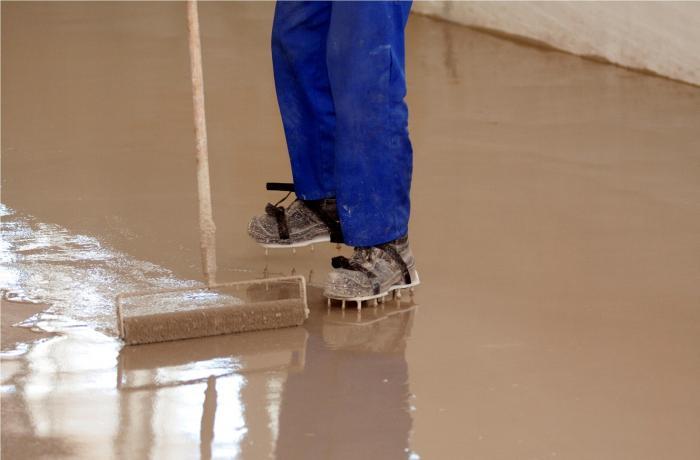
If the working surface is initially not too much curve and the drops of its heights do not exceed 3 cm, the bulk self-leveling floors can be used. When working with such mixtures, human participation in the process is minimized. After applying the coating on the floor, the mass spreads over the surface alone, forming a horizontal, smooth, smooth floor. Such mixtures are designed to prepare not only concrete, but also wooden and gypsum surfaces. After alignment of the floor, you can lower the laminate, parquet, carpet, laying ceramic tiles or other materials for finishing finish.
A liquid self-leveling floor is sold in the form of a dry mixture, the main component of which cement is. The substance also includes special modifiers responsible for fluidity of the solution and its plasticity. Some manufacturers are added to their product reinforcing components that prevent the formation of cracks on the drying surface of the solution.
The bulk self-leveling floor although it is considered very durable and reliable, is not always suitable for operation as an finishing coating. It is easily contaminated, absorbs dust and fat, it is difficult to clean. Therefore, for the finish finish, it is recommended to use suitable decorative materials. However, in the modern construction market, you can find special mixtures suitable for use as a finished flooring. There are also such compositions, with which even essential sex defects can be aligned. They are applied to the surface with a thick layer that makes up at least 3-4 cm, pre-laying the polypropylene ribbon through the perimeter of the room, designed to remove the voltage of the bulk sex after it is frozen. It should be noted that the compositions for the draft finish do not have too good fluidity, so they are recommended to be coated from above with a thin layer of self-leveling solution for finishing finish.
The process of working with a bulk self-leveling floor can be represented as a sequence of actions:
- As with all such processes, work is starting with the preparation of the foundation. It is carefully sweeping and vacuuming, removing dust and construction trash. In the room where the floor will be covered with a self-confined composition, you need to close all windows and the windows, so that there are no drafts and strong air movement. The room temperature should be at least 5-10 ° C. During the preparation of the floor, you also need to check the work surface for weaknesses. If somewhere the old coating crumble and pecks, it needs to be removed, and all the gaps and cracks to smell with putty.
- With a soft wide brush or a large roller on the floor, a layer of primer is applied to the floor. By the way, such work can be carried out with the help of a sprayer. In this case, the primer is needed not only to increase adhesion, such a layer prevents the formation of air bubbles in the process of sprinkling the bulk sex. Since the types of primers there are many, it is better to choose exactly the composition recommended by the manufacturer of a self-leveling solution.
- Prepare a high-quality mixture of dry raw materials is easy if you adhere to the proportions specified in the instructions for the product. To get a homogeneous mass without clots, you can use a building mixer or a drill equipped with a suitable nozzle for its stirring. Since the entire surface in a short time does not work, and the solution freezes quickly enough, it needs to be prepared by portions. The floor is covered with a solution not immediately, but separate areas.
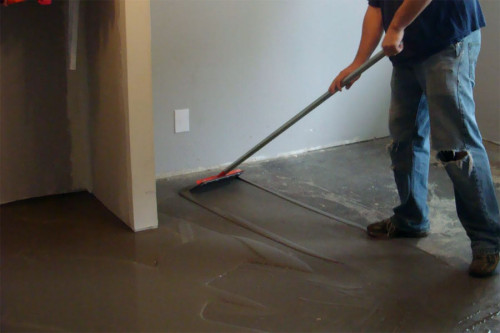
- The finished solution after stirring is poured into the floor and form a band with a width of 30 to 50 cm. Naughty on a long stalk wide metal spatula, mass roll up on the floor with a uniform layer. When the work is done, you need to immediately begin to fill the next strip. It is desirable that the previous site has not yet had time to grab up before the new floor fragment will be covered with self-leveling solution. The entire area of \u200b\u200bthe room should be processed in one reception by preparing the composition of small portions.
- From the temperature and humidity of the environment, as well as the thickness of the solution layer directly depends on the time of its frozen. As a rule, 6-12 hours are enough in order that by the floor it was possible to walk. But the full evaporation of moisture and the final solidification of the coating occurs only on the third day after the work.
- Before proceeding with the finishing finish, the humidity of the filling floor should be measured, and then compare with permissible humidity for a particular finishing material.
Wooden floor leveling cyclo
Wooden floor has many advantages: it is warm, natural and eco-friendly. But it is the wood that can be called one of the most capricious in the care of materials. It is susceptible to rotting, molding, attacks of parasites and bacteria, over time the tree is inclined to dying, curvatched and deform. To minimize the risks of the manifestation of these shortcomings, similar surfaces are treated with antiseptics, antipirens, oils, paints and other substances that allow you to increase the service life of the material. But even if with careful care, the wooden floor lost its attraction and needs to be finished, it can be aligned by cyclishing.
Before proceeding to this work, you need to evaluate the condition of the wooden floor. This is done as follows:
- First you need to check whether the material is damaged by parasites, fungi or mold. To do this, one floor board needs to lift and look good. On untouched wood, you will not notice traces of insects, the material will be durable and dry. Whole boards can be left on the floor, and when damaged parts are detected, it is necessary to replace them.
- The next step must be determined as far as the floor is even and what is his height difference. This process is more convenient to carry out a special laser level by installing it in the highest corner and making marks on the walls.
The cycloration of the wooden floor is a labor cost and quite a long process, but it is this method that is relevant in the case when the surface is prepared under painting or varnishing. Cyclish the floor can be both manually and mechanically. In the first case, there is a lot of treatment for surface treatment, besides, it will have to make a lot of physical effort. The mechanical method is simpler, does not require such costs and time, and the work is performed using a special cyclical machine. Consider the process of cyclishing stages:
- First you need to release the surface of the floor from all extra. Furniture, carpets, tracks and rugs are taken out of the room, and the curtains from the windows, paintings and photos from the walls are removed. If some items move out of the room it is possible, they should be covered with a large cut of the film or tissue, so that wood chips, sawdust and dust are dusting on the surface.
- It is very important that the floor before cycloying was not only clean and dry, but also did not contain metal objects like nails and buttons. Such details can damage the included cyclum machine.
- Do not forget to protect yourself from dust and noise, put your headphones, respirator and glasses. And since the cycles of the machine in the process of work vibrates very strongly, it is advisable to wear soft thick gloves in the hands.
- Cyclish the floor in the room starts from the corner, moving along the area zigzago-like. Inaccessible places where you can't get the machine, handled manually.
- When the layer of wood will be removed, all the disadvantages like the slots, chips, cracks and gaps are smelted with a putty on the wood. If the floor is covered with a transparent varnish, putty preferably pick up the color of wood. The most damaged boards can be rotated the opposite side or to replace new ones.
- When the putty dries as it should, it is possible to conduct the process of cyclishing the second time.
- All the garbage and chips first sweep the broom, after which the floor of vacuuming and wipes with a degreasing composition using a clean and not a dysple tissue.
The aligned wooden floor can be styled by rolled materials, lay the tile or panel, and you can simply paint it or open with varnish.
Wooden floor alignment with glue and sawdust
This method has recently gained considerable popularity, although it was invented relatively recently. The most important advantage of this method is its cheapness and ease of execution. For work, you will need the most affordable components: wood sawdust and PVA glue. These components are stirred into a homogeneous mass, which, after drying, forms a flat, dense and durable surface, steady to many influences. In terms of its characteristics, such a coating resembles a chipboard, but, unlike the latter, the putty does not need to be measured, cut into parts, customized in size. The putty of glue and sawdust fills even the slightest slits and cracks.
The whole process can be briefly described as a sequence of actions:
- The first stage is the preparation of sex to work. The surface is purified from garbage and dust using a broom and a vacuum cleaner.
- After that, the field curvature is determined, the horizontal level is noted and, focusing on it, install thin wooden slats on the working surface.
- Wood sawdusts are stirred with PVA glue so that it turned out very thick, but fluid mass. Sawdows should be quite a lot, since they are the main components of the mixture, the glue acts as a binding component.
- The distance between the rails and the floor is filled with the resulting composition. In the event that it is necessary to make a layer thicker 3 cm, the mixture must be applied with parts, giving each layer how to dry.
- How smooth the surface turned out, you can check with the help level. If somewhere there is a curvature, it is easy to fix everything with the same putty of PVA and sawdust.
- 2 days after work, the coating should dry completely. When this happens, it will be possible to carry out the finish finish of the floor.







 Start a discussion ...