Dry floor screed is one of the fastest ways to prepare the perfectly smooth surface for laying the finishing coating. Unlike a classic cement screed, it has a relatively small strength, but still it is enough for domestic use in apartments and in places with increased permeability. In some cases, in this way you can equip the floors in the garage. In this article we will tell in detail how to make a dry tie of the floor.
Main characteristics of method
The drying band is a simple solution to an inappropriate solution - on an uneven base, make a powder from a bulk material, which is placed by Phaneur, Hyprochlorial or chipboard. The finish coating is fastened with high-strength glue or self-drawing, resulting in an absolutely smooth and robust surface.
It is not surprising that most of the owners of apartments and private houses wishing to save on repair, prefer dry screed. In addition, it is easy to make it with your own hands without special equipment or professional skills, it has a mass of other advantages.
Why dry screed is better wet:
- Cleanliness - When you make a classic wet tie, you will not be able to avoid stains of dried cement on clothes, sex and walls. For breeding a solution, it is necessary to highlight a large construction bucket, work with a construction mixer, necessarily from a careless movement of sand or dry cement. In the case of a dry tie, you are insured against such troubles, because you only need to pour a layer of leveling material and immediately close it with a fixed floor. Cleaning will take a few minutes.
- Thermal insulation is a wet screed, in fact, is a conventional concrete floor - cold and solid. Even if you cover it with a carpet or parquet, it will somehow die from it in one way or another. Dry screed provides additional heat insulation, since it is performed from the crumbly material. Ceramzite and at all are specifically used for insulation, so there will be less resources in the house with a dry screed for heating.
- Small weight - dry screed lighter wet several times, which means that the load on the foundation will be less. In some cases, inexperienced builders do not take into account this factor and as a result, after performing a severe wet screed, a born house or cracked walls are obtained. The weight of a dry screed can be controlled by choosing various bulk materials. So, one of the lightest perlite is, so it can be used to align the floors, even in a dilapidated houses with wooden floors.
- Dry screed, unlike classical wet, does not interfere with the installation of communications. If necessary, you can disassemble the floor, repair the segment failed or change the location of wires and pipes. Ceramzite or quartz sand In this regard, they are most comfortable materials - they are lungs and allow you to easily pave various cables, wires or film heaters.
- Quick installation - you can make a dry tie with your own hands alone and only in a few hours. And while concrete will dry a whole month, after mounting a dry screed, you can immediately step on the floor and continue the repair.
- The cheapness is dry screed saves not only your time, but also money. For a concrete basis, it is necessary to buy cement (and for high-quality work it is necessary for expensive cement not lower than M400 or M500), small river sand, to rent a building mixer, get a spacious container for a solution, finishing, fastening or glue for it, etc. The impressive list is already obtained. For a dry screed, you need to buy only backfilling, fasteners and sheet material.
The video about the dry tie of the floor will put everything in its place:
Unfortunately, a dry screed has one significant drawback - it is afraid of water. But, if you think, the floor in the bathroom is not so big, and it can be pouring into concrete. For other rooms with a normal level of humidity, smooth floors can be made "dry", saving a lot of time and means.
Choosing materials
In this chapter, we will talk about what can be poured onto the floor for alignment and how to close the spinning layer. Depending on the materials selected, you can control the mass of the screed (load on the foundation) and its value.
Options for snowpad
Bulk materials are used to align the floor, therefore the layer thickness will depend on the degree of curvature of the base. You should also consider the availability of engineering communications that will be held under the floor. On average, the thickness of the dry screed is about 5 cm - this is quite enough to remove unevenness, accommodate the wires and pick up not too much free space. More than 6 cm thick tags need additional strengthening of the second layer of plates.
As a backfill, various materials with high porosity are used, not absorbing moisture and non-giving shrinkages. The size of one fraction of the bulk material can be from 2 to 5 mm. Below we list the most popular of them.
Materials for dry floor screed:
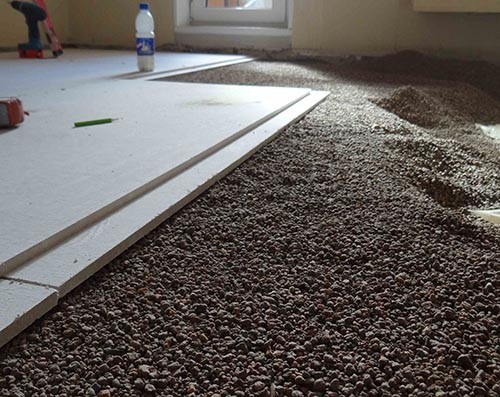
- Ceramzite is the most popular "filler" for a dry screed. This is burned at high temperatures of clay pieces that foam and frozen. It is distinguished by a porous structure that is well kept heat indoors (often used as thermal insulation material). The small weight of the ceramisite allows you to use it on low-power foundations. The only nuance is in the process of transportation, some granules can split (split they lose their insulation abilities) and when drought it better.
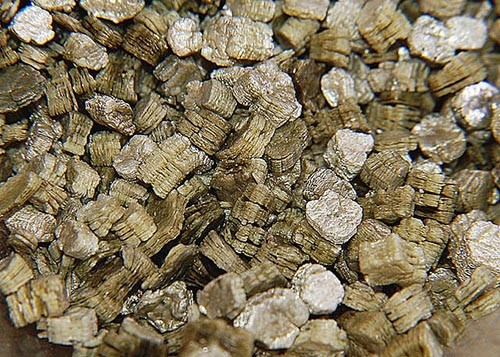
- Vermiculitis is a natural material with a layered structure in the form of silver or golden sticks. It is much easier to clamzit, so in some cases it is preferable to use vermiculite. So, for example, 1 cubic meter vermiculite weighs 160 kg, while as much clay weighs from 300 to 600 kg (depending on the size of the fractions). To create a dry screed, you can only use foamed vermiculite, because the usual easily absorbs moisture.
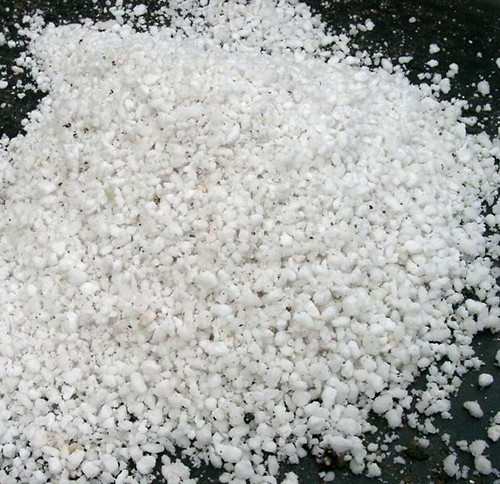
- Perlite - material of volcanic origin. For a dry screed, strolling perlite, obtained as a result of warming up to 1000 ° C. Only under such conditions it leaves almost all the moisture. Not only perlite granules are suitable for filling, but also the sand. When working with perlit, be careful - it is very light and instantly scattered from the slightest blow of the wind. Close all windows and doors before filling.
Dry screed can be carried out and without backing. This is done if the foundation is not twisted too much. Then the extruded polystyrene foam in the plates are placed on it and closed with their finishing coating. In addition to alignment, these stoves also give high-quality sound insulation, so if there are noisy neighbors under you, or, on the contrary, there are small children in the house, it is better to store the floor with polystyrene.
Construction firm Knauf offers a wide selection of various materials, as well as dry blends for a tie. Detailed installation instructions are attached to them, however, the snag is that in the domestic market you can not find the necessary tools to work with this mixture. Therefore, many builders prefer traditional options.
Sheetworks
How can I close the powder to get a reliable and beautiful floor? Usually, sheet materials are chosen for this - OSP, chipboard, dryriform or drywall, Phaneur, etc. However, it should be repelled not only on the value of the material, but also from the microclimate indoors. For example, if you arrange a dry screed in the kitchen, then it is better to cover it with moisture-resistant plywood, not a plasterboard. And in the bedroom, for example, it is possible to use gypsumless or osp.
Sheetworks:
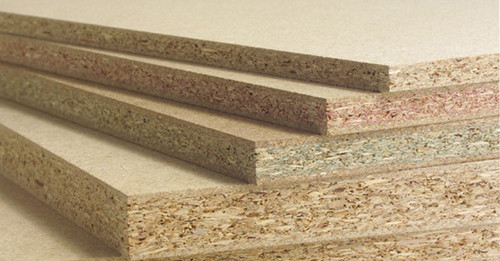
- Chipboard (wood-chip) - sheet material obtained as a result of pressing wood chips with the addition of binder and various additives (hydrophobic, antipyrins, etc.).
- A plasterboard sheet - a stove consisting of two-sheets of construction dense cardboard, between which there is a hardened gypsum with various additives to improve operational characteristics.
- Hypusoloconse sheets - similar to plasterboard material, except that the gypsum "filling" is reinforced with fiberglass and has hardened additives.
- Moisture-resistant gypsum fiber sheets - slabs with a "filling" of plaster and fiberglass, protected on two sides by hydrophobic and fire-fighting material.
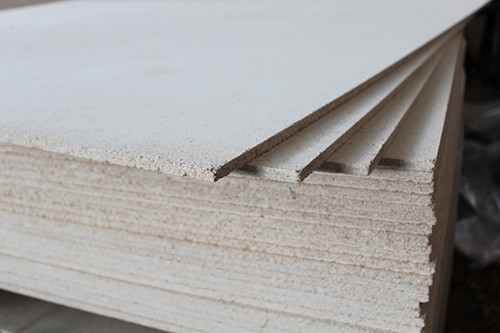
- Gypsum stove (GSP) - relatively new material for the Russian consumer. There are ordinary and moisture-resistant plates. There are about 80% of gypsum and 18% wood chips (2% moisture). The material is valued for the strength and environmental purity. Experts recommend putting it in two layers, gluing elements between themselves with a building PVA and screwing up self-draws. Many builders do not like to use GSPs, because with cutting sheets allocate a lot of dust.
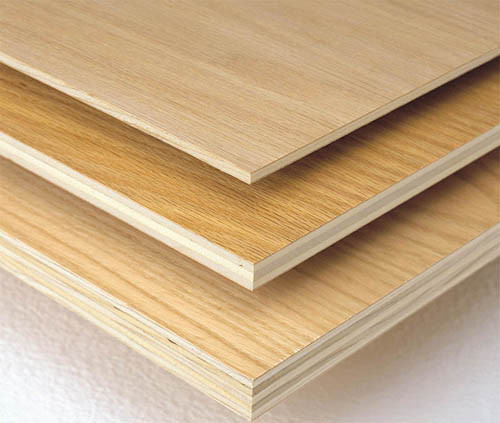
- Moisture-resistant plywood - thin layers of wood veneer glued together and treated with hydrophobic composition. The best and "invulnerable" is considered a plywood with impregnation from bakelite glue. She does not miss moisture, does not rot, unresponsible to chemicals (used to be used in air and shipbuilding).
Screed clay
Since the installation of a dry band screed in most cases occurs with the participation of clay, we propose to consider this particular option.
Progress:
- Prepare the floor base - remove the old finish coating, remove all the contaminants and check the integrity of the screed. If there are cracks or chips on it, close them with cement-sandy mortar and wait for it drying (3-6 days). Remove small litter with a vacuum cleaner.
- In order for the bulk material longer remained whole and fulfilled its purpose, it is recommended to be placed on top of vapor barrier. The vapor insulation material will divert the extra humidity and not to give the concrete base to crumble and dance. If you live in a multi-storey house, then from the neighbors from the bottom through the ceiling (your gender) will be inconsistent for the eye, but tangible for concrete the number of steam. It will settle in the form of condensate and very slowly, but effectively destroy the granular powder. For vaporizolation, pergamine or dense polyethylene film can be used. Shipping the surface of the floor by making small allowances on the walls (10-15 cm).
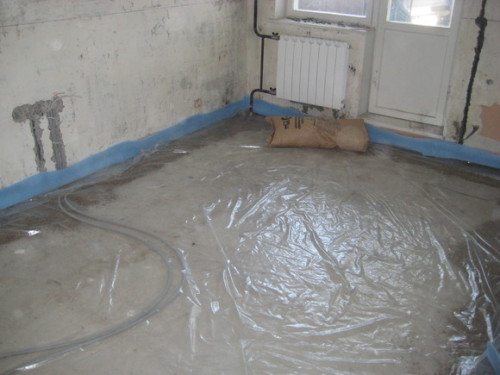
- If you use a rolled material that can only be laid by strips, make it 10-15 cm.
- In order for the future floor to not publish any extraneous sounds (screens, knocks), all over the perimeter of the room must be glued to the damper or edge tape. It will not allow sheets covering bulk material, knocking and straightening about the wall. The damper tape is a strip of foamed vinyl with a self-adhesive side. Lena should be glued directly on the vapor barrier film.
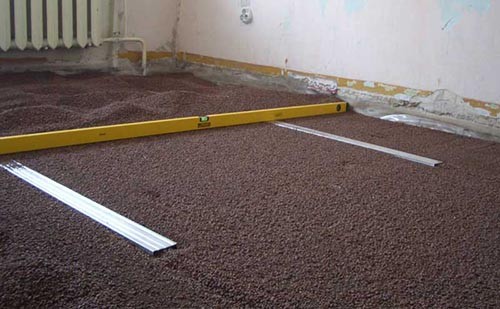
- Set beacons to navigate to create a perfectly smooth surface. If you pour a clamzite "on the eye", there is a high probability that the floor will be with a slope. To work, you will need self-tapping screws, a screwdriver, a construction rule that guides T-shaped and level. Put the level exactly in the center of the room and 50 cm from the angle, screw in the wall screws. Attach the rule and locate the intersection point with the laser. Put the mark on the rule. The second screws are screwed down by retreating from the first 15-20 cm to the side. Again, attach the rule and check that the laser and mark coincide. If the beam passes slightly higher or lower, it means that the self-tapping screw is screwed. Similarly, screw the screws into all the walls.
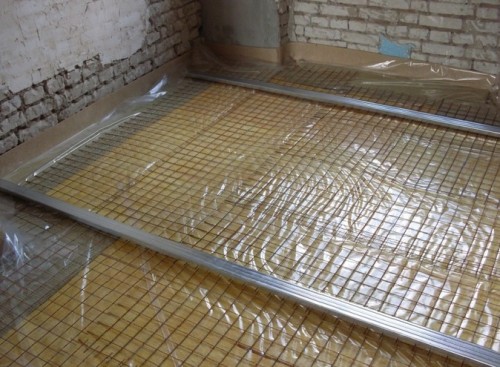
- Install the guides by posting on each self-tapping screw a bit of cement mortar. Put a metal profile on the solution and hurt it until it stops, remove the solutions to the spatula.
- Put the clamps. By the way, on the same principle you can make a backfilling from other materials. Usually, to remove even the strongest irregularities of the floor in the house or apartment, it is enough 3-4 cm layer, but not less than 3 cm. Otherwise, the sheet material will not be able to stably lie on the surface of the surface and will "walk" under the legs.
- Cutting down in small portions, ranging from the angle opposite to the front door and gradually making it up to the exit. Rove the bulk material is more convenient than a long rack or rule, spending it on itself.
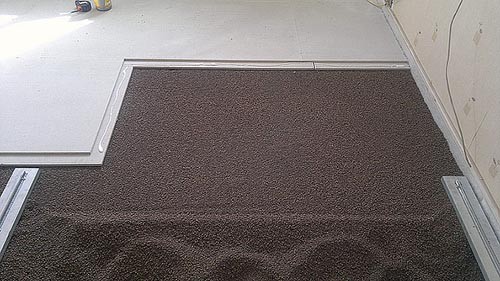
- After laying the powder and alignment of the layer, put the sheet material. In some cases, for example, with sheets of GVL, it is necessary to make "pie" from several layers of bulk material and sheets.
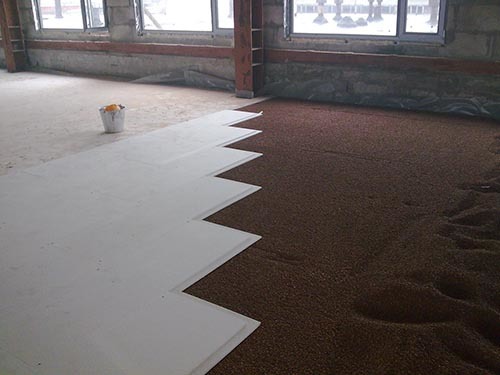
Useful advice: In order not to destroy the smooth layer of powder during the installation of sheet cabarton sheets or chipboard, put small segments on it in the form of a bridge so that you can attack them and not "sink" in the clay. - The technology of a dry band screed depends on the selected sheet material. As already mentioned, GVL needs to be laid in several layers, and moisture-resistant faeer or chipboard can be laid just on top. To fasten the sheets with each other with the construction glue of the PVA, enhancing the docking of the tree screws. After fixing, all seams must be sharpened and stabbed.
Useful advice: In the case of a conventional plywood or chipboard, after laying, the sheets should be coated with waterproofing material, for example, to lift with liquid bitumen. This can not be done if you make repairs indoors with normal or low humidity. - Start stacking sheets just as in the case of a backfill - from the angle (walls), the opposite door. In the process of laying, slurry under the sheets of claympsit and smash it.
- After laying the sheet material, do not forget to cut steam barrier, sticking along the walls. After drying the glue (a couple of hours is maximum) you can start the installation of the finish coating.
As you can see, make a dry tie of the floor with your own hands is not so difficult, so if you want to get a warm and silent floor in a house or apartment in a short time, use the instructions above.



 Start a discussion ...