The inner decoration of the housing is the point of responsible. The final result directly depends on the skills, effort and effort of one who carries out repairs. One of the main roles in the design of the room is played by the walls. Even the most expensive and high-quality wallpapers will not look beautiful if they are pasted on the curve unprepared surface. In this article, we will pay attention to the putty of the walls under the wallpaper, from which the accuracy of the interior design directly depends.
A set of tools for working
To implement the replacement process, you will need the following devices:
- Drill with a special nozzle for stamping solution. In order for the mass to be homogeneous, it is better to mix it manually, but with a peculiar mixer.
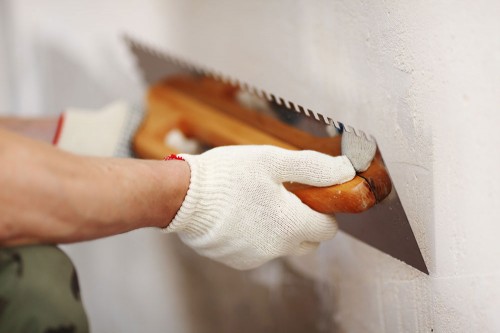
- Spatulas. Burst with these tools of different types and sizes. In the process of work, you may need both large and very small devices, and specially curved spatulas exist for the processing of direct corners.
- Tassels and rollers. Such devices are needed to apply a ground solution that allows you to provide a good grip of various materials with the surface of the walls.
- Level rule. It can be useful in cases where you have to do a rather thick coating layer. So that the putty in this case lay down exactly, it must be smoothed out by such a device.
- The sandpaper is necessary in order to get as a smooth surface without flaws. Preferably stocking paper of different grain. The sandpaper with large grain will be useful when it is necessary to level the base layer of putty, and the small one is necessary to give smoothness to the finishing coating.
- Skotroter. It is a hand tool to which sandpaper is mounted using special locks.
- The laser level is a tool with which it is determined as far as the smooth being processed. It must be done even before starting to apply the base layer of material.
- And the last, without which you can not do - this is a bucket or other suitable container for mixing putty.
Types of wipelok
Classification according to the composition
Let's figure out what types of this material are presented in the construction market:
- Cement putty. Its main characteristic is good moisture resistance, thanks to which such a coating is advisable to apply where the level of humidity is often increased. In an apartment or house, the room is considered toilet, bathroom and kitchen.
- Gypsum mix. This option is optimal for the walls of the residential rooms: bedrooms, hall, living room.
- Oil-glue composition. This type of material in our time is somewhat outdated. The cost of such a putty of walls under the wallpaper is rather low, but the final result is no good quality.
- Polymer mixture. It includes modern materials that make such a coating with the highest quality and durable of all. The polymer putty is often used as the finishing layer, which is obtained very smooth and smooth.
Prices for putting out walls under wallpaper can be completely different. Choose the option that optimally fit into your budget, but try not to harm the quality of the finishes. Another advice: when buying a material, be sure to pay attention to the expiration date, written on the packaging of the goods.
Classification by appointment
Depending on the purpose of putty, there are the following types:
- Basic or leveling. It is used as the first layer and is intended to hide all the irregularities of the wall. High-quality material should not be lightering, creating a smooth surface.
- Finish. It is applied after the basic putty finally dried. By texture, such a coating is obtained even smoother and even. It should be remembered that the finishing layer should be well clutching with the basic, not peel and not crumble.
- Specialized. It is used for some specific purposes, for example, for processing stoves or plaster panels, for lubricating breathable cracks, etc. Information on the appointment of a particular material can be found on the package with the mixture.
- Universal. Often, in the process of putting out walls under the wallpaper, this type of coating is used. It can act as a basic and finishing layer, but it should be understood that in its qualitative characteristics it is significantly inferior to the above varieties.
Work process
The price of the putty of walls under wallpaper largely depends not only on the value of materials, but also from the cost of labor of workers. If you want to save, we suggest you to make the process of aligning walls yourself. It is not at all difficult, let's consider the sequence of actions:
- Prepare the surface of the wall. Deoperate wiring, unscrew the sockets and switches. If there are significant protrusions or irregularities on the walls, if possible, remove them with a knife.
- Cover the wall with a layer of primer and leave for a while until the surface dry.
- Take the construction level and determine the places of the greatest curvature, mark them with a pencil.
- Carefully read the instructions on the packaging with putty and prepare the mixture by following all instructions. Note that the solution dries quickly, so it is extremely recommended to use more than 5 kg of powder at a time. If you are new to and have enough experience, it is better to knead the mass of relatively small portions. Another subtlety: Be sure to use only pure container for the solution. If the remains of previous building materials will be in it, the wall will not work perfectly smooth.
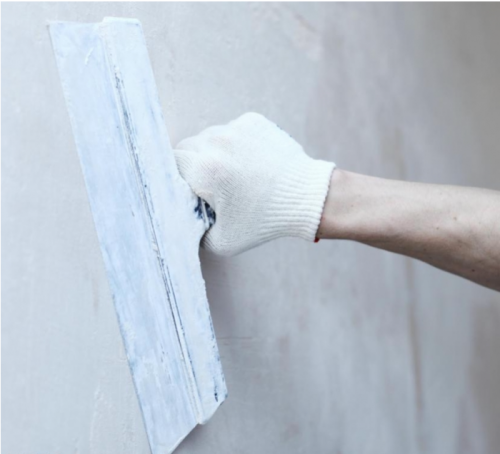
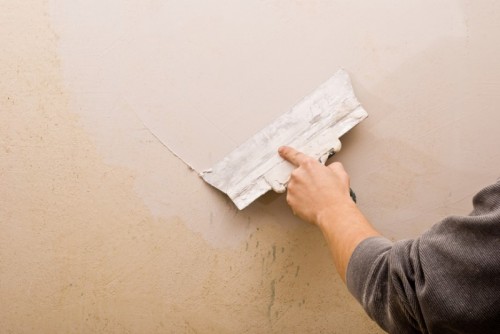
- To put the putty on the tool is needed as follows: Take a wide spatula in one hand, with a smaller hand with a smaller spatula, pick up a small amount of material and shift to a larger tool throughout its width. Then cement a large spatula to the surface of the wall and make a moving movement from the bottom up and from left to right. The movement in the opposite direction remove the excess coating. Separate layers of the mixture is better to apply braziness. Remember that too wide smears do undesirable.
- When processing the lower sections of the wall of the movement, it is better to make it only in the bottom direction.
- When this stage of work is done, let me wash the container and tools right away, and leave the wall to complete drying.
- Then estimate the result obtained by checking the surface using the rule. If you notice the protrusions, they can be trimmed with a sharp spatula and wipe the sandpaper. For grinding the surface with a large area, it is advisable to use a special typewriter, but if you clean the finishing layer of putty - it is better to carry out work manually. At this stage, the wall processing you will need to protect yourself from dust using protective glasses, respirator and suitable clothing.
- When the wall is completely polished, it must be allowed and apply a layer of primer. After drying the surface, it can be re-covered with its base putty. In order to turn out to be smooth and neat, an angular spatula should be used.
- If the basic wall covering you quite satisfies, it's time to start the finish layer. This work is carried out similarly to the above described.
- Those who wish to make their own wall perfectly and smooth can at the end put the superfinish putty, which will help hide the smallest and barely noticeable shortcomings. It should be said that if you are preparing the wall for sticking wallpaper, then this stage of work is not necessarily.
- When the surface is finally dry, it must be covered again with a primer immediately before having wallpaper.
Useful advice
Significant cracks in the walls are best climbing with a plaster-based putty. Santgips is considered a good material - it is elastic, but dries noticeably longer than usual.
To effectively fill in the deepening in the wall, it must first increase it slightly and make notches throughout the perimeter to improve the adhesion of putty with the surface. After that, the crack must be covered with a primer and engage in it.
Splatten walls under the wallpaper, video:




 Start a discussion ...