Most modern wooden houses have single-layer walls. It is quite natural that most owners sooner or later understand that the house needs to warm up well. And the complex vaporizoation of the house is one of the most effective solutions.
When is it really necessary?
There is a whole list of factors that affect the bandwidth of the tree:
- tree thickness;
- the presence of cracks;
- material processing type;
- quality of connections and fasteners.
In most homes, made from the mast, polulafeta or logs, wood humidity is due to natural factors. The humidity was the best, the logs must be about 5 years. But the most active humidity changes are taking place in the first year. And its sharp spikes can cause severe deformation. As a result, the insulation of all much worse at home. The best option - do not take any action for a year after being installed frame. Or immediately his paroizolirovat.
There are several options for when and how to install a vapor barrier:
- Five years later, when the tree is completely dry. From this point you can do the installation of the wall cake and start finishing work indoors. In this case, you can do even without a vapor barrier, but will have to carefully shut up all the cracks, and it is more time-consuming process. In addition, the need to further put the drywall and insulation. While the second will have to be replaced every 5 years, shooting for this finishing layer.
- Immediately, as soon as the house is fully built. In this case, the vapor barrier should be installed immediately. It is better to retain a layer of insulation, and all the properties of the tree remain. The durability of the whole structure will increase significantly, and the house would be better to keep warm. But in this case also need waterproofing the wall and a full pie. They are installed only a year later.
Vapor barrier wooden house from the outside
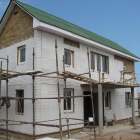
As a rule, the external vapor barrier is needed only if you have an old house. This will update its look, but keep the wooden base of the structure. For new homes it is irrelevant.
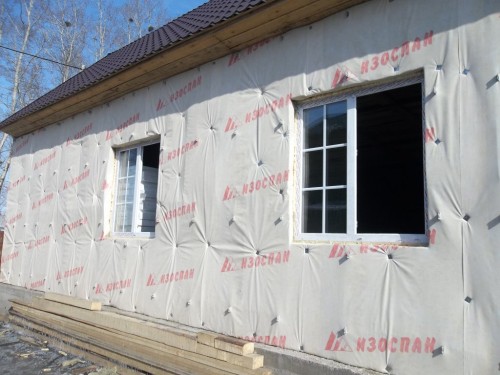
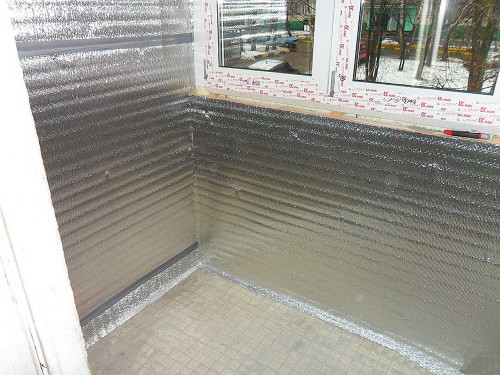
For exterior trim, you can choose a film, aluminum foil and roofing felt. The longest lifetime in foil. Her replacement will not be required for many years. No matter what material you choose, it must be put overlapping each other at least 2 cm. For bonding you can use a metallized tape or self-adhesive tape. If your house is made of smooth round logs, the vapor barrier can be fixed directly on the wood. If a rectangular or square cross section, the air circulation is low and it is necessary to fill a timber rack increments of 1 m, and the material directly fix them.
Nowadays you can even buy the materials that act simultaneously paroizolyatorom and insulation: different kinds of polymers, poliprofen and the like. But the cost of their significantly higher.
Remember that such a coating must always lay the insulation outward. Otherwise, the material will perform their functions much worse.
Parosolation inside the house
We recommend all the work according to the specified plan:
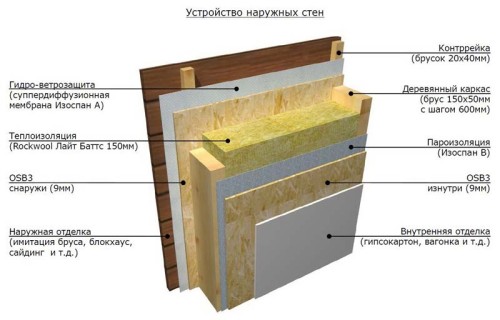
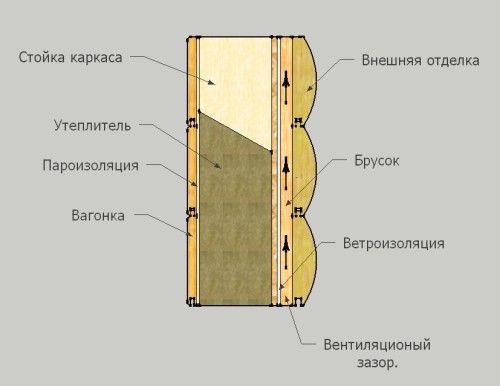
- take the crate with a width of no more than 5 centimeters. Fasten the layer of thermal insulation material on it. This will provide good ventilation due to the presence of a gap between the materials;
- expand the metal profiles from above, which will later lie down the insulation;
- now the flashes put the heat insulating film. It is very important at this stage to fully seal all the joints;
- after that, spend the final finish.
Take into account the following factors:
- the wooden house will always be subjected to stronger steam exposure than brick;
- after several years, the logs dry and deform. It is possible that you will have to replace a layer of vaporizolation;
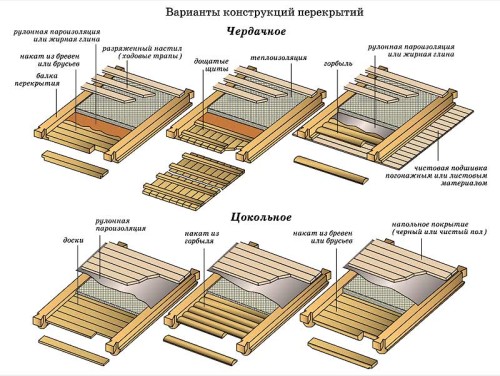
- the loop circuit should be exactly the same as the overlap of the attic and the base.
Parosolation floor in a wooden house
Here the task is slightly complicated. But, following the instructions, you can get a really good result:
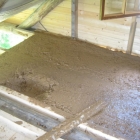
- Preparatory stage. Before proceeding with the case, it is initially necessary to clean the surface of the floor from any dirt and garbage, as well as thoroughly process the antiseptic to protect the tree from insects, fungi and other pests. If any, the old materials need to be removed. They will no longer suit you.
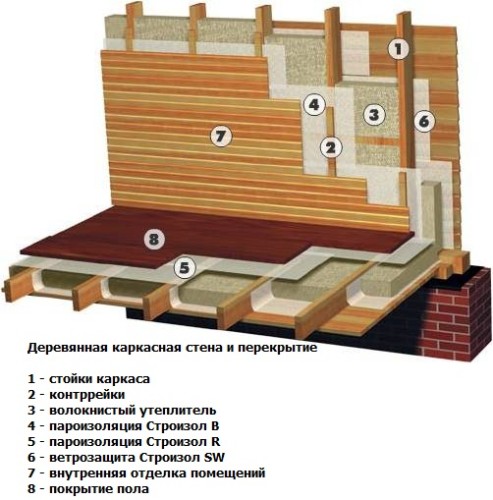
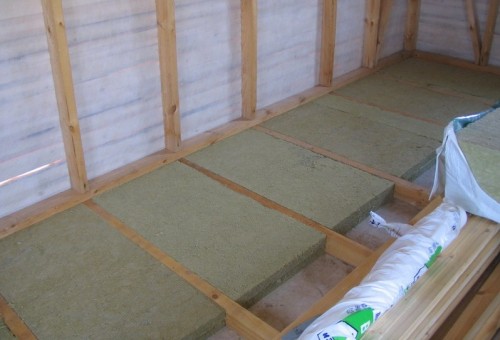
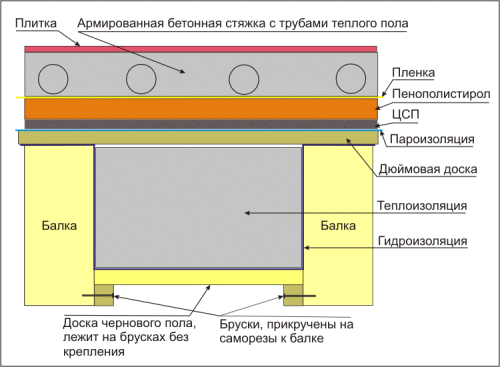
- Laying. The first layer must be laid so that it does not give moisture to fall into the insulation. Expand the roll roll and bed to the floor. If you put individual strips, then it is necessary that they go to the pectorist to each other at least in 15 centimeters. It is easiest to combine them with the help of bilateral scotch. Thus, you will not even get minimal gaps and cracks. At the edges, the layer can be strengthened with nails or construction stapler.
- Installing insulation. Mandatory step - laying the thermal insulating layer. In this case, its thickness should be at least 0.5 cm. Insulation can be chosen any, but it is important to monitor that it fits tightly to the lags and the film.
- The second layer of vaporizolation. This is the main barrier for steam, which will go from the heated room. Film must be put in such a way that a small gap for ventilation remains. The technology of laying is almost identical to the first layer. The strips are glued together with a mounting ribbon or scotch.
- Clean floor. When the "sandwich" of steam and thermal insulation is laid and securely fixed, you can move to the installation of the finish flooring. There is practically no restrictions in the wooden house of restrictions. It can be parquet, linoleum, laminate, etc.
Parosolation ceiling at home
If you have already taken care of the floors and walls, do not forget about the ceiling. It is he who strongly contributes to the right microclimate in the house. In addition, it can solve a number of additional problems:
- a significant increase in the life of any roofing materials;
- preventing the formation of fungus and mold inside materials;
- protection against heat leakage;
- protection against ignition and burning.
Modern membrane materials available in the construction market allow you to protect you from the need for additional regular maintenance during operation.
It must be borne in mind that in the wooden house, condensate is formed much faster than in any other. But but the vaporizolation layer can be installed at any time: not only during construction work, but also during the repair period.
The preparatory stage consists of four main steps:
- surface cleaning;
- processing of slots, cracks and other defects;
- primer;
- drying.
The installation process itself is quite simple:
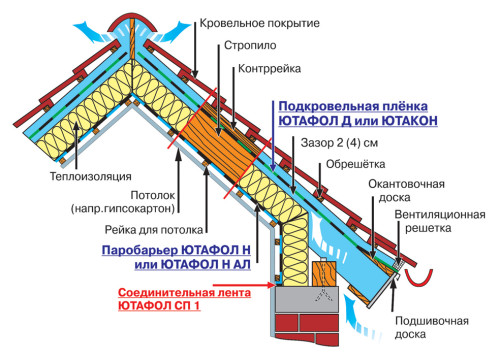
- Material must also be sharpening. But at the same time it is necessary that it will also be a mustache and to a layer on the walls in order to avoid even minimal gaps. Attach the layer to the ceiling is the easiest way with the help of a construction stapler. If you have time, it is better to install wooden slats and install the web directly on them.
- So that the connections are tight, use the waterproof adhesive tape.
- Fall on the ceiling should be about 10 cm. No longer needed. The main thing is to ensure that the material lay freely and did not stretch. Sometimes it is reasonable to even make it somewhat weak and savory, because with strong leaks of temperatures, the material can be tightened that it becomes the cause of breaks.
- Please note that the vapor barrier layer is strictly forbidden to punch with nails. The best option is to use a frame laying system. It will ensure the integrity and safety of the material and will significantly increase its service life.
Several Additional Parosolation Tips
We believe, you understand that the quality of the material itself does not directly affect the end result. Therefore, before stacking, make the right choice. Therefore, we bring to your attention a few simple tips for choosing and laying:
- Polyethylene is the easiest and cheapest material. If you use it, you can be sure that the microclimate in the house will be defective. It prevents the normal circulation of air flows, and its service life is short.
- As a parobararrier can perform various kinds of mastic or varnishes. They are really able to create a good layer of vapor barrier, but their service life when exposed to all sorts of irritants is significantly shortening.
- If you wish to independently resolve the amount of penetrating steam, you can use different membrane films. Their main advantage is an increase in throughput with increasing humidity in the room. That is, it is such an automated regulatory system.
In any case, it is almost impossible to do without installing hydro, heat and vaporizolation in the house. And the wooden structures though look stylish and unusual, but have a number of flaws even with the correct installation. Remember that your key task in the work is to avoid the formation of gaps and ruptures of the material. Otherwise, part of the work will have to redo and buy additional materials.
Such works are best carried out in the warm season when the air temperature is above average. In such conditions, the material keeps its usual shape. If work is done in winter, the layer can be strongly saved with the onset of heat.
We hope our advice will help you in the arrangement of your own wooden house and you will not have any additional problems with its insulation. Good luck.



 Start a discussion ...