Any owner of the country area is sooner or later thinking about the construction of a bath. This is a place where you can relax after a hard working day in the garden and restore health with a cold winter day. And the construction of such a special place requires a special approach - in the bath there is always a very high level of humidity and frequent temperature differences, therefore it is not any design to maintain such conditions of operation. But the most attention during the construction of a bathhouse requires a roof. Water pairs, climbing, are able to quickly destroy the wrong roof, and all heat will go out. We will help you to avoid similar troubles and tell how to make the roof of the bath.
Choosing a roof type
The choice of the type of roof depends on many factors, such as climatic conditions of the terrain, wind load, the dimensions of the building box and the materials used for it. Any construction should begin on paper, so before going to the store for building materials, it is necessary to make measurements and develop a roof project of a bath. It is better to do this before booking the foundation to immediately designate the planned amount of expenses and the timing of work.
There are many types of roofs, but for baths more often use the simplest - single and duplex. They can be with an attic or without. The simplest design of the roof for the bath is as follows: a crate to the carrier of the rafter system is stuffed, to which steam, hydro, thermal insulation, make the ventilation system and put the finish coating. It sounds pretty simple, and in practice it is, but it is very important to choose the right building materials and arrange them in a certain sequence.
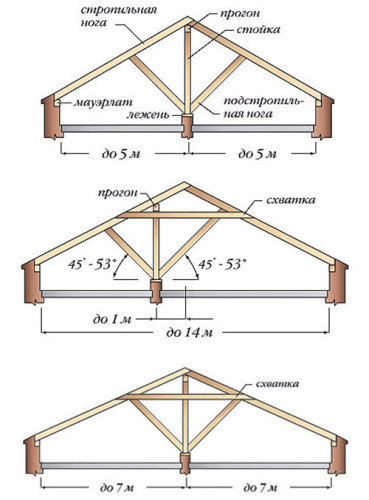
Design sizes determine the presence of certain elements. Thus, struts, screed, rigleels or racks can be added to enhance the stiffness of large roofs. The image below presents the main methods of the roof of the rafting system, depending on its size.
Operate rafters on the Mauerlat or the upper crown of a bar from a bar is easier than to make a roof with hanging rafters, but in this case there will be a strong load on the walls, which should also be considered.
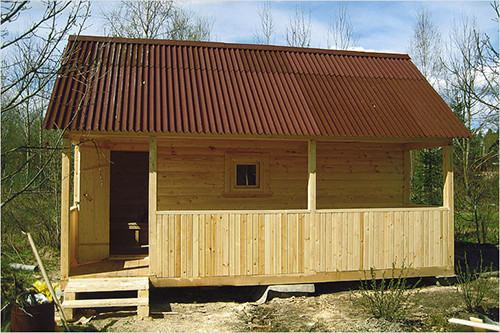
Single roof is the simplest, and it is reasonable to do in cases if the bath is adjacent to the house. Then the roof raft can be combined from the roof of a residential building, thereby saving money and time. But even if the bath is pronounced, make a one-piece roof with your own hands cheaper than any other.
The only drawback, more precisely, the peculiarity of the exploitation of such a roof is that due to the small angle of its inclination in winter, snow can accumulate snow, giving an additional load on the rafter system and on the foundation. If you do not live in the country constantly and you can not regularly clean the roof, the design will last less laid.
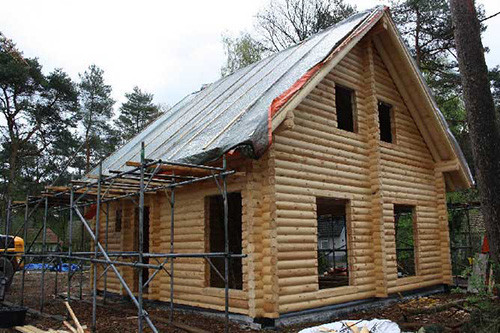
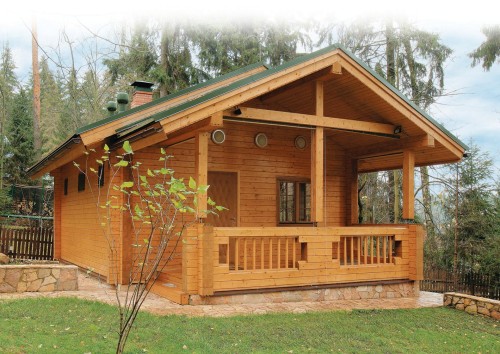
Baths from the cut are usually built with a duplex roof. This design, in contrast to the previous one, is not afraid of heavy snowfall and get rid of the snowdrifts. In addition, a small attic can be organized under such a roof. For a bath, this is a very useful room, because it can be dried oak and lime brooms, store various utensils and firewood for extras. The attic can be done in a single-sided, and in a double roof, but in the latter case it will be more spacious and comfortable. Small baths that are used only in the warm season can be built without a attic. But if you plan to visit the steam room and winter, it is better to organize a small space under the roof - the attic will play the role of additional thermal insulation.
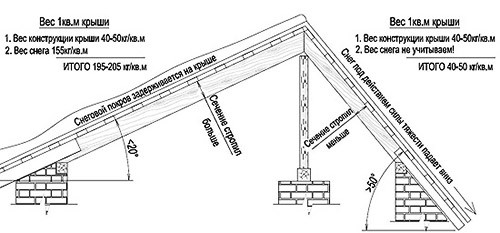
The cost of building a duplex roof will be higher than one-sided, but also serves such a design longer. The size of costs by and large depend on the angle of inclination of the slopes, which is clearly shown in the image below:
The greater the angle of inclination of the roof, the less the load it is experiencing from snow and wind, so for construction you can use bars with a small cross section. Single roof, on the contrary, in addition to the strong snow load, is exposed to wind, which is thinking under it.
Materials of roofing cake
The project must be developed simultaneously with the choice of material for the roof of the bath, since these two concepts are closely related - the installation of some products for the finish coating requires a certain angle of inclination of the roof.
Fortunately, the construction market offers a huge selection of all sorts of building materials for a bath for every taste and wallet. When you choose, pay attention not only for the cost, appearance and durability, but also on the ability of the product to absorb water. Banya is a rather raw place, so it will be good to build it from the most hydrophobic materials.
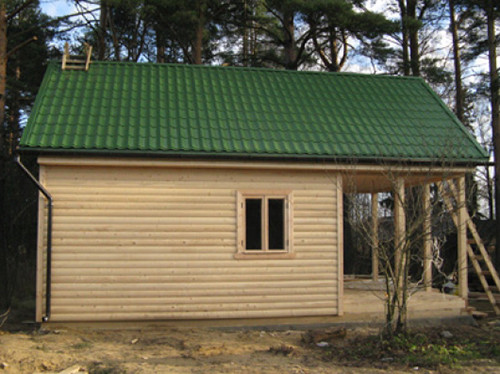
Metal tile, professional flooring, slate and rolled products are most popular among roofing coatings. Metal tile is quite expensive, but will serve faithfully at least 50 years. She is very smooth, and when a lot of snow falls on the roof, it is self-rolled under his own weight. The professional flooring is also distinguished by durability, but it can be stacked with a minimum bias of 8 °. Many "in habit" are facing the roof of slate, but it has one unpleasant property - over time, moss appears on the surface, which is better to count. Slate can be put as a bias at least 20 °. The cheapest roofing is rubied. It is perfect for a single bias with a slight bias. It serves, however, such a material is not long - only 10-15 years.
Much attention when choosing materials of roofing cake should be given to hydro and vaporizolation. From the initial course of physics, it is known that a warm pair is tested up, in the case of a bath - to the roof. If the steam penetrates through the trim and wet insulation, then he will stop performing the function entrusted to it, and all heat will go out. To this not happen, it should be correctly selected.
As waterproofing for the construction of the roof, the baths most often use membranes and films. The simplest waterproofing is a dense construction polyethylene with a thickness of 200 microns.
Important: Between the material of the inner finish, the attic or ceiling of the bath and a vapor barrier membrane need to leave the distance at least 2 cm. In this ventilation gap, condensate will evaporate faster and cannot penetrate deep into the roofing pie. There are bilateral vapor insulation membranes on sale, which reliably protect the insulation layer and do not need a ventilation gap.
All insulating materials must be laid on 15-20 cm, overlapping the seams with a wide scotch. Films and membranes can not be stretching, otherwise they will be broken under the influence of temperature differences. Materials must lie freely, but at the same time do not hang out on the crate. Wooden elements of the rafter design and beams of overlapping should be treated with special compositions from dampness and appearance of mold.
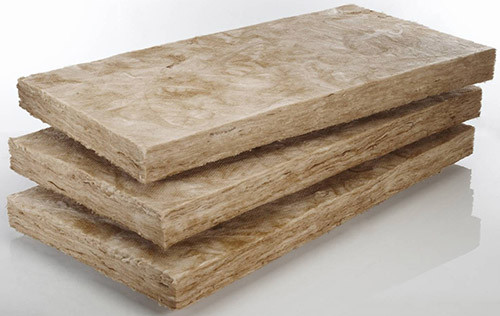
The warming of the roof of the bath helps longer maintain heat inside and save on heating (coal, firewood). Mineral wool is considered the most popular and cheap insulation. She perfectly holds warmth, but moisture is very afraid, so you should take care of her reliable protection. Also, the extruded polystyrene foam and basalt plants are often used for these purposes and basalt plates (a type of mineral wool, but moisture is afraid of less). Polyfoam should be used very carefully and ensure complete fire safety. It does not burn, but when the melting is released toxic smoke.
So, when you draw a detailed plan and bought all the necessary materials, you can proceed to the construction of the roof of the bath with your own hands.
Single Roof
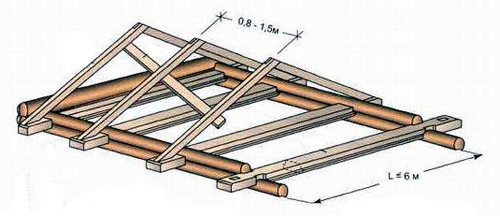
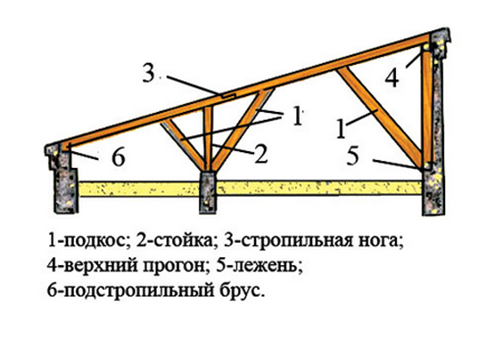
If you want to save time, money and your own strength, we suggest to build a simple single-sided roof for a bath. It will look good on small structures or extensions to the house. The image below shows the design of the rafter system of such a roof.
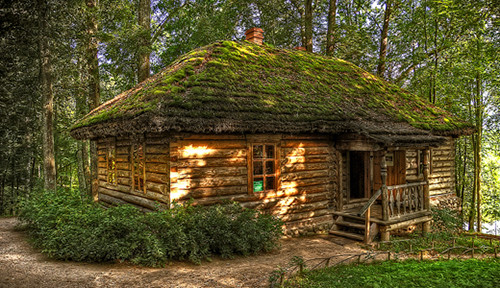
Interestingly: In the past, one-sided roofs drove the turf - fertile soil layer. He preserved warmly and harmoniously fit into the natural landscape. It was done very simply: a moisture-proof material was laid on a wooden crate, on top of which the turne was laid on several layers. The bottom layer was rooted up, and the upper - roots down.
How to make a single roof on the bath:
- One wall of the bath should be higher, so that the roof has a slope. In a rectangular design, the long wall usually makes a long wall so that the length of the skate is smaller - it reduces the cost of materials and make the roof stronger.
- If you are planning to make a lion with a attic, at the low-carrier level, select the grooves in which the ceiling overlap beams will be inserted. It should be installed at the same distance as rafters. Also make grooves and in the upper part of the high wall and carefully treat them with antiseptic solid for wood.
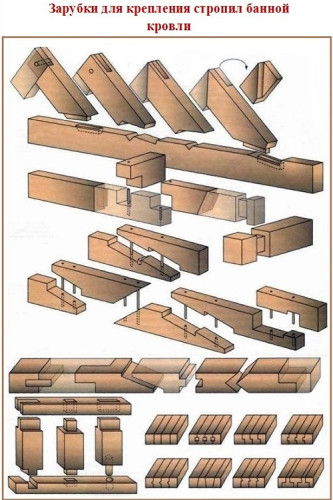
- Drink overlapping beams and rafters according to the drawing. To do this, it is best to use a thick edged board. The ends of all the elements that will be dripped in the beams, treat the waterproofing liquid mastic and wrap the rubberoid layer.
- Insert the beams in the grooves and secure with metal brackets or studs.
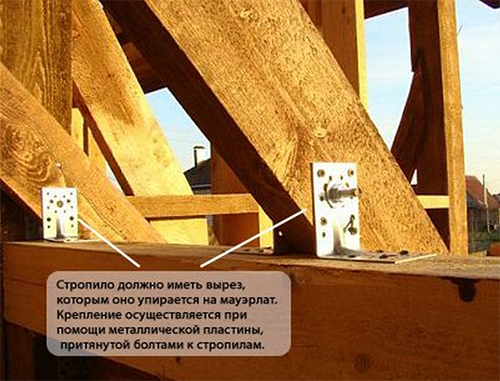
- Place the rafters on Mauerlat and turn them among themselves with stiletts with metal plates.
- If the skate is planned to be made longer than 4 m, between the rafters and the beams of the overlap should be placed in the scenery or supports.
- Sewing frontton boards. If there is a attic under the roof, make a small ventilation window at least in one of the frontones.
- Perpendicular to the rafters to put the waterproofing film so that it sags slightly. For fastening to wooden elements, use the building stapler, and the seams between the cuts of the film laid by the mustache, put a wide scotch.
- On the waterproofing, put the selected insulation and close it with a layer of vapor barrier. For the climate of the middle strip of Russia, the optimal thickness of the insulation on the roof is 10 cm. At the same time, it is better to lay it in two layers of 5 cm in a checker order to eliminate the occurrence of cold bridges.
- For reliability, you can put another waterproofing layer.
- For the film to the rafters, bring the bars and put on it a crate of boards or a solid moistureproof plywood. If you make a rareled crate, nail the rails at a distance of about 40 cm. The solid doom is needed if you should be treated with a rolled roof.
- Place roofing in accordance with the instructions. For fastening the metal tile and professional flooring, use special tapes with thermoshaba, inserting them into the lower "wave". Ondulin, on the contrary, it is necessary to pierce in the upper "wave" with special galvanized nails with a wide hat. To work with a soft rolled roof, use adhesive masts or gas burner (welded coating).
- Attach the wind and cornice strips, horse and do not forget to arrange a ventilation gap. If you make a roof of a bar from a bar with a wood stove, and there is a flue pipe outlet, ensure reliable protection of this place. Since the pipe will go hot smoke, it will heat the nearby surface, creating a fire hazardous situation. It is necessary to sew a sheet metal between the wooden elements and the pipe, and inside such a box, there is a non-combustible insulation material, for example, basalt cotton wool.
Installation of a single-sided roof of a bath on video is shown more clearly:
For a frame bath, a single-table roof is suitable as it is impossible. Even the master self-taught work will be able to build it without work experience.
Gable roof
The arrangement of the bartal roof of the bath takes a little more forces, time and money, but the result will justify all the investments. Under such a roof, you can make a comfortable attic or even a living warm attic with additional bedrooms for guests.
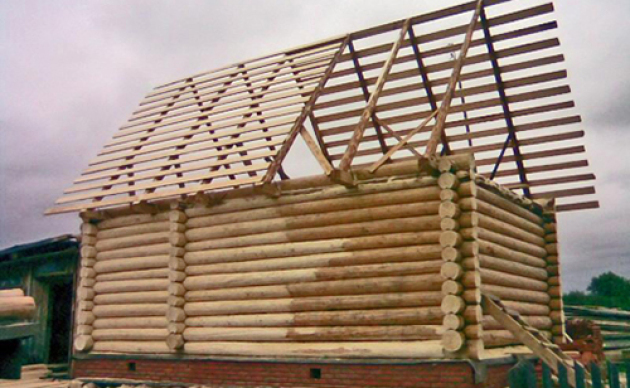
The construction of the rafter system is quite simple, therefore, if you understand the theory, then any hardworking owner will be able to realize the conceived if desired. The bearing elements of the rafter system of the bone roof with one end restorate in the supporting bars of Maurolalat or overlap, and the second is connected to each other or a skate beam.
How to put a roof on the bath:
- Start the construction of the roof from the laying of the attic overlap. It can be collected on earth, and then just raise onto the roof and fix fasteners.
- Secure Mauerlat. If the bath is made of wood, then the support bars can be screwed using special metal corners. If the walls of the baths are made of reinforced concrete or brick, then you will need to make another low concrete ring with protruding reinforcement pins. After drying the concrete, remove the crate and put the Maurylalat on these pins, pulling on the other side with powerful nuts. Before installing Maurolala in both cases, the base should be treated with waterproofing mastic and led the rubberoid.
- The rafters can also be assembled on Earth separately, and then raise up. Install them on Mauerlat at a distance of 60-80 cm from each other. Any roof should have a cornice, so install the rafters so that their ends shall stick the wall for about 30 cm.
- Install the cutter on the rafter (solid or rarefied depending on the finish coating).
- Attach the waterproofing material on the crate.
- On top of the waterproofing, put the insulation and close it with a vapor barrier film.
- It remains only to attach the roofing material and, if necessary, isolate the outlet yield.
As you can see, the installation of the roof of the bath is not as folded as it seems, especially if we are talking about single constructions. The main thing is to choose quality (albeit not very expensive) materials and thoroughly treat the wood with antiseptic compositions. Once a year it is recommended to inspect all potentially vulnerable designs for faults and eliminate them.


 Start a discussion ...