By purchasing a new door, the buyer gets not fully finished design for installation. Manufacturers do not specifically fix the loops, do not cut locks, leaving customers freedom of action. After all, it is unknown, in which direction the door will open, at what height the loops, locks will be fixed. Therefore, the buyer arises a non-trivial question mark. Alternatively, you can use the services of specialists. Or trust yourself in the assembly of the door box. To do this, it is recommended to explore the technological nuances and prepare the toolkit.
Replacing doors of any kind of a priori carries a decorative function. Such structures are able to revive the interior, supplement the standard design "Cherry from the cake". Often, new doors are not suitable for standards for available openings and boxes, as a result of which any installation of the door frame is made with a complete replacement of previous bearing elements.
First stage: Preparation
All doors presented on the market in the middle price range are supplied with a dismantled door frame. It is not difficult to assemble the assembly in compliance with all recommendations. According to the technology, the process includes the mandatory execution of a number of operations.
It seems the advice of carpenters regarding the coating of doors (decorative film, veneer). It is necessary to work with the material as accurately as possible, otherwise the chips and scratches will spoil the impression of high-quality installation.
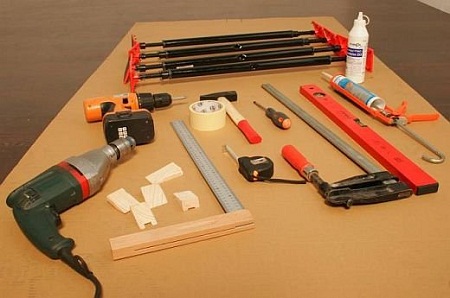
When the door canvases are purchased and waiting for the installation, you can move to the preparation step. You should choose the following toolkit:
- self-tapping screw 4.2x75;
- chisel;
- hammer;
- roulette;
- screwdriver;
- stuslo;
- the level of installation.
Naturally, a hinge will be needed for a complete set that will help to understand how to put a door box.
Second phase: assembly process
Any box for installing the interior door provides the following fragments:
- Fitting.
- Upper timber (perturbation).
- Looper.
The task of the installer is to combine all the details strictly in size. Several methods for fixing the timber, but the most popular is a thickening connection. According to it, spikes are created on vertical and horizontal components, which are then combined with the grooves of other elements. Multiplers are often asked by questions like: "How to assemble the door box correctly so that there are no ugly gaps and zarrin on the corners?".
For beginners, experts recommend a connection of cloths at an angle of 90 °. To do this, do not need to cut and strike the bars. For more confident in their abilities, a second option remains - a connection at an angle of 45 °. Show how to assemble the door frame on the video.
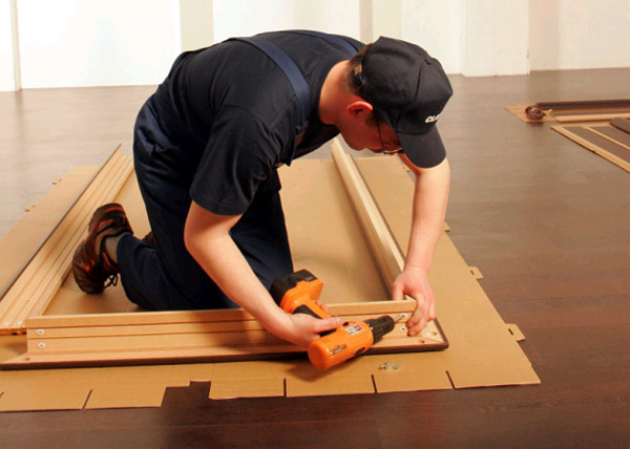
- For installation it is necessary to combine looping and ceiling bars. And since the cross section of the data of the components is characterized by a complex form, then in the area of \u200b\u200bcontact, it must be unlocked by the attendance of the entire structure.
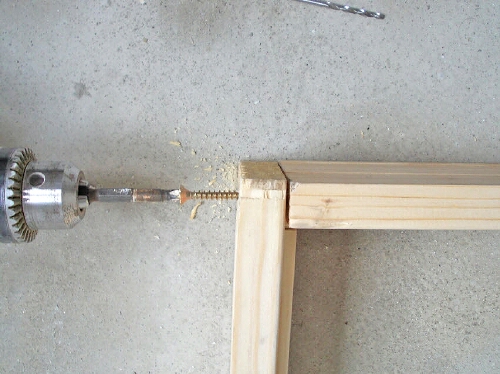
- Then the control alignment of the connected parts is performed using the chisel, after which the fixation process is performed. The best means for this are dark screws. In the case of disassembling the box with a subsequent assembly, the self-tapping screw will not damage the structure of the material.
- After the place is noted, the combining of the canvas is noted, and the components are dismantled to install the lower migration cards to the plane of the looper of the looping. From the issue of fixing the door frame proceed to the installation of loops.
Setting loops
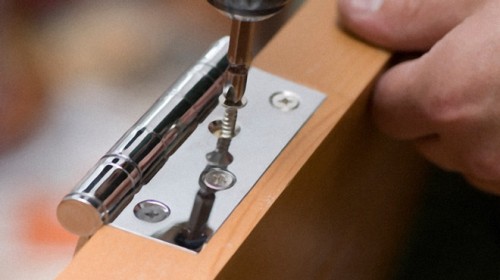
- The location for the installation of looping cards is set to the location of the loops mounted on the door leaf. It is necessary to provide a 3-millimeter gap.
- If 30 cm is fixed from the upper door end at a distance of 30 cm, the position of the lower mounted card on the bar will be located at a distance of 30.3 cm from the compound mark. Accurate in the middle is applied so-called "dad", the place of the future installation will be burned with a pencil. Then the part is crashed into a pre-prepared small deepening.
- The next step is the docking of the upper structure, mark the point for fastening the accessories, the process of the insert and fixing the canopy. Experts advise to do it as closely as possible so that the surface flush.
Finishing stage assembly
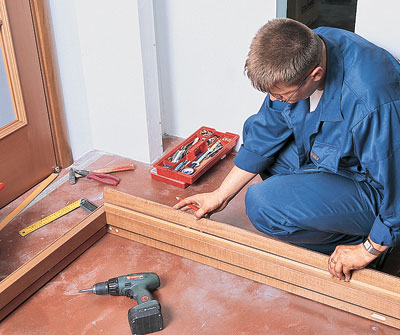
- We connect the looping and ceiling bar according to the holes available. The door is hung on the door installed. The task is easier to perform on a horizontal surface, for example, the floor.
- As soon as the design acquires the finished outline, from the edge of the door it is necessary to withstand the gap of 3 mm to the preliminary timber. The place of connecting the preliminary and reverse side of the spiral timber is noted on the basis of this feature.
- By analogy with the first case, the box is removed, and the components are combined into the design by means of screws. In order not to evoke the displacement of the elements at the moment of connecting the gaps of the side and upper part are complemented by wedges. They are made of simple organity or cardboard with a thickness of 3 mm. How to assemble the door frame, you will demonstrate the photo installation. Be scrupulous in size and reliable in the mount.
How to make a door frame
To obtain a tight base of the box, fix the corners of the design narrow planks from wood. In the absence of a threshold, the lower part of the opening is built by a temporary plank of the corresponding dimensions.
Do not worry about hats from nails, because cash will be installed on the box. They will hide all elements of connections and fasteners. Naturally, the installation process of the door frame can be started only after disassembling the former design and processing of the opening.
The optimal option for fixing the design is the mounting foam. But for increased reliability, it is recommended to fix it with anchor bolts. Examine the nuances of installing the door frame on the video. At the same time pay attention to the following items:
- The box together with the door blade is fixed in the opening with the help of wooden wedges. If necessary, check the horizon and vertical level.
- In the vertical bars it is necessary to drill at least three holes.
- Through the holes are made of deepening under the anchor.
- Then the box is fixed.
- The next step is to fill the voids between the opening and construction. This uses mounting foam. It should be carefully monitoring the level, since the foam after drying increases in the amount and produces some pressure.
- In order to prevent the box deviation, it is advisable to resulter the structures by means of wedges around the perimeter. Foam finally dries out per day. After that, all spacers and wedges are removed.
- Mounted platbands.
What is noteworthy, thus set all kinds of doors. Therefore, if the question arises: "How to assemble a door frame for the MDF door?", You will not experience problems.
How to Collect Door Box for Wooden Bath
Genuine wood is a wonderful material for construction. It is distinguished by naturalness, environmental harmlessness, durability and practicality. The only minus for the builder is the shrinkage process.
The openings in wooden cuts or structures from the bar should not be equipped immediately after the construction of the crowns.
There are two options:
- If the width indicators of the opening correspond to the project solution, in the end, the groove is cut in the middle, after which the timber is installed in it. The box is nauseous. What is curious, it is categorically impossible to fix the design to the wall surface again in favor of shrinkage.
- If the opening as a result of construction is not formed, you need to cut the hole you need to pass. Moreover, the width should be less than the design of the fold of the ridge thickness. With this variant with the groove, the box timber is performed.
Experts assure that in both embodiments, the box components play the role of cunners of the crowns. Directly above the opening always provide for a slot that protects against significant deformation of the structure during the shrinkage process of the entire structure.
Conclusion
Unprincipled, what type of door you are going to install, what a width of the doorway doors, the basic rules of installation are one. Taking advantage of the recommendations and carefully performing a step-by-step plan of the installation, you will be able to install any interroom door.





 Start a discussion ...