In the economy without this tool, it is hardly possible to do. Processing of the garden, construction work and banal garbage cleaning does not cost without the use of shovels. For various types of work, there are various models of shovel that help people do work faster and easier.
Types of shovel
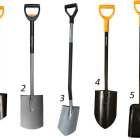
Today there are several types of shovels that differ in their shape and are intended for various types of work. All types of this indispensable tool can be combined into several basic groups:
- Bayonet shovels. This species is used for earthworks. This may be the processing of a piece of vegetable garden, planting various cultures or digging a pit or trench for construction. Such shovels received their name due to the form of their working part. A pointed at the end, she resembles a bayonet. The sharpened tip makes the spade without much effort to bother into the soil layers.
- Police (American). Such shovels are nothing more than a hybrid between the bayonet and the Soviet shovels. They received their name, thanks to wide distribution on the American continent. These tools have a wide work part with a pointed end, located at an angle to the cutlets (like Sovic shovel). Some American models have a form similar to a spoon. Thanks to its form, such shovels are quite easy to control with bulk soil. On a flat bayonet shovel, it will be difficult to translate a large volume of sandstone - it just hurts that in the case of a semi-shovel, it is unlikely to happen. Recently, such shovels have won popularity among domestic gardeners.
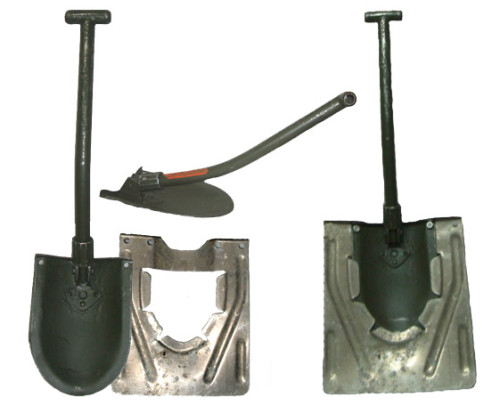
- Soviet shovel is an indispensable tool during construction. It interferes with the solution, carry out unloading and loading of building material and garbage, swelling holes. Due to the wide working part, such a shovel is very convenient to pass a large volume of materials. The angle between it and the cutter makes it easy to capture the material from the surface. However, such a shovel is impossible to break the surface of the soil, since they are mainly made from steel thickness.
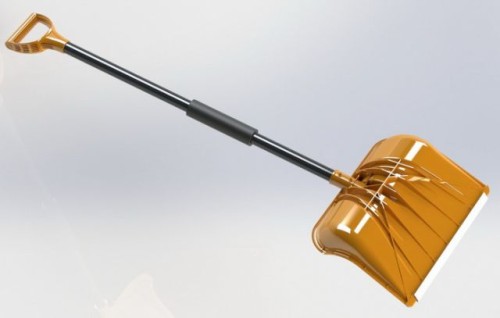
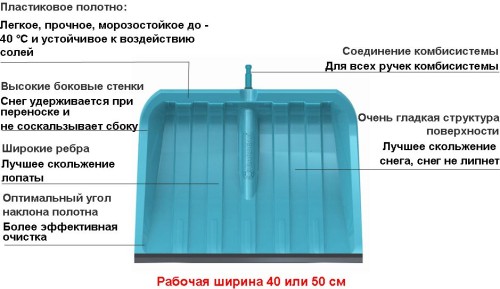
- Snow removal shovel. This is one of the varieties of Sovka shovel. It is designed to clean snow, which has a smaller density than the soil, respectively, less weight. Such shovels have a larger size than ordinary Soviet. Due to this, a similar type of tools is released both from steel and from other materials, such as plastic, from which the shovel of snow plastic, wood, etc. manufactured. Large dimensions of snow removal shovers allow them to quickly remove fresh snow, without spending a lot of energy.
Production of snow removal shovel with their own hands
Basic moments
As a rule, all types of shovel, and snow removal in this is no exception, are manufactured in factory conditions. At the same time, its material is used for each type of tool. At the plant by stamping from sheet metal, metal parts of the shovel of snow metal, which pass the process of painting. A stalk is made from wood, which is processed by special compositions. Thanks to high-tech equipment and applying new materials, modern snow removal shovels have a sufficient margin of safety and can serve not one dozen years.
However, if everything covered around everything, and there is no one tool at hand. Naturally, before going to the Economic Store, you need to, at least, dig a garage and car. In such an extreme case, it is possible to make a snow removal shovel alone.
For this work, it will not be necessary to have a special tool, engineering knowledge or greater experience. The minimum set of simple operations, the use of sweater materials, and the shovel for snow cleaning will be ready. Well, the most important thing: in addition to saving time and money, the pleasure of the work done and the good result is guaranteed, and it is worth a lot.
Preparation of material
For the manufacture of simple snow removal shovels, you will need:
- Plywood sheet 4 mm thick.
- A piece of uncircumcised board.
- Several pieces of galvanized (in the absence you can apply tin cans).
- Nails.
- Stalk.
From the tool you need to have at hand:
- Hammer.
- Plane.
- Electrolovka.
How to make a snow shovel with your own hands
Procedure for work:
- The first thing is cut out a piece of plywood, the size of which will correspond to the dimensions of the future shovel. At the same time, it is necessary to make a discount on the physical possibilities of the one who will work with it. The fact is that fresh snow weighs not too much, but it stands to him a little, how to work with him is already much harder. Therefore, too much shovel will become simply an inbox for a physically weak person. The average size of a snow removal shovel for an adult is approximately 50x50 cm, which can change in one direction or another, depending on who will work with it.
- Cutting a piece of plywood of the required size, you can start making the end of the shovel to which the plywood will be attached. It is made from the untreated piece of the board, which can be found in any farm. The item will have a semicircular shape. Due to the convex part, the plywood will bend, thereby forming a scoop, for the convenience of work.
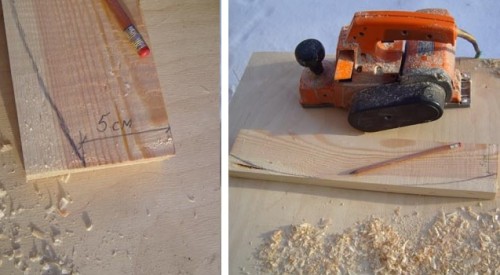
- The board is processed by the plane, until the smooth surface is obtained. Then the outline of the future part is applied to its surface. Its thickness at the edges will be approximately 5 cm, in the middle - about 8 cm. The contour must be carried out as smooth as possible so that there are no sharp corners.
- After that, with the help of the electrolybiz, the end of the shovel is cut out. At the end of the work, the electroller needs to be cleared the place of the cut with the help of sandpaper from sowers and chips.
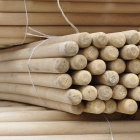
- The next stage should be the preparation of a cutting. For its manufacture, a cutting board or a rake of the corresponding cross section is perfect. Of these, we drink a piece of 2 meters long and about 4.5 cm wide. It is best to make it a rectangular strength of the cutter for the convenience of use.
- The carved cutlets must be treated with a planer and then sandpaper. Unprocessed places over the entire length should not be, because they can lead to injuries. When choosing a material for a cutlery, you must pay attention to the absence of bitch in the wood. They are the most "weak places", which in the process of work during the load will cause the cutting of the cutting.
- The next step is necessary in the end part to cut the opening to install the cutter. Naturally, the size of the opening should be equal to the dimensional dimensions. To make a neat opening, it is better to use an electrolybiz and a chisel. The jigsion is made two cutting across the fibers of the end part, then the chicken piece of wood is knocked out.
- When drinking the opening, it is necessary to keep in mind that its depth in the outer and the inner part should differ by about 5 mm. This is done so that the stalk, passing through it, was at an angle to the end of the shovel.
- Further, the plywood is nailed to the end part, flexing along its contour. For fastening there will be enough 3-4 nails. You can, of course, use more, but they will not add a special strength of the design.
- Next, customize the cutlets under the cut-off SCOS. The cutlets should fit tightly to the plywood, and it is necessary to do it strictly in the middle. Otherwise, when driving a snow, it will be laid in one of the parties, which will make it use extremely uncomfortable. After the place of installation of the cutting, it is nailed to the plywood of several nails.
In principle, snow removal shovel is ready for their own hands.
Snow shovel with their own hands. Strengthening construction metal
No matter how strong the plywood does not seem, it's still a tree, and it can smear from additional blows and loads. This is especially noticeable in the front and rear end of the shovels that are directly contacted with snow or road surface. In case of impact or friction on the surface of the plywood can split or stratify. To avoid this and thereby increase the life of the product, it needs to be strengthened.
For this purpose, pruning galvanized iron is perfect. It is necessary to cut out of them a few bands with a size of 50x5 cm. One of them will be reinforced by the front end of the shovel, the other is the location of plywood and the end part. For the front edge, we fold the strip in half and put on the edge of the shovels. Then with the help of small nails fix the design. For the end part of the zinc band, it is necessary to abnormalize the corner and nail it into the connection site with plywood.
Painting snow shovel
Anticorrosive processing of the finished product will not only give it an excellent appearance, but will significantly increase the service life. Unprocessed wood, even if it was properly dried, can quickly come into disrepair, especially if it is always in contact with moisture (snow).
The processing of finished shovels can be started with the impregnation of the oil. After drying, the last shovel is painted with alkyd enamel. It holds well on the surface for a long time.
Storage shovel
So that your shovel is a snow wooden served for a long time, it needs to be properly stored. Do it better in a dry ventilated room, the working part down. Since Plywood is fragile material and with careless handling, it can break, the shovel is better removed from the passing place to accidentally damage it. Special care homemade tool does not require, and with careful terms and storage can be served not one season.



 Start a discussion ...