The deep borehole pump creates the pressure, sufficient to raise water from great depths (even up to 100 m) and implement it in the water supply system. Many models of pumps are calculated on the pumping of water, including sand or clay impurities.
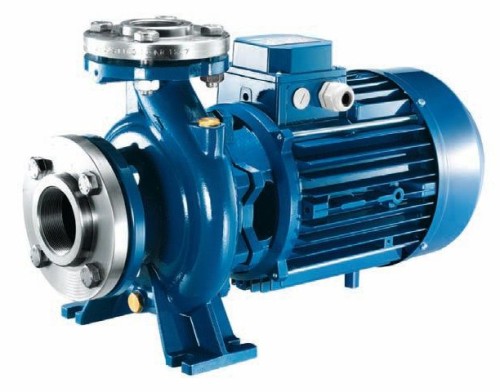
Two types of pumps are used:
- vibration;
- centrifugal.
The first type is used for wells with a shallow depth. The price of such pumps is quite accessible, but the quality is low. Basically, the vibration pump is used to produce water in small volumes. For example, for seasonal water supply of cottages or household economy. One of the disadvantages of such a type of pumps is the destructive effect on the walls of the well due to vibration.
Centrifugal pumps have greater performance than vibration. They can be used for water supply home day after day, all year. Models in which all parts are made of stainless steel are able to withstand the abrasive effect of sand and other impurities.
Almost everyone can independently connect the depth pump, regardless of its type. Consider the basic rules of connection, but first a few words about the use of hydroaccumulators.
Why do you need a hydroaccumulator?
The principle of operation of the deep pump involves its inclusion at the time of a decrease in water pressure in the water supply system. In this case, the frequent opening-closing of the crane leads to frequent turning on the pump. Even with an open crane, the pump creates a pressure sufficient for automatic shutdown, so it can be turned on several times and disconnected. The result of such a mode of operation: premature wear of the pump engine. That is why the pump connection is carried out through the hydroaccumulator to protect the engine from frequent pressure drops.
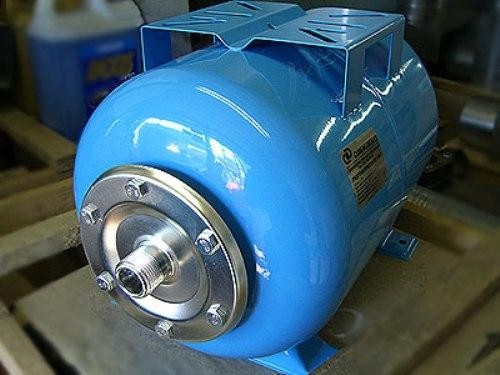
This device is a container separated into two parts with a special flexible membrane. In one part there is air, to the other - water. The working pump fills the part of the hydroaccumulator with water until the air located in another part does not balance the fluid pressure. When the crane is opened, the air pushes water. The hydroaccumulators are also used, in which the water drive is made in the form of a pear located in the air filled with air.
The hydroaccumulator performs three tasks:
- supports water pressure in the system at one level;
- serves as a warehouse of water;
- prevents hydrate in the water supply system.
Since the battery supports constant pressure, the pump is switched on less often and is less wearing. The volume of the desired hydroaccumulator is calculated based on the amount of water consumed. For a private house, 100 liters are usually enough.
General rules for connecting the deep pump
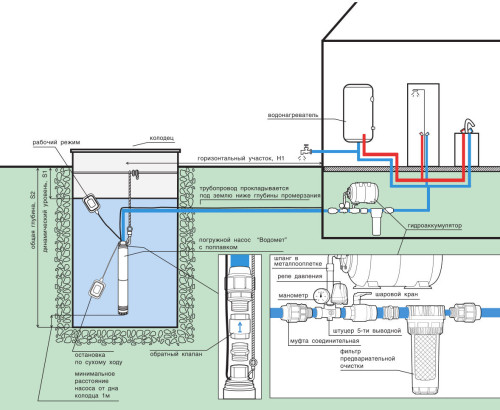
The connection diagram of the deep pump shows, in what order the connection of all parts is performed. The depth of groundwater slides determines the depth of the well. The minimum pump distance from the bottom of the well should be 1 m. The distance from the upper point of groundwater to the surface of the Earth is called a dynamic level.
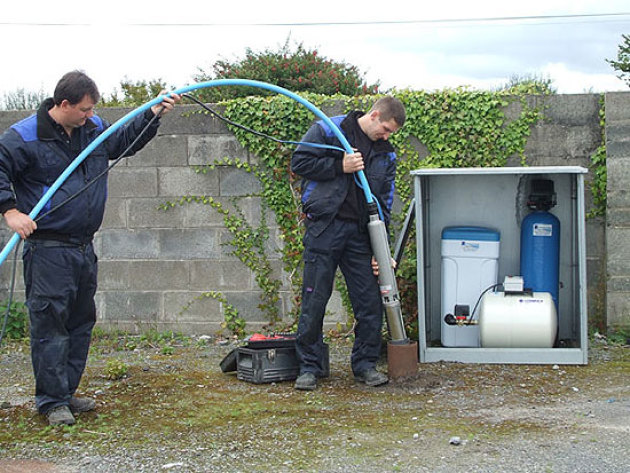
In detail, the order of connection of the deep pump is presented in the photo below.
To ensure the possibility of winter use of the well, a special well (caisson) is equipped, the depth of which should be lower than the depth of the soil layer. The well pipe at the exit to the caisson is cut and connected to the pipe deployed in the trench. Thus, the trench for the pipeline is laid at the level of the lower boundary of the well (caisson), below the drainage depth. In the trench, you must lay two pipes: water and for the electrical wiring of the pump.
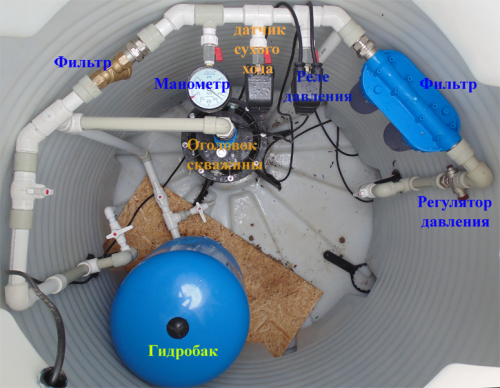
The installation of a coarse cleaning filter in front of the pressure regulation assembly with a hydroaccumulator is required. The water purification filter is also installed on the segment after the hydroaccumulator before serving it into the water supply system of the house, although it is optional.
The electrical connection sequence is performed according to the electrical connection diagram of the depth pump. The pump control panel is placed in the boiler room. For the power supply of the pump, a water-loading cable (wire) is used, providing reliable grounding. An ordinary waterproof wire will not fit. The length of the wire is equal to the sum of the dynamic level of the pump plus the distance from the well to the boiler room.
The cable is soldered to the deep pump. Isolation is carried out using shrink hydromeflip. It is not recommended to perform a heat shrink on your own, since the process is quite delicate. Excess the heat shrinking time is fraught with loss of elasticity and water resistance. Insufficient heat shrinking leads to incomplete hydraulic cable.
If the deviation from the nominal voltage is high, then it is necessary to install a voltage stabilizer with a three-time excess of the pump power. It is desirable that the electrical connections spent a qualified electrician.
Connecting the hydroaccumulator to the deep pump is made through the pressure relay and pressure gauge. The pitchfly serves as a node of the connection between the feed, analysis, hydroaccumulator, pressure gauge and pressure switch. Factory pressure switch settings: Lower - 1.5 bar, upper - 2.8 bar.
If we assume a removal to watering, you can install an additional hydroaccumulator in the caisson, through which irrigation water will be carried out. It is possible to use one hydroaccumulator, which regulates water pressure for watering and for home, and is in the well. But for the convenience of maintenance and pressure control, it is better to place a hydroaccumulator in the boiler room.
Descent of the deep pump in the well
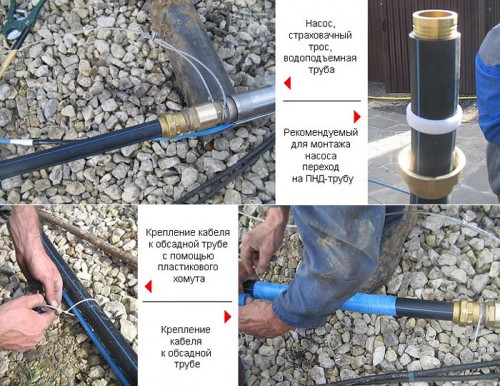
Connecting the pump to the water supply pipe we carry out through the connection: Barrel + check valve + fitting. All threads are compacted by the FMU tape, with the exception of the transition of metal plastic. Here applies Paste Annak Plus Linen Pakle.
After trimming the well, but before the pump is shrunk, the lower part of the head and the rubber ring-seal are put on the tube. All connections thoroughly seal to protect the system from leaks.
The slope of the pump in the well is carried out using a stainless steel cable with a diameter of 4-5 mm. The length of the cable is determined with a reserve of 2-3 m to secure it at the ends. One end of the cable fasten on the top of the pump, stretching through special holes. For strength, a rivet with a copper pipe is made, but you can use special clamps (not less than two). Clamps are carefully covered with a tape. At the other end of the cable, clips or rivets are also mounted.
The pipe feeding water from the pump must be straightened on a flat surface. Then unwind the cable and also have on a flat surface. Also with a cable. The pump is ready for descent.
The cable and cable are fixed in the pipe every 1.5-2 m with the help of construction screed. After the descent on the casing, a borehole headpoint is worn. It is possible to turn the water hose, the cable and the cable in advance through the hole of the head, before descent. The headband will protect the well from garbage.
Confix the capacitor and check the pump operation. If the water rolls out, then you can crop the pipe near the head and connect it with the pipe laid in the trench for supplying water into the boiler room. The connection is made through a clutch with a collet clamp.
Starting pump after assembling system
Connect the outlet. A warning lamp lights up on the control panel. Turn on the water supply in order to release air from the system. The pump begins to work, and water enters the hydroaccumulator. There should be noise of water.
After the release of the air begins to flow water. Close the crane. Follow the testimony of the pressure gauge: the pump shutdown occurs after the pressure is injected 2.8 bar. Then let the water from the crane and check the pump work after the pressure is reduced to 1.5 bar. The pump is again in work. So, the work cycle is repeated.
If you are hermetically connected the entire system, then turning on and off the pump will be carried out according to its settings. The pump connection is successfully completed.
Vitely the process of connecting the deep pump is demonstrated to the video:






 Start a discussion ...