Open wiring is a wire and cables on insulators attached to the wall surface or ceiling. This technique was popular at the beginning of the last century, but today many prefer it with a closed wiring. There are several reasons for this: the wires are always in sight, which allows you to quickly eliminate the malfunction, replace the damaged area, and in the case of wooden houses, open wiring is generally the only reasonable option. In this article we will talk about how to make an open wiring in a wooden house with your own hands.
Characteristics of open wiring
The problematic of the electrification of wooden houses lies in flammability of wood. If in such a building to mount the hidden wiring, then the slightest malfunction, the "crazy" spark or a closure can provoke a fire, and find the source of fire will be almost impossible in time. In order to avoid such trouble in the cuts, the wires are laid in the open.
The rules of the electrical installation device say that the installation of open wiring in a wooden house should be carried out on walls or streams. The laying of wires inside walls in this case is not only dangerous, but also technically difficult, since the channels for them need to be done at the stage of erection of the house, which means that it will take carefully to drill every crown. Despite the prohibitions of domestic SNiP, many do this, creating potentially unsafe living conditions.
Some consider open wiring with the remnant of the last century, the inclined interior of the house, but this is only one side of the medal. In this article, we will tell how to make wiring not only safe and convenient to use, but also aesthetically attractive. It can easily become an interesting design element and emphasize the stylistic features of the interior.
Useful Tip: open wiring very convenient to use and monitor control. Plus, it can be modified by laying new highways and add multiple terminal installation devices.
Post Requirements
Requirements for open wiring in a wooden house are different from a similar system, say, in a brick or concrete building. Since the tree is prone to fire, it is necessary to take all possible protection measures. Wood can light up as a result of a short circuit or overvoltage in the network, which often happens in electrical cabbels. Based on this, all wires must be fixed so that they do not touch the wooden surfaces. This is the first and most importantly installation of open wiring.
In addition to the observance of the distance between the wires and the wooden wall, it is also necessary to take care so that these wires are most isolated. Choose products with a protective shell or lay them into special channels (housings, pipes, etc.). Despite the fact that the rules for the installation of electrical equipment make it possible to carry out installation without additional protective elements, it is still better to be restrained.
Methods of installation
So, how can I attach the wire to the wooden wall so that he does not touch her? There are several methods for mounting open wiring, each of which ensures safe operation. The main criterion for choosing the method is perhaps its aesthetic attractiveness and compliance with the interior stylistry. Of course, there is also a financial aspect, but when ensuring the safety of the house and the safety of residents, the savings are moving into the background. There are as many as five ways to arrange open wiring, so you can easily pick up the best option for your home.
Porcelain insulators
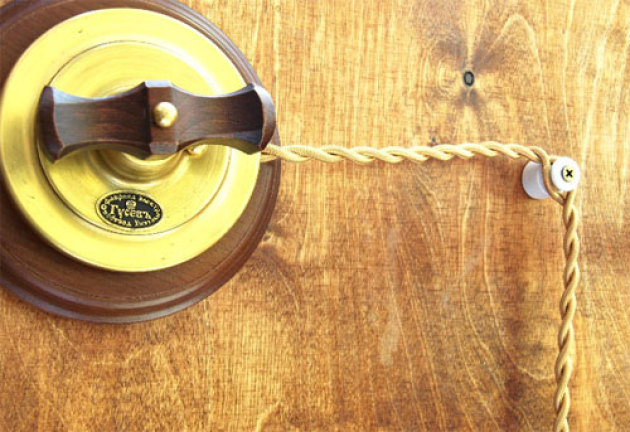
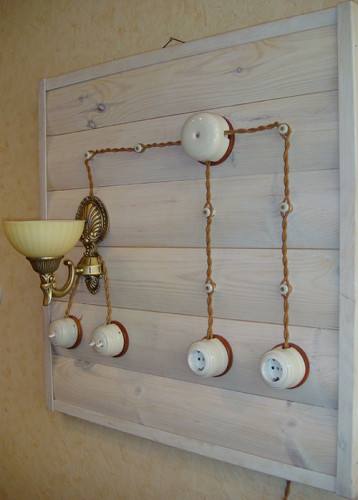
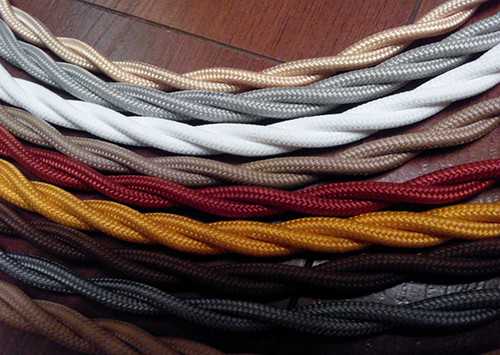
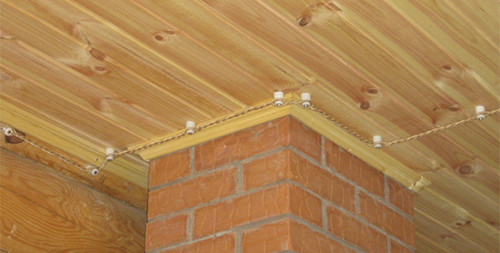
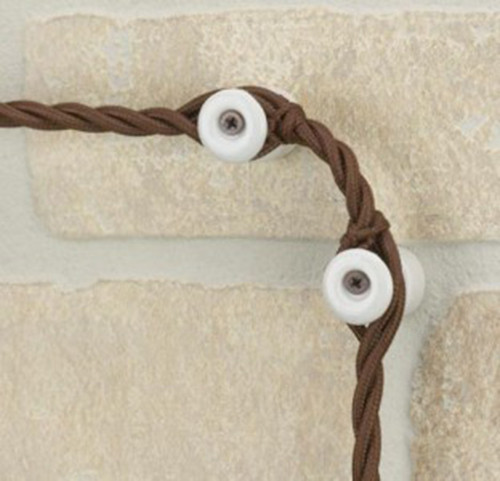
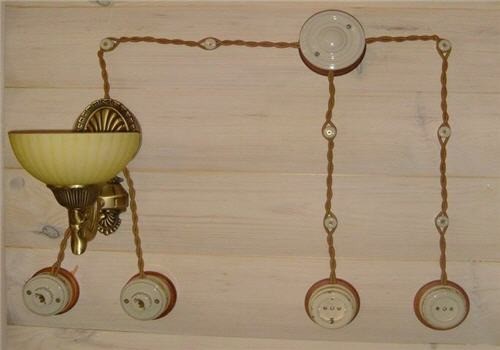
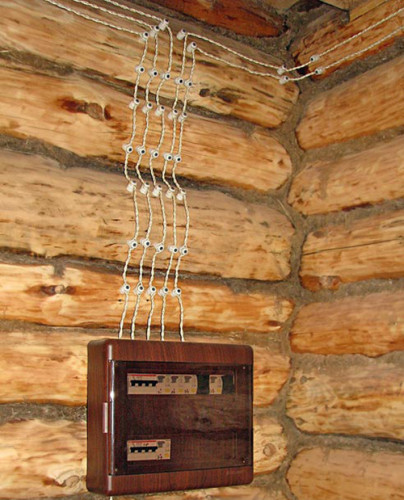
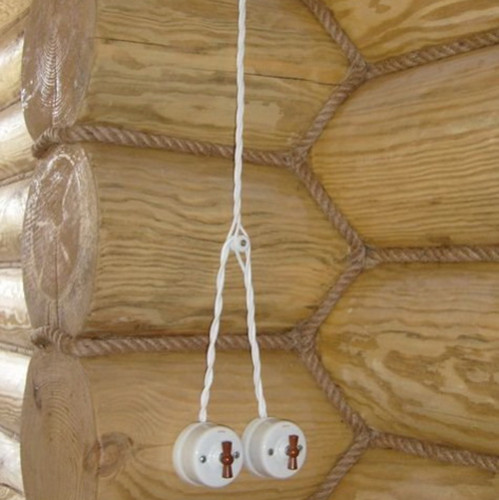
Installation of wiring on ceramic insulating rollers is traditional, if not to tell the historical, method of electrifying wooden houses. Wires twisted with each other (twisted wire) are attached to porcelain blanks, driven into the wall, resulting in a small gap between the wall and wiring. This method is considered the most neat and beautiful, so such a wiring can often be found in country or retro interiors.
At the beginning of the XX century, such a picture could be observed in every home and apartment, but then people discovered the charms of hidden wiring. Today, fashion is returned again, and designers use porcelain rollers to create original interiors.
Porcelain insulators are attached to the wall with a distance of 4 cm from the socket, a junction box or switch in a step of 30-50 cm with a vertical mounting. If the wire is planned to be placed horizontally, the rollers are attached with increments up to 45 cm, otherwise it will be recorded. The turns use two isolators fixed at an angle of 45 °.
Twisted wire passing next to the switch or socket and in the corners are tied with a textile braid, removed from excess cable segments. Such a measure will prevent the wire tightening and extends its life.
But such a laying of open wiring has its drawbacks. So, the twisted copper wire is quite expensive, especially if you consider that it should have double insulation. For such a way it is better to use the Wire of the HPVP either a pvop with the corresponding cross section. The usual VVGNG is also suitable, which is an order of magnitude cheaper, but has lower protective characteristics.
In addition, you will need to purchase special components for open wiring in a wooden house, which are also not suiced: porcelain rollers, switches, junction box, sockets, etc.
It is useful to know: ceramic rollers are installed so that 1 m horizontal area accounted for at least 5 dielectric elements. Sockets and switches are mounted, given the degree of their isolation. To get a beautiful and neat braided wire, after attaching to each porcelain insulator you need to send twist in the opposite direction.
Staples for open wiring
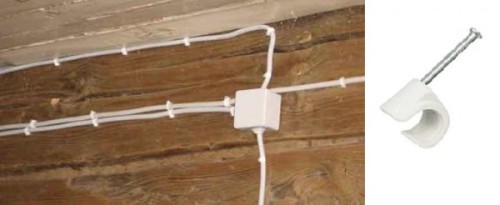
Staples used for fastening are small plastic "hooks" that are naked to the ceiling or walls. For this method, single-core copper bonds are usually used. You can also purchase a NYM cable - a better product with triple insulation. The opening technology of open wiring is determined by the type of electrocable.
It is useful to know: NYm cable is more preferable for open wiring, as they are securely protected by several layers of insulating winding. You can also choose WDGN-LS - a cable that does not support burning. Even in the case of a short circuit, it will allocate little smoke. In the case of using the universal flat wire PUNP, between the wall and the wire, it is necessary to place a gasket of asbestos or metal. It should be wider than 1 cm wires on each side.
Applying brackets for the installation of open wiring is very popular, as this is the fastest and inexpensive way. However, he has one serious disadvantage - the appearance of such a wiring will be pretty promotion and inestretical, especially if you put several wires in parallel.
Corrugated pipe for open wiring
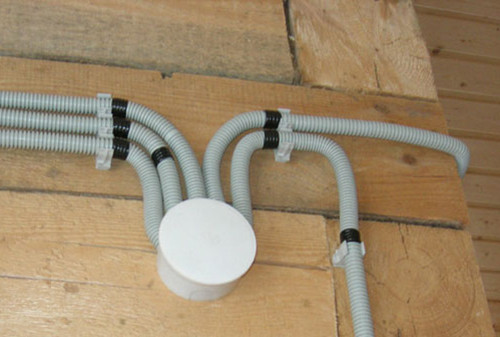
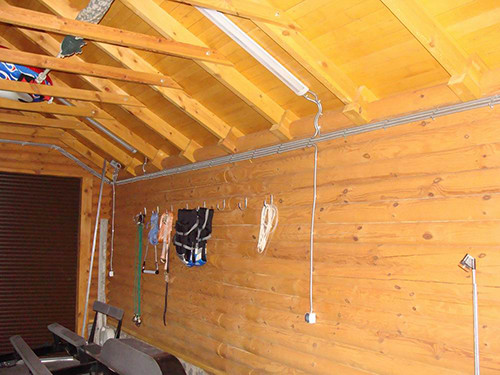
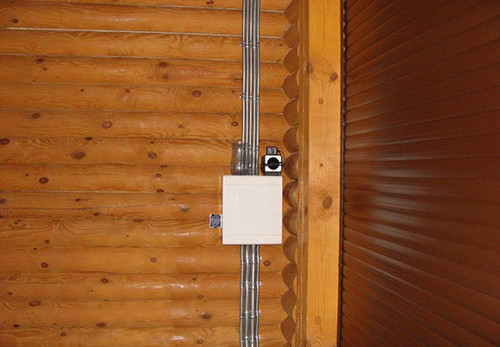
Gofrots are quite often used to install wiring not only in fires, but also in brick or reinforced concrete homes. Due to the wide selection of models of pipes with different diameters, several wires and cables can be hidden in them. For fixing the pipe to the wall or ceiling, screeds or clips are used.
The main advantage of corrugations for wiring is its non-combustible and inability to distribute burning. This allows you to use it as an additional insulation for an electrocabyl place of any brand. Plus, it can be easily attached to any surface.
However, there was no shortcomings here. This pipe is very difficult to lay in a straight line - it does not torment and twist. As a result, all bends and savings spoil the appearance of the wiring. Also in the folds of the pipe constantly accumulates, so it is necessary to clean it regularly. For mounting in a residential building, this option is not very suitable due to its aesthetic unattractiveness, but due to the low cost of corrugations and its good protective abilities, many prefer to sacrifice beauty for the benefit of practicality.
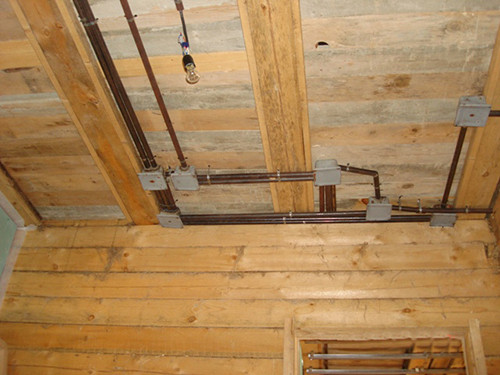
Metal sleeves, pipes and PVC pipes can also be equated to the use of corrugations, but in contrast to it such products will be difficult to mount at the corners and bends.
Cable Channels for Open Wiring
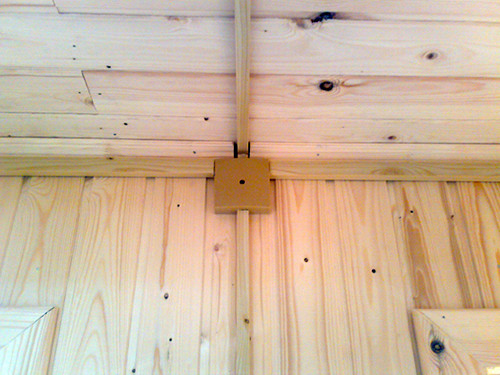
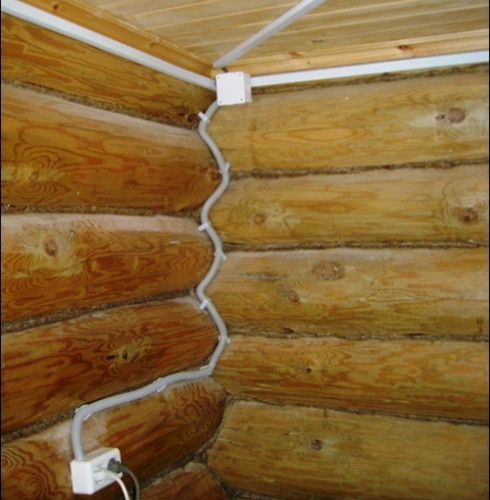
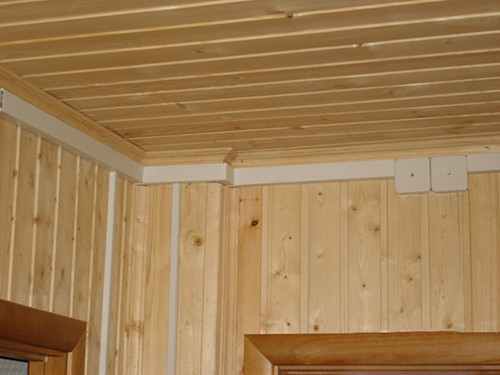
Cable Channels are perhaps the most optimal way to mask open wiring in the house. They allow you to safely pave the cable, provide quick access to them if necessary and at the same time do not violate the integrity of the interior design, and even emphasize it.
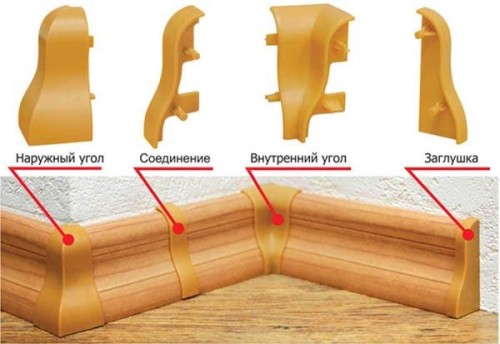
An analogue of cable channels are special plinths, on the back of which there are grooves where the wires are placed. A wide selection of textures, sizes and colors allows you to choose a model for the interior, divert attention from its disadvantages and possible defects.
Liquid nails, screws and dowels are suitable for attaching cable channels and plinths. Since we are talking about installing wiring in a wooden house, in this case the optimal solution will be fixed on the self-tapping screw or nails without hats. Before mounting the cable channel, it is necessary to determine its cross section. It should be so to fit all wires freely and with small gaps. It is not recommended to "stuff" it closely, it is best to purchase a model with separation faces so that each wire is in the personal groove.
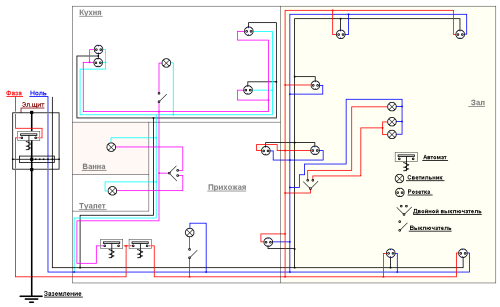
To make a list of necessary materials, and in addition to the Channel cable you will need even connecting accessories, corners, fasteners, sockets, etc., you need to draw the most detailed scheme of open wiring in a wooden house.
So, we described the main ways to install open wiring, and now you can choose the best option for your home. Of course, no one forbids combining them, on the contrary, it will make more practicality and beauty. For example, under the ceiling, you can hide the wires into the plastic box, and in uneven areas it is used corrugated tubes.
Installation of open wiring
In this chapter, we will describe the general principles of mounting open wiring in a wooden house. Depending on the selected installation method, the specificity may differ slightly. First of all, you should draw up a detailed plan at which the entire route of the wire breaks, all sockets, switches and power that devices will consume in each room will be consumed. Based on this, the cross section of cables and wires should be selected. In each room for supplying energy to lighting devices and outlets, you need to put different cables.
To work, you will need the following tools and materials:
- wires and cables;
- switches and sockets;
- plastic sleeves;
- extension;
- switchgear;
- metal sleeves and plate;
- porcelain insulators, cable channels, corrugated pipes (depending on the selected installation method);
- plastic brackets;
- circuit breakers and UZO;
- boxes;
- screwdrivers;
- hammer;
- file;
- drill;
- stationery knife;
- spanners;
- voltage pointer;
- multimeter.
Progress:
- Prepare places where switches, lamps and sockets are fixed. Each of these parts must be installed on the metallic basis. To make it, cut 2 mm from the sheet metal a rectangular piece of the appropriate size and adjacent to the wall.
- Run the cable and wires on the walls, ceiling or by the floor. To skip the wiring through the wall, you will need to drill the hole. Use the drill for this. But just to push the wire through a wooden wall can not be, because, as we already know, he should not touch her. Here at this stage you will need a metal sleeve. First, insert it into the hole, and then have to do the cable. The diameter of the opening should be slightly larger than the diameter of the sleeve. At the same time, the edges of the sleeve should perform at both sides of the wall at least 1 cm. To the sharp edges damage the insulation of the cable, close them with plastic sleeves.
- For a single-phase network, use three-core cables, for the technical - five-housing.
- After placing the wiring in accordance with the schema, make it a wiring and connect the wires to sockets, switches and lighting devices.
- Before connecting each of the branches to the distribution box, measure the insulation, grounding resistance, the loop phase-zero and the RCD. Also check that there is no closure in the branches.
If you are not enough qualifications, it is better to trust this work to specialists, otherwise you risk not only to burn wiring, but also expose your life to danger. Electrification is a serious matter that requires care and great experience, so if you decide to do it yourself, observe all personal safety measures.






 Start a discussion ...