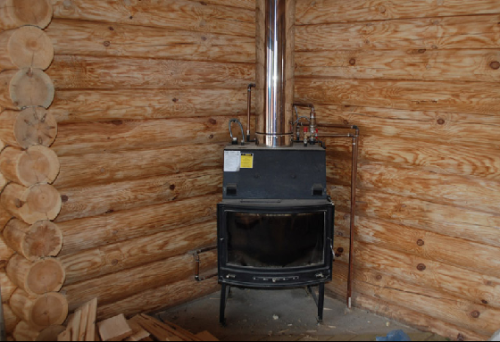
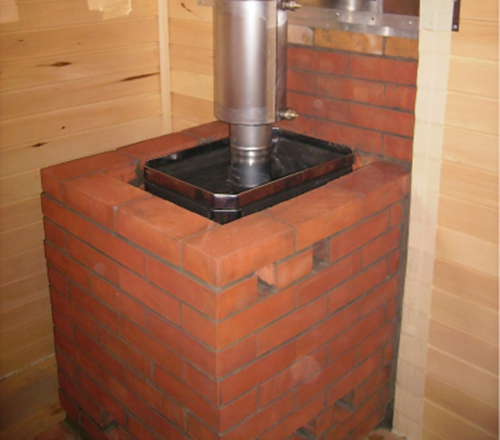
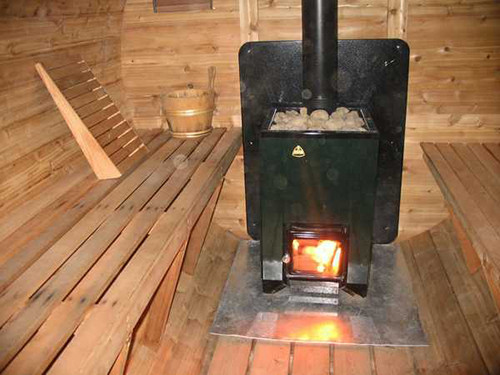
The advantages of metal furnaces compared to bricks force many owners of private houses to choose them. They weigh a little, they serve for a long time, and a wide range allows you to choose a model of any power for any fuel. However, metallic structures have one significant drawback - the case is very warm up and cools down just as quickly. This can cause inconvenience, especially if the stove is in a living room or bath. The cladding of a metal stove with a brick makes it possible to increase performance, reduce fire hazard and ennoble the appearance of the heating device. In this article, we will tell you in detail how to do it with our own hands.
Why cover the stove with brick?
The stove in a bath or private house is an integral thing responsible for creating a cozy microclimate. Metal stoves have a number of undeniable advantages: they are compact, mobile, warm the room well, they are easy to install or even build with their own hands. But one single minus forces many homeowners to give preference not to them, but by a massive classic brick constructions. The fact is that the metal has high heat capacity - it quickly heats up and cools quickly. This means that it is only half an hour in just half an hour, but in order for the house to be warm, you need to constantly maintain fuel combustion.
Of course, much depends on the design of the furnace itself. For example, long burning furnaces can work effectively for a day with just one fuel load. The lining of a metal stove with a brick allows you to extend the heating time several times. It is common to heat the brick and also slowly cool down, so even if all the wood burned out in the furnace, the heated walls of the case will continue to give heat to the room for several more hours.
In the process of operating the furnace, its metal case is very hot, and only one careless touch is enough to get a serious burn. And if this case is fenced with brick masonry, you will protect yourself and households from such troubles. Of course, the surface will be hot, but not so much as to greatly harm the skin.
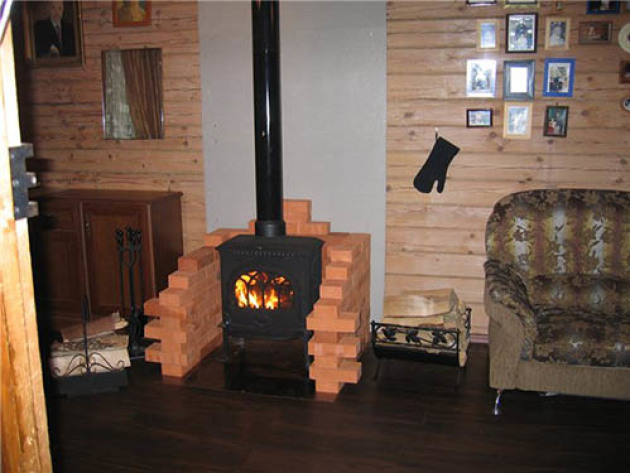
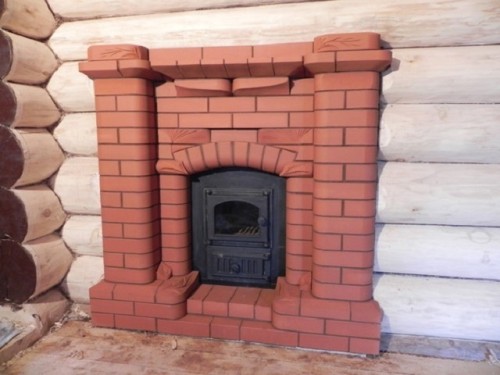
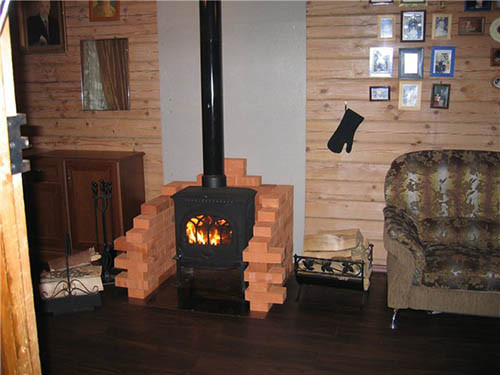
And finally, the metal stove in the brick looks much more beautiful and comfortable. The masonry can be done using decorative techniques, apply paint or art painting, decorating the design for classics. Thus, you can improve the design of the room and turn the stove into the very “highlight” that he lacked.
Materials for work
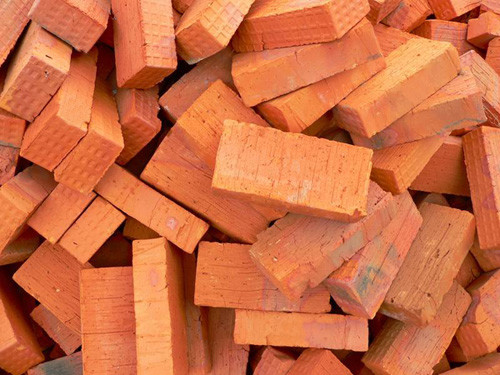
What brick is overlapping a metal stove? Not every material is suitable for this work. Due to regular temperature differences and condensate, the masonry structure can quickly collapse, and your entire work will come to naught. Only burned clay brick is suitable for facing furnaces. It can easily be recognized by a characteristic red shade.
To choose a good brick, without effort, throw it on a solid surface from a height of 1-1.5 m. If it is immediately split, it is better to refuse such a purchase. Then split the brick yourself into two parts and look at the cut - you need products with a evenly painted core. If there are dark spots, then the batch was burned incorrectly and its quality is in doubt.
In addition to bricks, you will need a special solution for masonry. He also must cope with temperature changes and withstand strong heat, so there can be no question of any classic cement mortar. For a furnace facing, you can use the composition of clay with sand in a ratio of 1: 1 plus 100 g of table salt per 1 bucket of the mixture. If you have a passion for cement solutions, then so that the masonry does not fall apart after the first clan, add chamotomes or glue to the mixture for working with porcelain tiles.
Useful advice: do not knead a lot of solution at once - prepare small portions, otherwise you will not have time to spend everything before solidification.
Often the masonry is strengthened by a reinforcing mesh. To do this, it should be cut in advance with stripes of a suitable size. The launch of masonry may be needed for weak foundations for the furnace, which are not designed for additional brick cladding.
Burning of the furnace
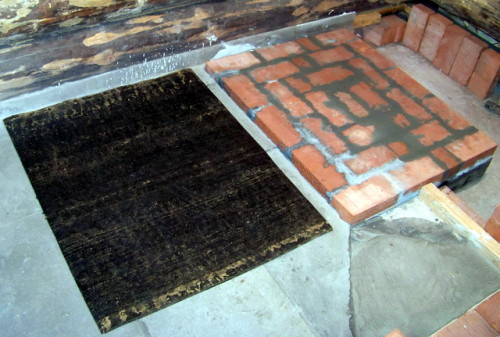
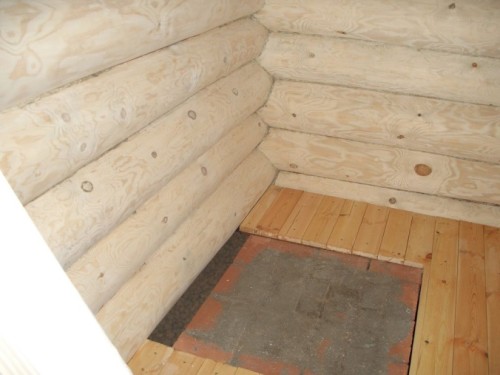
Before starting work, you should carefully prepare and strengthen the base of the furnace. Since the metal structures themselves weigh relatively little, they do not need a separate foundation. However, a brick “fur coat” will give an additional load of several tens of kilograms, or even more (depending on the size of the furnace). Not every floor will withstand such pressure, so before masonry it is necessary to disassemble the floor and make a separate foundation - monolithic or columnar.
The foundation for the furnace
The monolithic foundation is most popular, so we will start with it. To make such a base, disassemble the floor under the stove. The area of \u200b\u200bthe foundation should be such that a gap of 10-15 cm remains between the future brick cladding and the metal body of the furnace. Dig a hole about 30 cm deep, pour crushed stone with sand to the bottom, tamp the reinforcement and pour concrete with concrete. After the foundation is completely solidified (it will take about 2 weeks) you can start masonry.
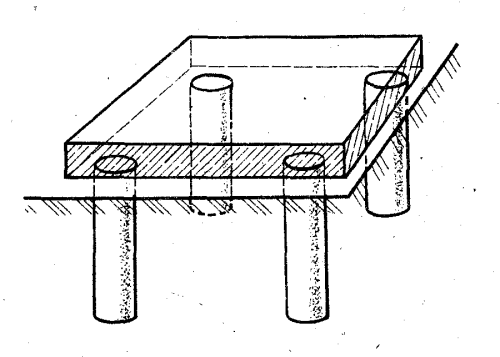
If you do not have the opportunity to make a monolithic base, you can organize a columnar foundation. Pillars are installed at the corners of the future facing box and in places of high load. This is an economical and at the same time reliable option, the manufacture of which will take a minimum of time. The advantage of the column foundation is that in this case there is no need to do drainage or waterproofing.
How to make a columnar foundation for the furnace:
- Mark the stove in the corners of the furnace - the pillars will be installed there.
- Dig strictly vertical pits about 50 cm deep.
- At the bottom of each pit pour 10 cm of sand and compact it.
- Prepare a classic cement-sand solution 1: 2 (thick sour cream consistency).
- Pour 10 cm of a solution mixed with gravel or brick crumb over a sand layer. Wait for the solidification.
- Next, put the pillars of brick so that they toward the floor by 7-10 cm.
- Install the beam of the lower strapping. The most reliable is to lay a channel around the perimeter and weld the edges.
The use of ready -made concrete columns is also acceptable. In the process of installation, make sure the strict vertical of the pillars using the construction level.
Stove laying solution
Since the solution for laying furnaces and their cladding is used special, we decided to pay more attention to this moment. Experts recommend taking small mountain sand for the preparation of a quality mixture, since it is extremely durable and heat -resistant. First, skip the sand through a sieve with 1.5 mm cells to clean it of litter and small stones. The smaller the sand, the more careful and thinner the seams between the bricks will be. Thin seams allow the masonry to hold heat longer.
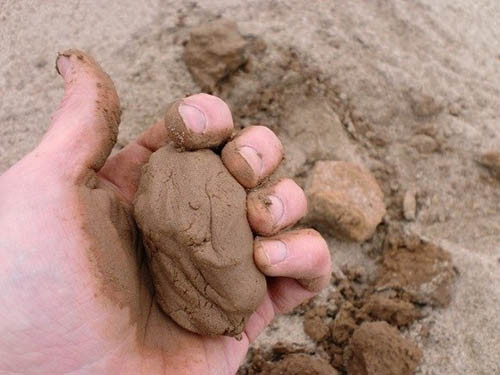
You can not accurately call the ideal proportions of clay and sand for the solution, since in each case the clay will differ in fat content. To determine the optimal ratio of these components, measure 5 clay cans with a volume of 1 liter, after passing it through a sieve. Do not add anything to the first jar, pour 1/10 of the sand in the second, in the third - a quarter of the can of sand, in the fourth - 3/4, and in the fifth - one sand. Add water to each jar to get a solution of plasticine consistency (should not stick to your hands). Make 5 balls with a diameter of 5-7 cm and five small pancakes 3 mm thick. Leave your “crafts” to dry in the shade for 10-14 days, after which, without effort, throw each sample on the ground from a height of 1 m. The option that will not break. In order not to confuse, it is better to immediately sign each sample.
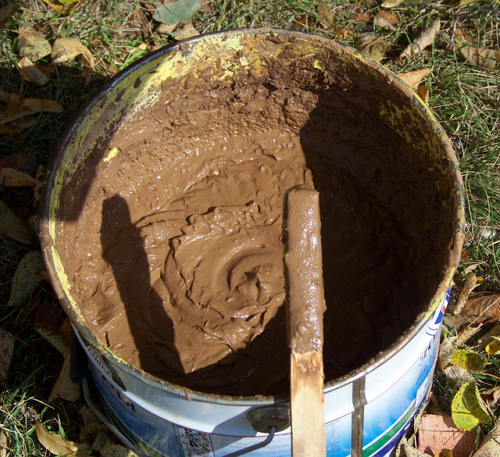
When you find out the optimal ratio of the components, you need to correctly prepare a pantry solution. To do this, pour the clay into a large container, pour water and leave for 3 days to sour and gain elasticity. Add the required amount of water and mix the mass until smooth. It is important that there are no lumps in the solution, so large pieces can be kneaded manually or with a tamping. The mixture should freely go from the trowel. Apply a little solution to the brick and attach it to the masonry - if after 5 minutes it does not work, then the solution is ready for use.
Useful advice: there is another way to check the correctness of the solution - to lower the wooden stick into it. A good solution will remain on it with a thin layer, too dry will be almost not visible, and the fat will leave a glossy film.
Bricklaying
After preparing the ideal solution, you can finally start facing the stove with a brick. At the same time, take into account that the design along with its brick “shirt” should be at least 20 cm from the wall. If the walls of the house are made of wood or other flammable materials, the distance must be increased to 50 cm.
Useful advice: to ensure fire safety, the wooden walls of the house near the stove are recommended to be finished with asbestos -cement sheets or cover with sheet tin.
How to properly overlap a metal stove with brick:
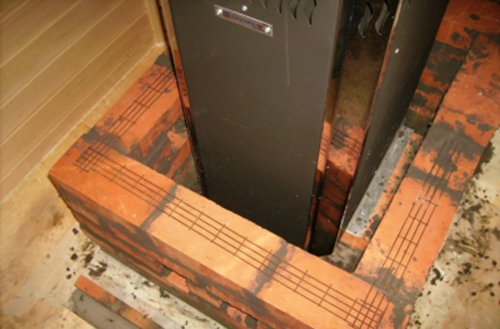
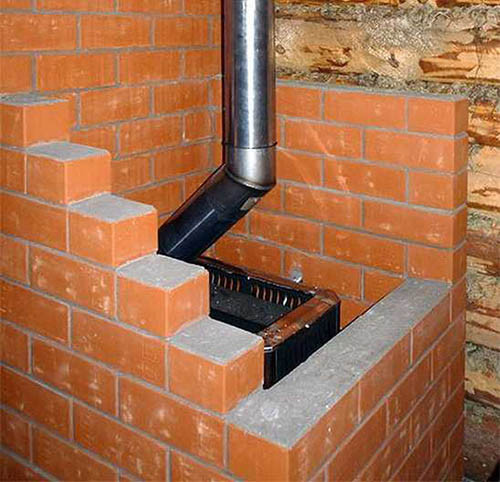
- The facing of the furnace should not be performed thicker than in half a brick, otherwise it will not be able to warm up. By laying the first row, measure the indentation from the outside of the metal case to the inside of the brick cladding. The minimum allowable distance is 5 cm, recommended - 10 cm.
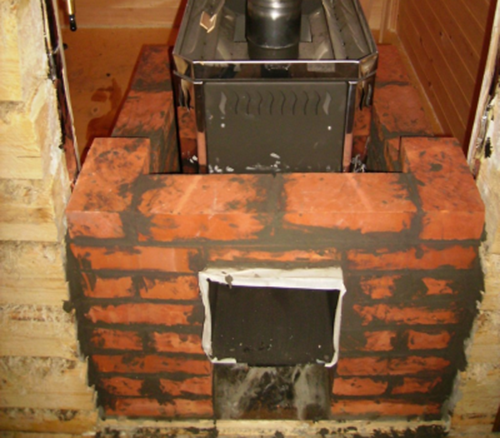
- Close the masonry in a checkerboard pattern. Soak the brick in advance, shake off excess moisture from it and apply a clay solution over the entire surface. The brick absorbs moisture strongly, so if it is not moistened, it will take the entire liquid from the solution, and it will lose its binding characteristics. Attach the brick smeared with the neighboring part and align it, proceeding with a wooden hammer.
- To increase the rigidity of the structure, use the reinforcing grid, laying it on top of each row. When passing the corners, tighten the mesh with an additional soft steel wire. It is important that the network does not go beyond the edges of the masonry, and fit tightly to it.
- The seams immediately grind with clay solution.
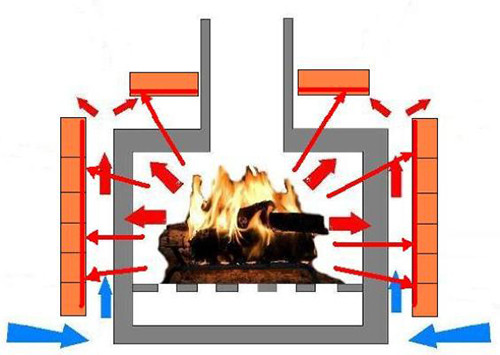
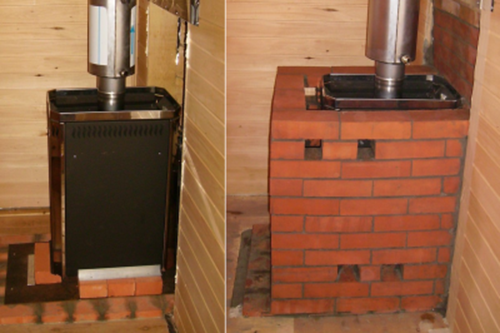
- For unhindered circulation of air around the metal case in the masonry, you need to leave several holes. The easiest way to do this is to attach one of the bricks not along, but across. On each side of the masonry, it is necessary to leave 4 holes: 2 above, 2 below. Cold air will flow through the lower holes, and heated through the upper holes. Thus, you prevent overheating of the furnace and provide free heat output into the room.
- Drive up to the top of the metal furnace. The last row can be made of bricks with a decorative textured surface.
- When the masonry is completed, let the walls dry. The solution will finally harden after 24-48 hours, so that by the finish processing you can postpone at least a day and go to rest.
- When the solution dries, its excess must be cleaned from the surface in order to leave only a beautiful even color of brick. It is best for removing the solution that a drill with a nozzle is suitable, but if there is no, you will have to act in the old fashioned way-with your hands and sandpaper. In both cases, it will not hurt to put on a respirator, because in the process it will be very dusty.
- If after cleaning you find dark spots on the masonry surface, go through them with a hard brush, moistening it in a soap solution. Rinse the solution with water and let the masonry dry.
Below the video shows how to cover a metal stove with brick in all details:
But you need not only to know how to cover the metal stove with a brick in the house, but also how to use it later. It is very important to properly draw the first furnace - the durability of your efforts depends on it. This must be done neatly and not overload the furnace so that the solution will gain maximum strength at a gradual, but not critical increase in temperature.
If you have faced a bath stove, then after the first furnace you will feel qualitative changes - the heat will cease to be burning, become softer, even and will stay longer in the room. A brick has another amazing feature - it independently controls the level of humidity in the room. The brick “shirt” around the metal furnace during heating evaporates excess moisture, giving it to the air, and when cooling, it absorbs excess couples from the room. As a result, the microclimate in a steam room with such a stove will not only be comfortable, but also more useful for the body.





 Start discussion ...