Kuznetsov's ovens for more than 50 years are considered one of the most efficient and economical, making up healthy competition to expensive modern furnaces and boilers. Today, the models developed by Kuznetsov are popular not only among Russian dacities, but also far beyond the country. In this article we will tell about the features of the designs and tell you how to make Kuznetsov oven with your own hands.
General characteristics
Igor Viktorovich Kuznetsov began to develop furniture projects as early as the 60s of the last century and since then has created more than a hundred options for heating, cooking, water heating and all sorts of household needs. On official websitein detail the drawings of the Kuznetsov furnace are described and the technology of manufacturing each model is described.
The advantages of Kuznetsov's stoves are not reading, and we will talk about each of them in more detail below. But the main factor explaining the popularity of products abroad is not only high productivity, but also an attractive appearance, which adds a characteristic "highlight" to the general interior of the room. And if the Russian dachas have a sense of aestheticism, it is not so pronounced, then it is thanks to the neat appearance of Kuznetsov's ovens that they gave fame from the spoiled Western consumers.
Projects stoves
As mentioned above, for his career I. V. Kuznetsov managed to develop many projects. But among the variety, several basic groups on functional intended can be distinguished.
Types of household furnaces Kuznetsova:
- cooking (for cooking);
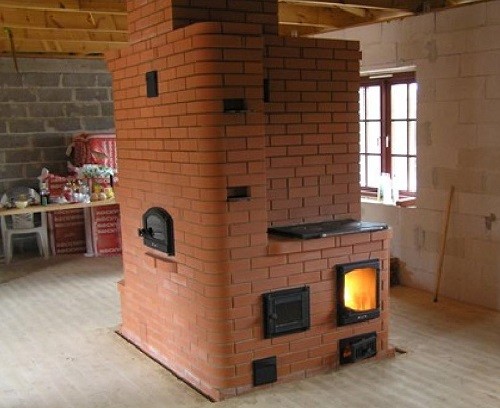
- bread (for perfect cooking bread. Often combined with cooking);
- heating (for heating residential premises);
- baths (powerful stoves for Russian baths);
- street (for cooking barbecue or complex models, for example, for open kitchen);
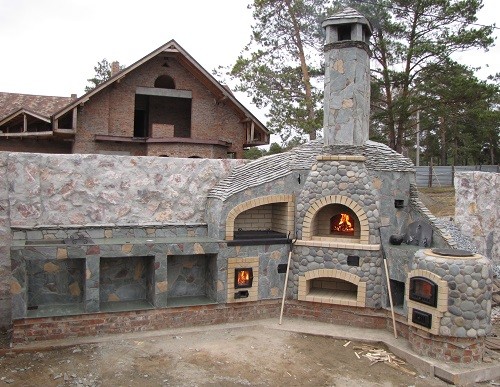
- fireplace (in this case, there is aesthetics in the first place, and not functionality).
In fact, the species and subspecies of Kuznetsov furnaces are much larger, and if you consider the possibility of creating mixed structures for any needs, then the functional characteristics and the boundaries will be lost at all - one furnace can serve for heating, and for cooking, and as a beautiful fireplace.
Features of construction
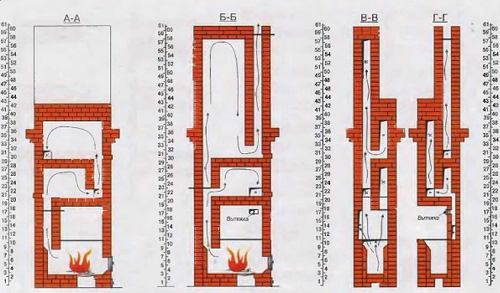
The concept of building the Kuznetsov furnace is pretty simple - immediately behind the furnace is a cap - a special container in the form of a rolled upside glass. Thus, oven gases overlook the lower part of this cap.
Such an unusual item significantly transforms the design in a functional plan, since oven gases, leaving the furnace, immediately resolve depending on the temperature. Cold gases rise up the chimney, and the hot linger in the cap and give all their heat to heating, heated water or cooking. Inside the cap is constantly maintained, since it is located very close to the furnace. There are also all combustion products, which did not have time to give their warmth. As a result, you get greater heat transfer and less soot in chimney.
Kuznetsov oven decides at once the two main problems - the cost of heating at home in the cold season and regular cleaning of the scoring chimney. The design with a heating boiler is qualitatively different from all previously invented stoves with water heating. The transfer of heat exchanger from the furnace in the hood creates unique conditions under which the efficiency of the stoves are not reduced with incomplete fuel combustion.
But the most important advantage of Kuznetsov's stoves is that the hot gases do not leave the cap and cannot climb the chimney until they get cool. That is, they will give all the heat to the last, and you will get a maximum of energy from any fuel, whether it is coal or firewood. At the same time, no one forbids to install not one, but, say, two or even three caps, creating several thermal zones with a gradually decreasing stable temperature. So, over the first cap, you can make a cooking plate, where to quickly cook food, over the second, colder cap, organize a fruit dryer, over the third - warm bed, on which it will be comfortable to sleep with cold winter nights.
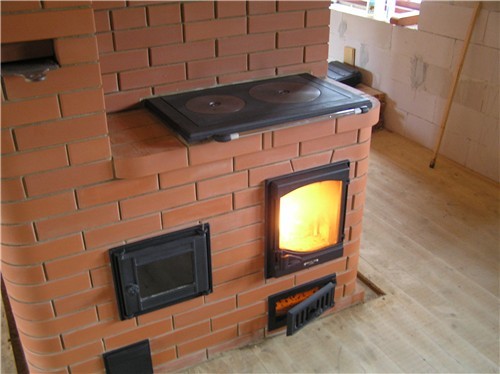
Useful advice: If you want to post over the first cap hob, give preference to a solid surface without removable elements in order not to give out combustion products.
Advantages of Kuznetsov furnaces
In order to correctly and fully answer the question about the advantages of Kuznetsov furnaces, it is necessary to have at least a superficial idea of \u200b\u200bthe requirements for furnaces in general, and also know what problems during operation occur most often.
So, in ordinary brick furnaces there are several essential constructive disadvantages, the main of which lies in the burning of fuel. Such a stove does not give appropriate heating. In the process of burning, as is well known, hydrogen and carbon are oxidized, forming CO and H2O. Air in the furnace is saturated with carbon dioxide and water vapor, overlapping the access of oxygen and not giving firewood to flaws. The temperature of the combustion products is reduced, as a result of which heating decreases. Even if the oven has a long chimney, the furnace gas comes out of it with a very high temperature, and the stronger you melts the oven in the hope of hartwing the room, the more the ashes flies out of the pipe.
Advantages of ovens of Kuznetsova:
- High performance - efficiency about 80%. The stove for 4 kW easily natopits a house of 100 square meters. m.
- Maximum combustion temperature of solid fuel without the use of additional technologies or industrial materials.
- Kuznetsov's stove can be drowning with any solid flammable, while the sediment of soot is minimal.
- It is very easy to care for the design - in fact Kuznetsov oven does not require almost no maintenance (cleaning every few years).
- Uniform heat transfer between the fireboxes, and as a result, a stable temperature in the entire room.
- The possibility of installing a water heating circuit without deteriorating the characteristics of the structure.
- Strong thrust even with a short chimney.
- Due to the short chimney, Kuznetsov oven build faster and cheaper than any other.
- The dual-stocking scheme of the furnace allows you to adapt the design to almost any room and combine with any design.
- The channels across the channels are distributed automatically, thereby minimizing the risk of ugara - you can almost never close the view.
Stove laying with their own hands
Creating his creations, Kuznetsov sought to maximize the productivity of furnaces. Depending on the functional purpose, they are equipped with all sorts of devices and undergo changes. Each of the realized ideas of the genius of the border was tested in practice, and quality is proved by many years and impeccable work. That is why many home country houses are taken to build Kuznetsov's furnaces with their own hands. Make it really even without professional skills, clearly follow the instructions and using high-quality materials.
Construction of a heating furnace
Before constructing, decide on the function that the oven must perform. There are more than 150 drawings, among which you can find a suitable kuznetsov furnace scheme. Below we will look at the construction of a simple heating structure.
Explore the room plan in detail in which the furnace will be located. If the house is still at the planning stage or not completed, place the stove so that each room can be slept evenly. It is very uncomfortable to mount heating in the already built house, but this is possible. If this is just your case, consider the location of the bearing elements and beams, when you will schedule a place for chimney.
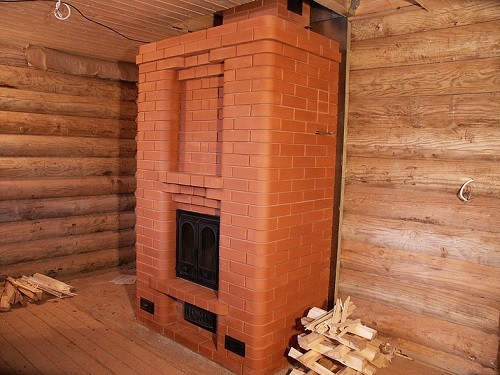
Special attention is paid to the preparation of the foundation. The oven Kuznetsova (photo) weighs quite a lot, therefore requires separately fortified base. The foundation for it is a monolithic concrete slab, the width of which is 10-15 cm more than the width of the furnace. The perfect option is to make the foundation for the stove during the construction of the house. Otherwise, the floor will have to be disassembled and spend much more time and strength.
What you need to know
Before proceeding with such a responsible case, it is necessary to carefully study the theory and take into account all possible errors.
The following data will help you to avoid trouble in the construction and operation of the homemade kuznetsov furnace:
- The furnace and the cap must be combined with vertical slit or dry seam. It is needed for the correct movement of convection flows - ballast gases saturated with water vapors will be circulated in the furnace, creating turbulence and improving the combustion quality of fuel.
- In no case do not combine the firebox with the cap. Fuel should burn with limited batches, only in this case a high temperature will be created. If you make a fake part of the cap, it turns out the most common stove with a bad burden.
- Over the furnace it is necessary to make a catalyst in the form of a grate of chammed bricks. Bricks are repeated to the maximum possible temperature, helping to survive what has not had time to burn in the furnace.
- In the Kuznetsov furnace, the air comes not only at the bottom of the outdated through the grate, but also through the holes in the walls - in the upper part of the torch. This makes it possible to almost completely burn the carbon monoxide and hydrocarbon. When the air passes through the grate and reaches the top of the torch, it has almost no oxygen.
Choosing materials
The third part of the successful construction of the furnace depends on how the right materials you use. At the same time, they should not necessarily need the highest quality, but suitable for physico-chemical characteristics. For Kuznetsov furnaces, we need the most common natural materials that can be purchased in the store or even get free (to score sand on the river, to accumulate clays, etc.).
To build a stove alone is absolutely difficult, especially if you figure it out with the principle of design work. But to make a truly high-quality oven, you should use my friends and drawings.
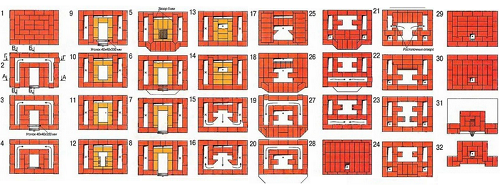
The order is called the complex of the schemes, which shows a step-by-step display of a furnace model or another. With it, you can unmistakably lay out each row.
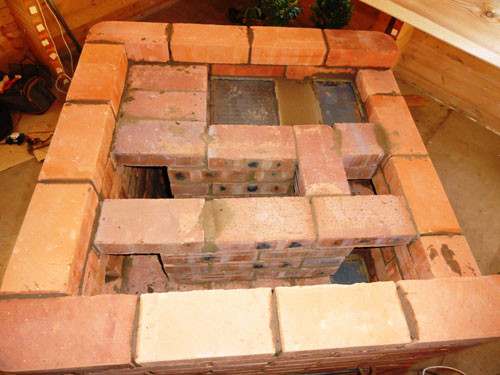
The appearance above demonstrated the order of the usual heating furnace Kuznetsov, which can be postponed even without special training or skills. The main thing is to lay out each brick as shown in the drawing and not forget about the rules of the internal structure of the structure.
What materials build furnaces:
- Chamotte bricks for masonry internal parts. Guided by a friend, you can clearly calculate the required amount of bricks.
- Clay bricks for external laying (M150). If you buy cheaper bricks, over time they are cracking from temperature drops.
- The clay of good quality without impurities in the amount of 100-110 kg (it is better to take about 130 kg at once). If you know the terrain with a good natural clay, it can be accumulated yourself. In the event that you are not sure of its quality, it is better to purchase material in the store, otherwise the poor-quality solution will quickly begin to crack, and the furnace will break.
- Small river sand in an amount halved in excellent clay mass (200-250 kg). In the store you can immediately buy a clay-sand mixture to not be mistaken with proportions. Such a mixture of 500 bricks will need an approximate 0.2 cubic meter.
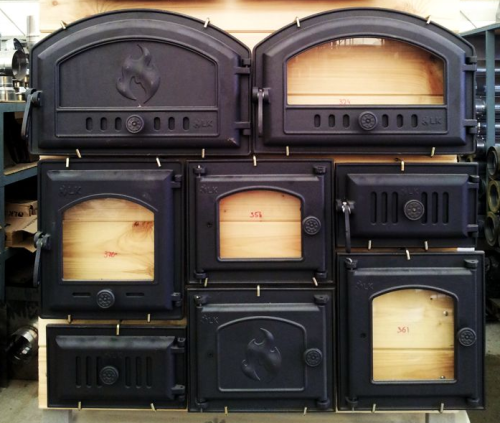
- Fittings - Metal components: Door for firebox and confusing, junk, corners, wire and grate.
Features of the calculation
Print on paper a dealer drawing and proceed to the lays down the furnace. Features for the creation of this particular heating furnace Kuznetsov quite a little. So, make the channel between 1 and 2 tier in the ¼ brick to lengthen the furnace.
When you reach 21 rows, leave a couple of non-strokes of the passages on the side inner walls so that it is convenient to light the oven.
Kuznetsov furnace laying is described in detail in the video material below:
Finally, we suggest you familiarize yourself with useful advice that will help build a strong and durable kuznetsov furnace:
- Position the refractory shell inside the construction as if hanging in the air (it should not be tortured to any of the parties). When the brick is repelled, it expands and can deform the walls.
- The inner laying of chamotte brick is always installed on the edge, which is not always shown on their neighborhoods. External masonry made of clay brick master makes at its discretion.
- The list of essential materials is present. It is necessary to enhance the bundle. After each pair of rows, lay the wire to ensure the reliability of the design.
- Take into account that from high temperature bricks expand, therefore, between all metal elements and walls, install special refractory gaskets.
- When the furnace is constructed, and the solution is dry, treat the structure with a refractory mixture.
- Swipe the first extractor, starting with the minimum possible temperature, gradually adding heat.
The most important thing in this matter is not to be afraid to start. In the end, this is an incredibly interesting and useful practice that will allow you to organize warmth and comfort, wherever you are.





 Start a discussion ...